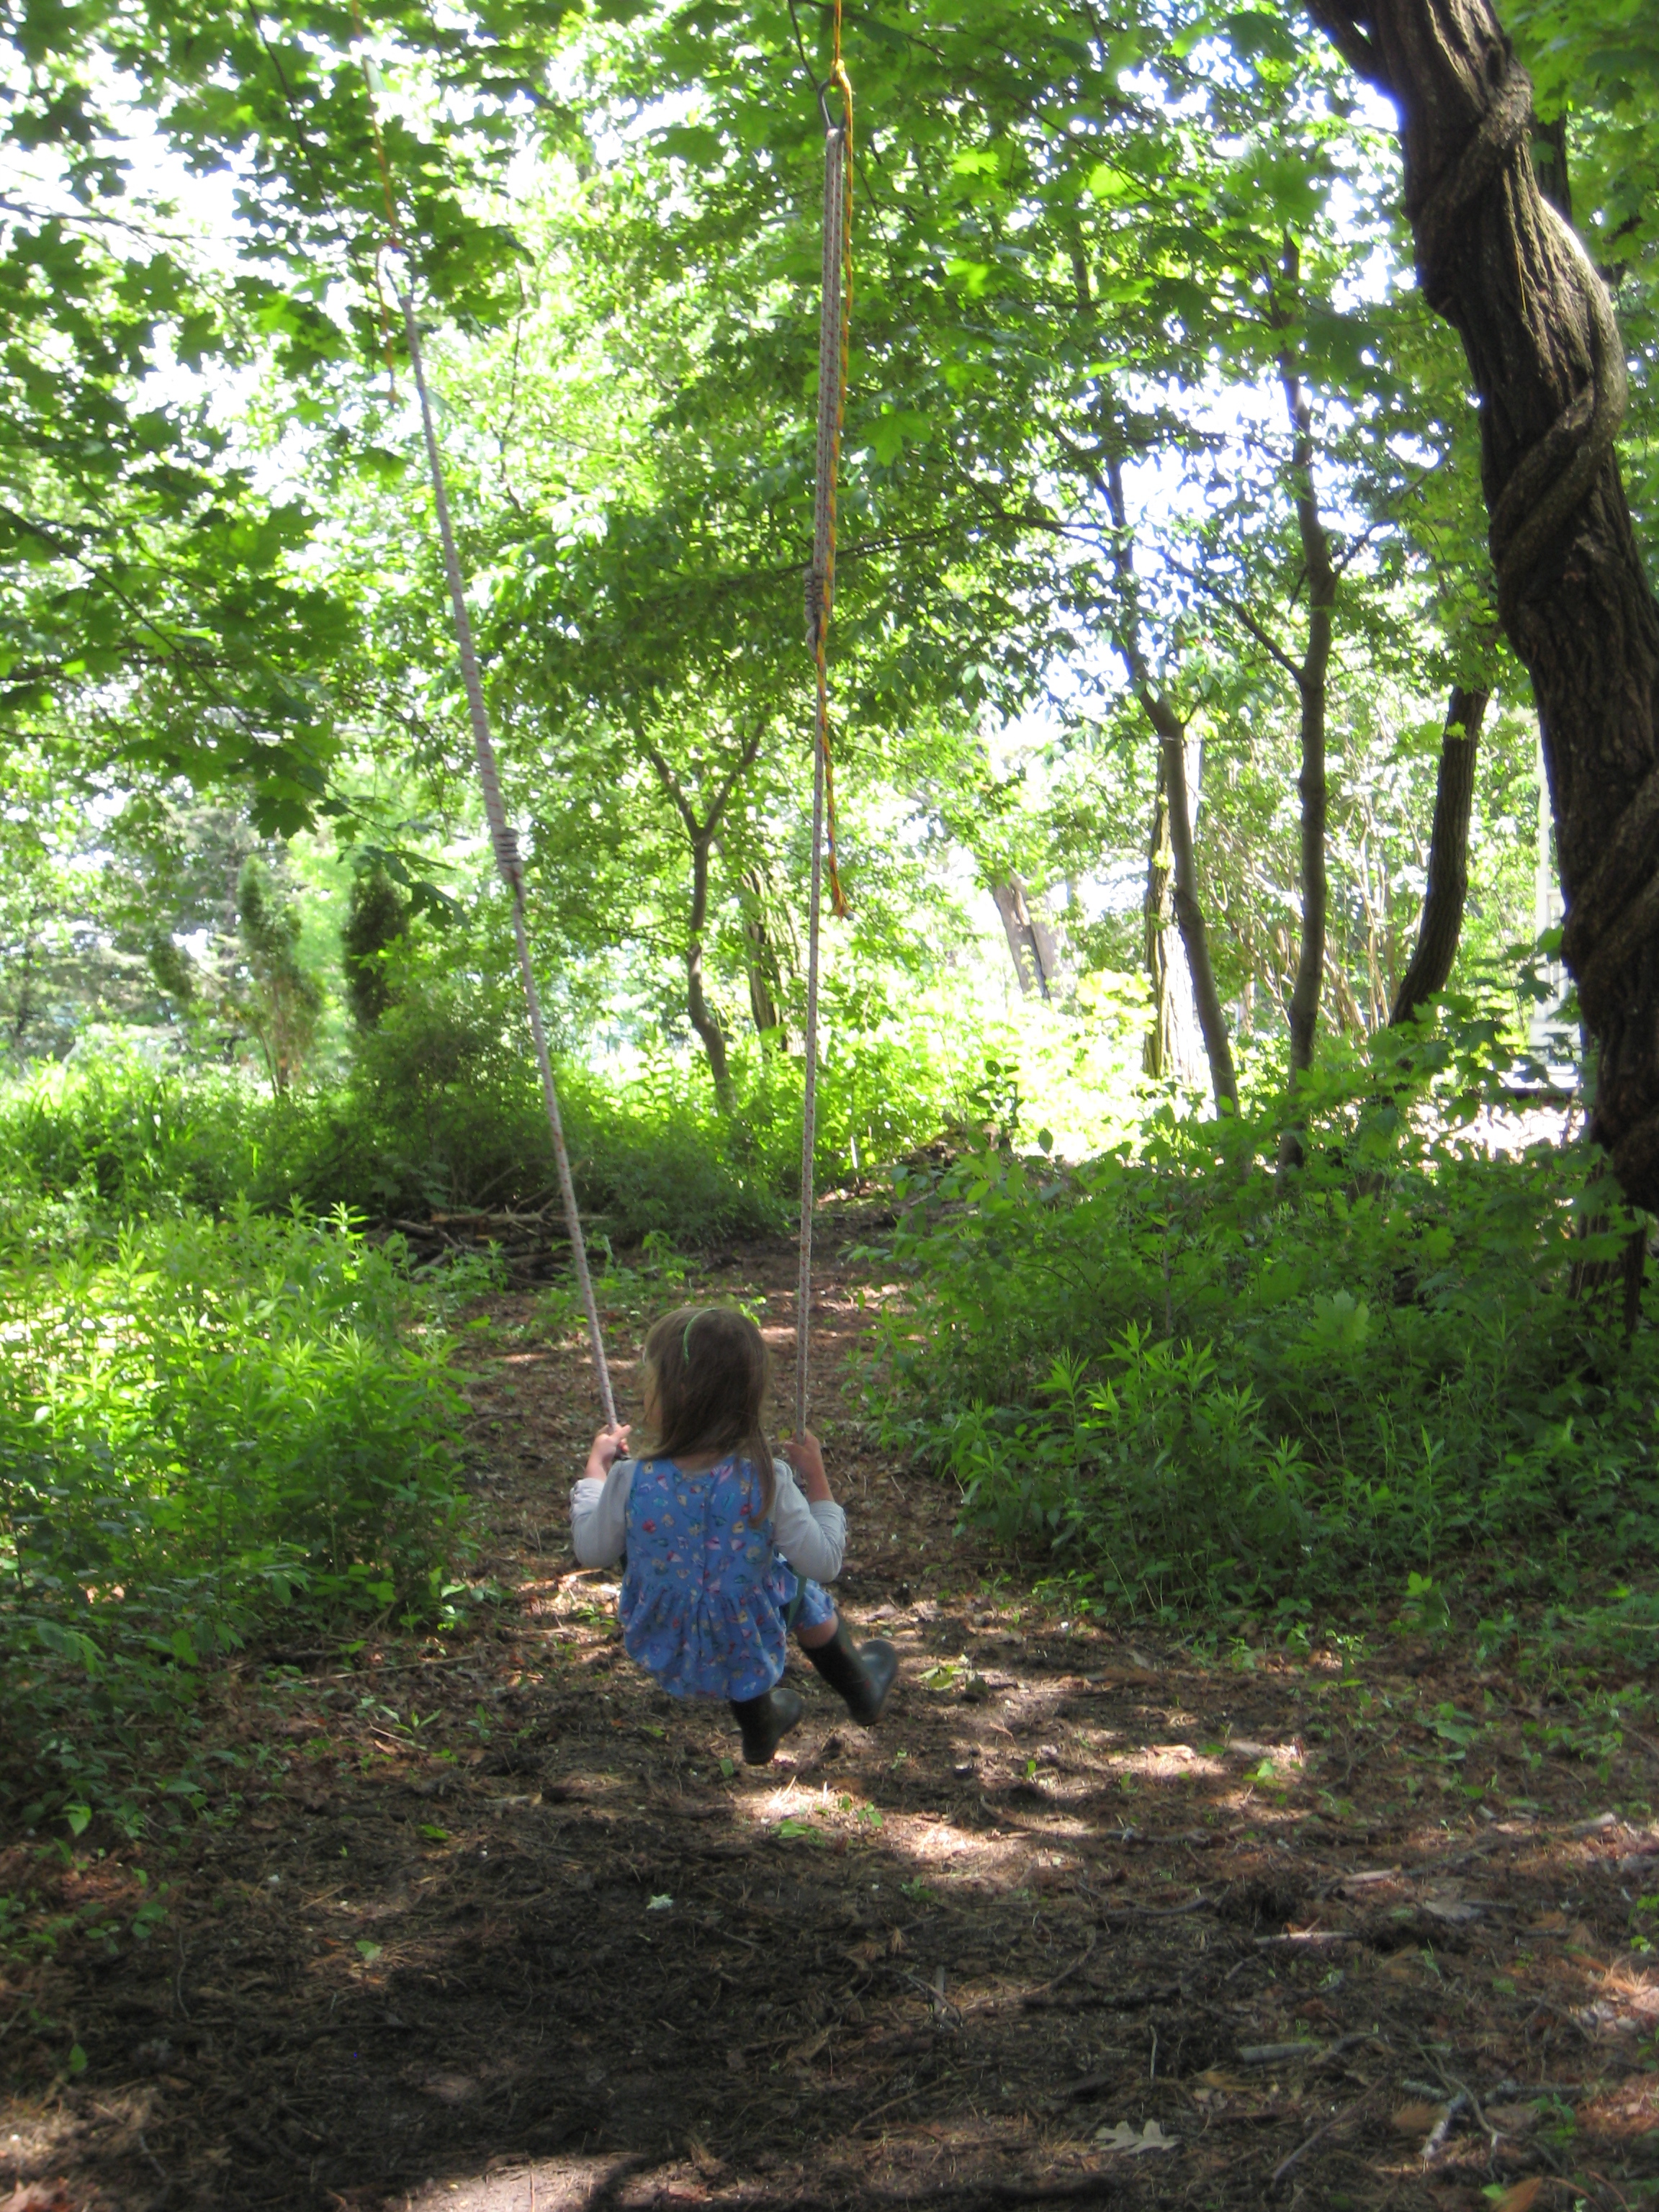
Happiness is…
Posted: June 9, 2013 Filed under: Child Centered Activities, Permaculture & Home Renovation 4 Comments
How do you like to go up in a swing,
Up in the air so blue?
Oh, I do think it the pleasantest thing
Ever a child can do!

Up in the air and over the wall,
Till I can see so wide,
River and trees and cattle and all
Over the countryside

Till I look down on the garden green,
Down on the roof so brown
Up in the air I go flying again,
Up in the air and down!
— Robert Louis Stevenson
Unplanned Renovations
Posted: May 27, 2013 Filed under: In the Kitchen, Permaculture & Home Renovation 4 Comments
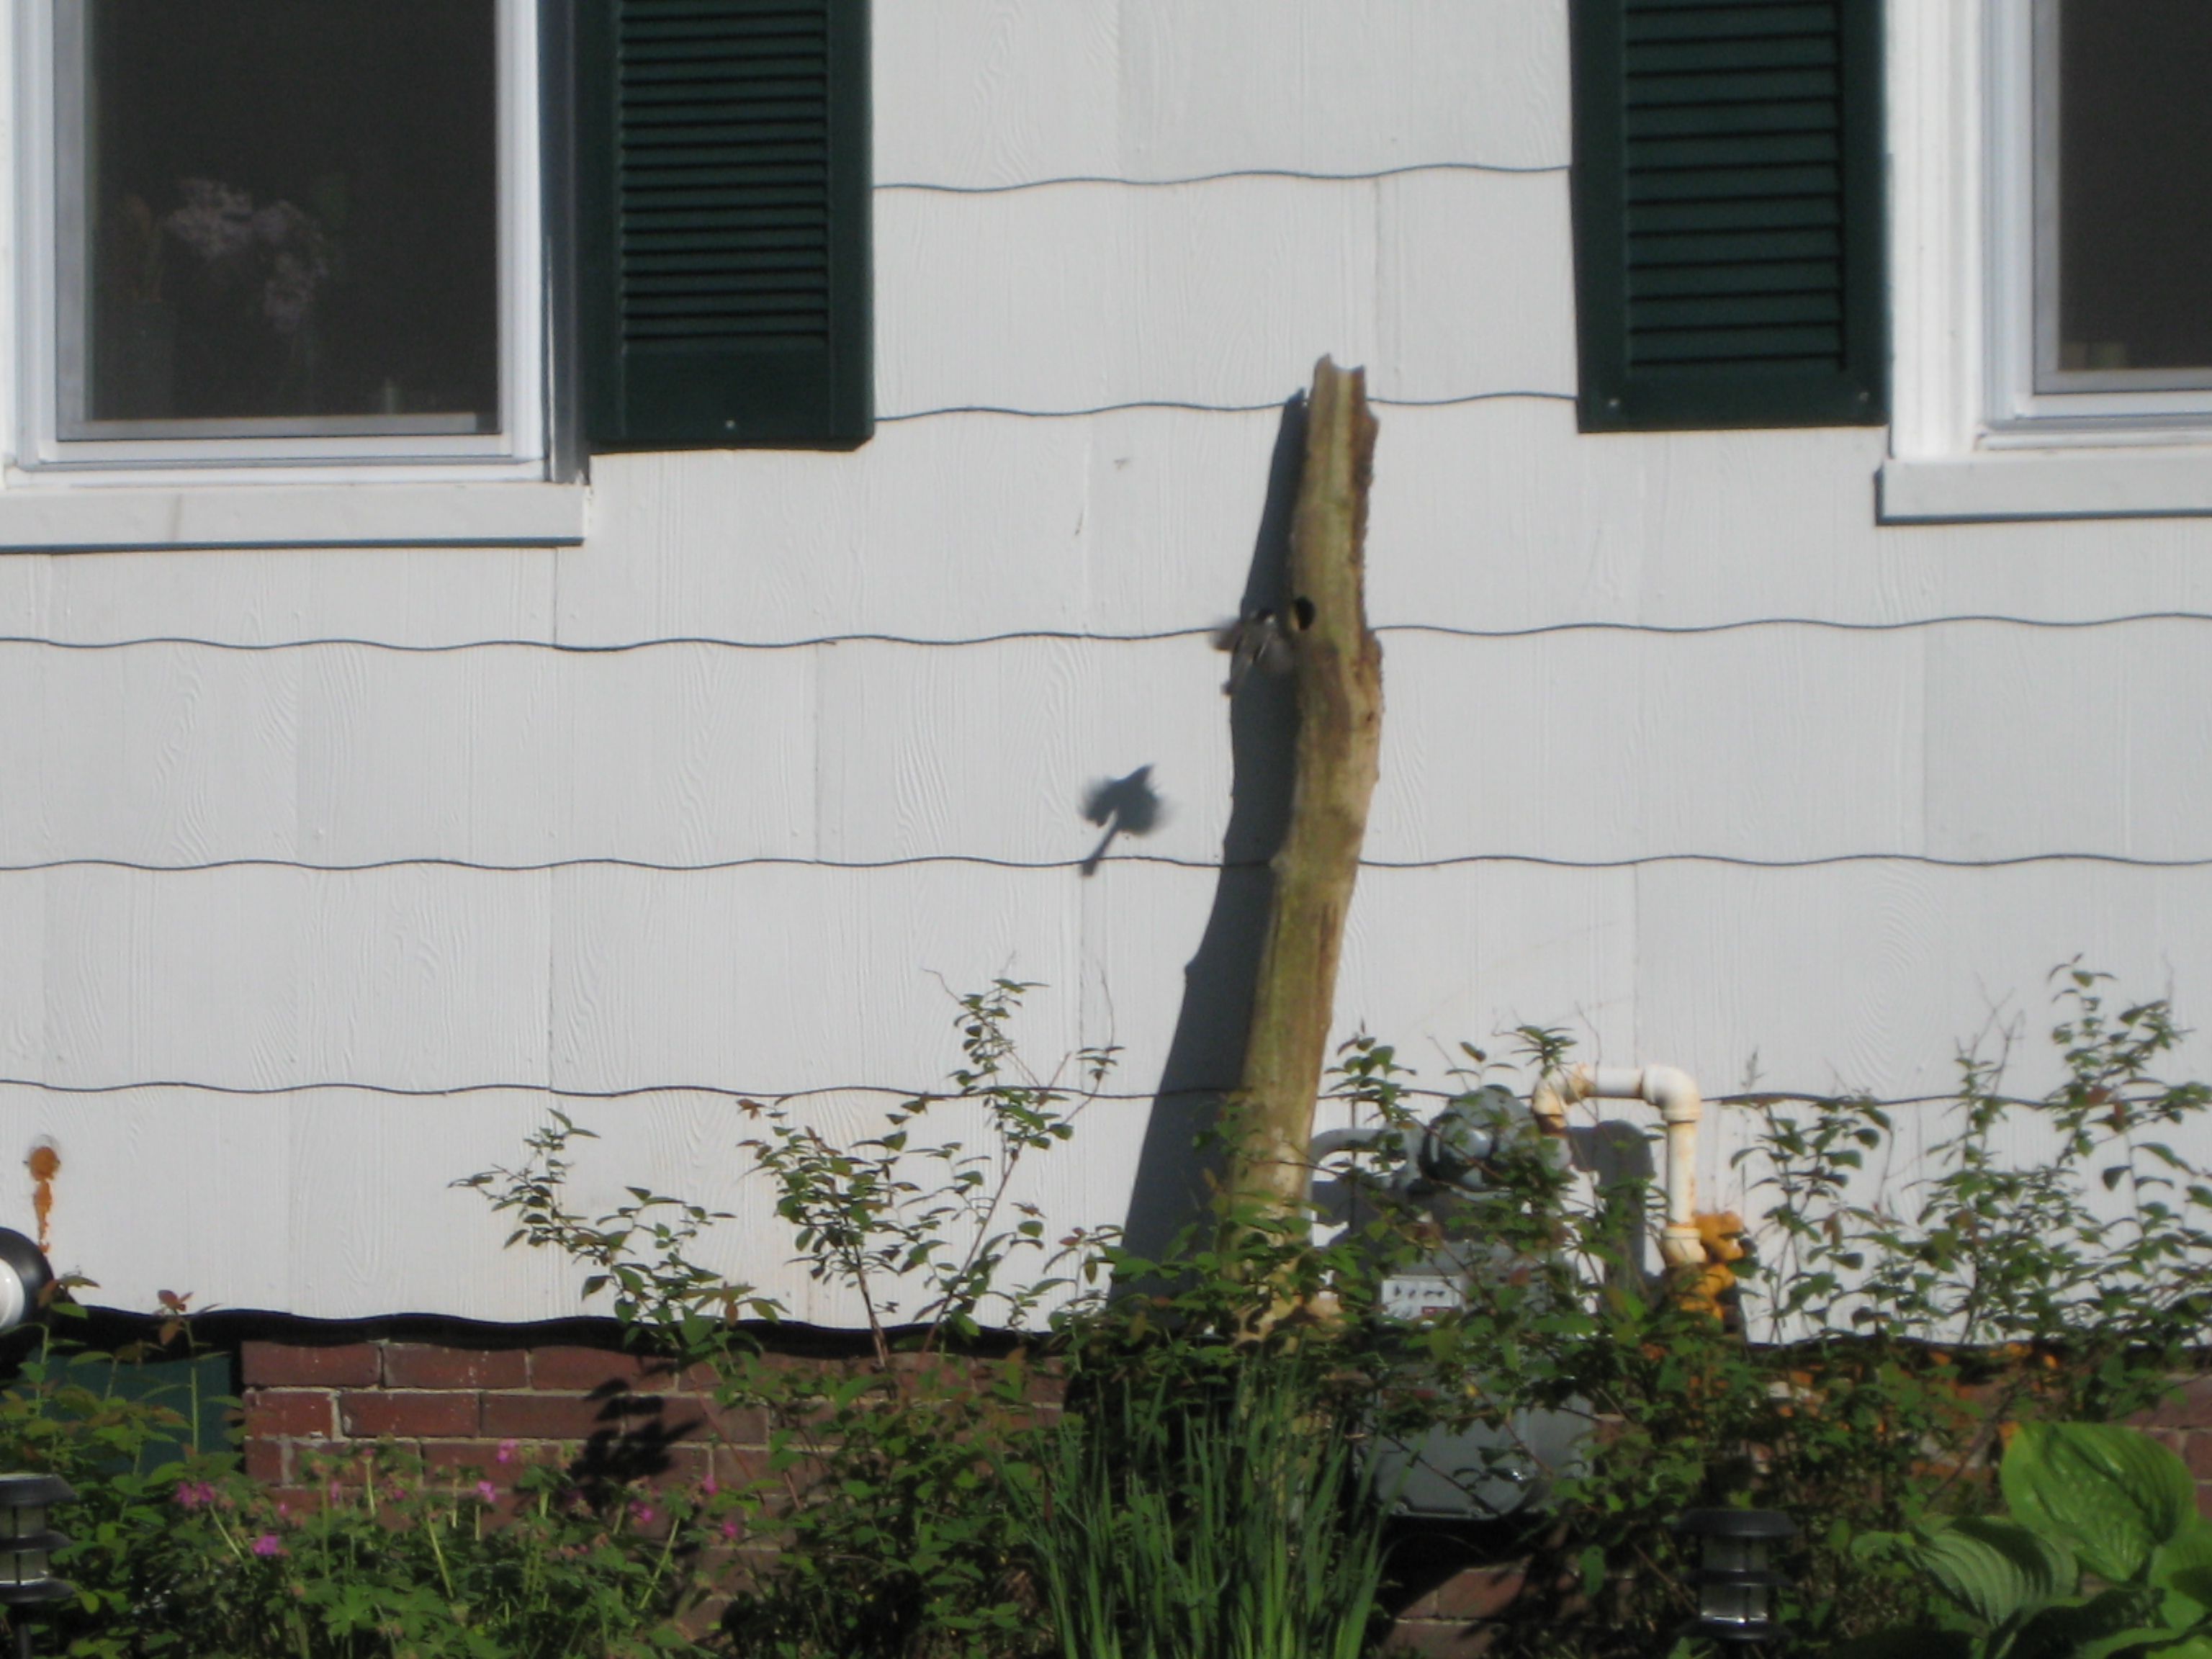
Our property came with a falling down barn and a storm damaged box elder tree. And as sentry overlooking it all, a Pileated Woodpecker.
Our plan for a permacultural renovation was unilateral, and once I noticed our sentry I had a conflict; we were not turning back but we were going to turn him out.
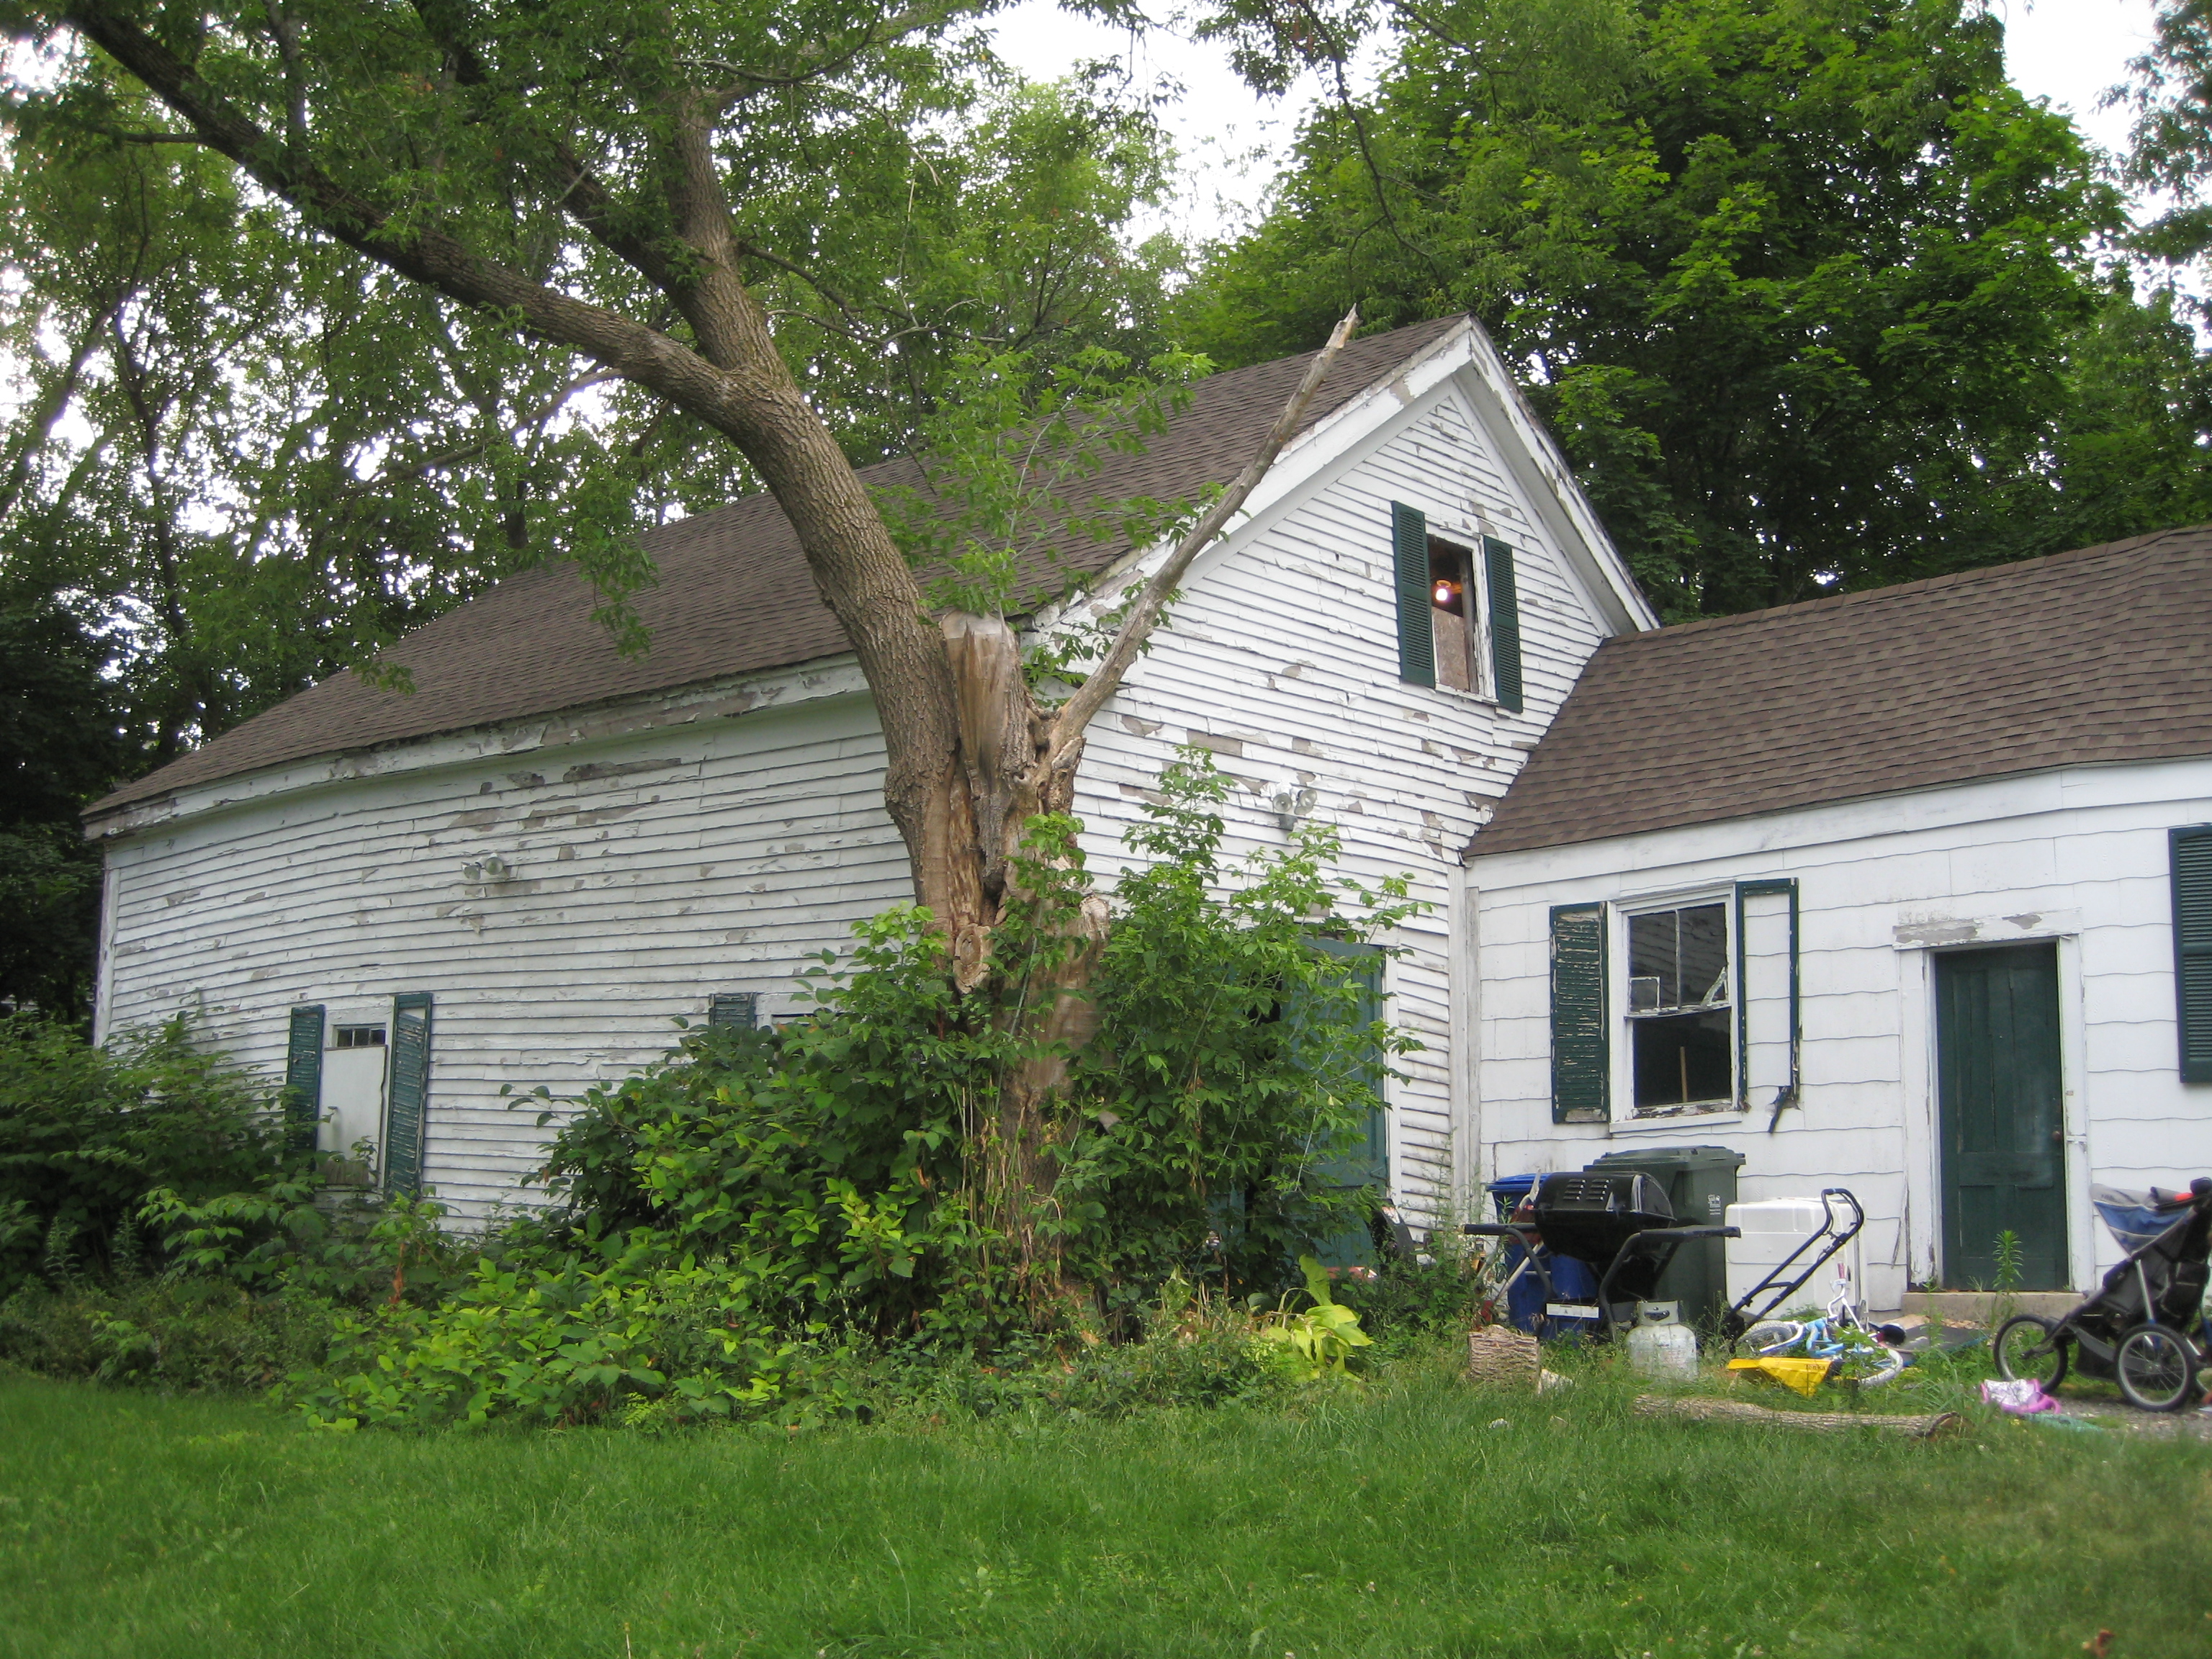

So one balmy afternoon last September, I paused and had a meditation with Mr. Pileated. I doubt it made a difference to him, but I pledged the branch would be remounted somewhere on the farm. He moved on and we moved forward. The branch was saved while the rest was razed.
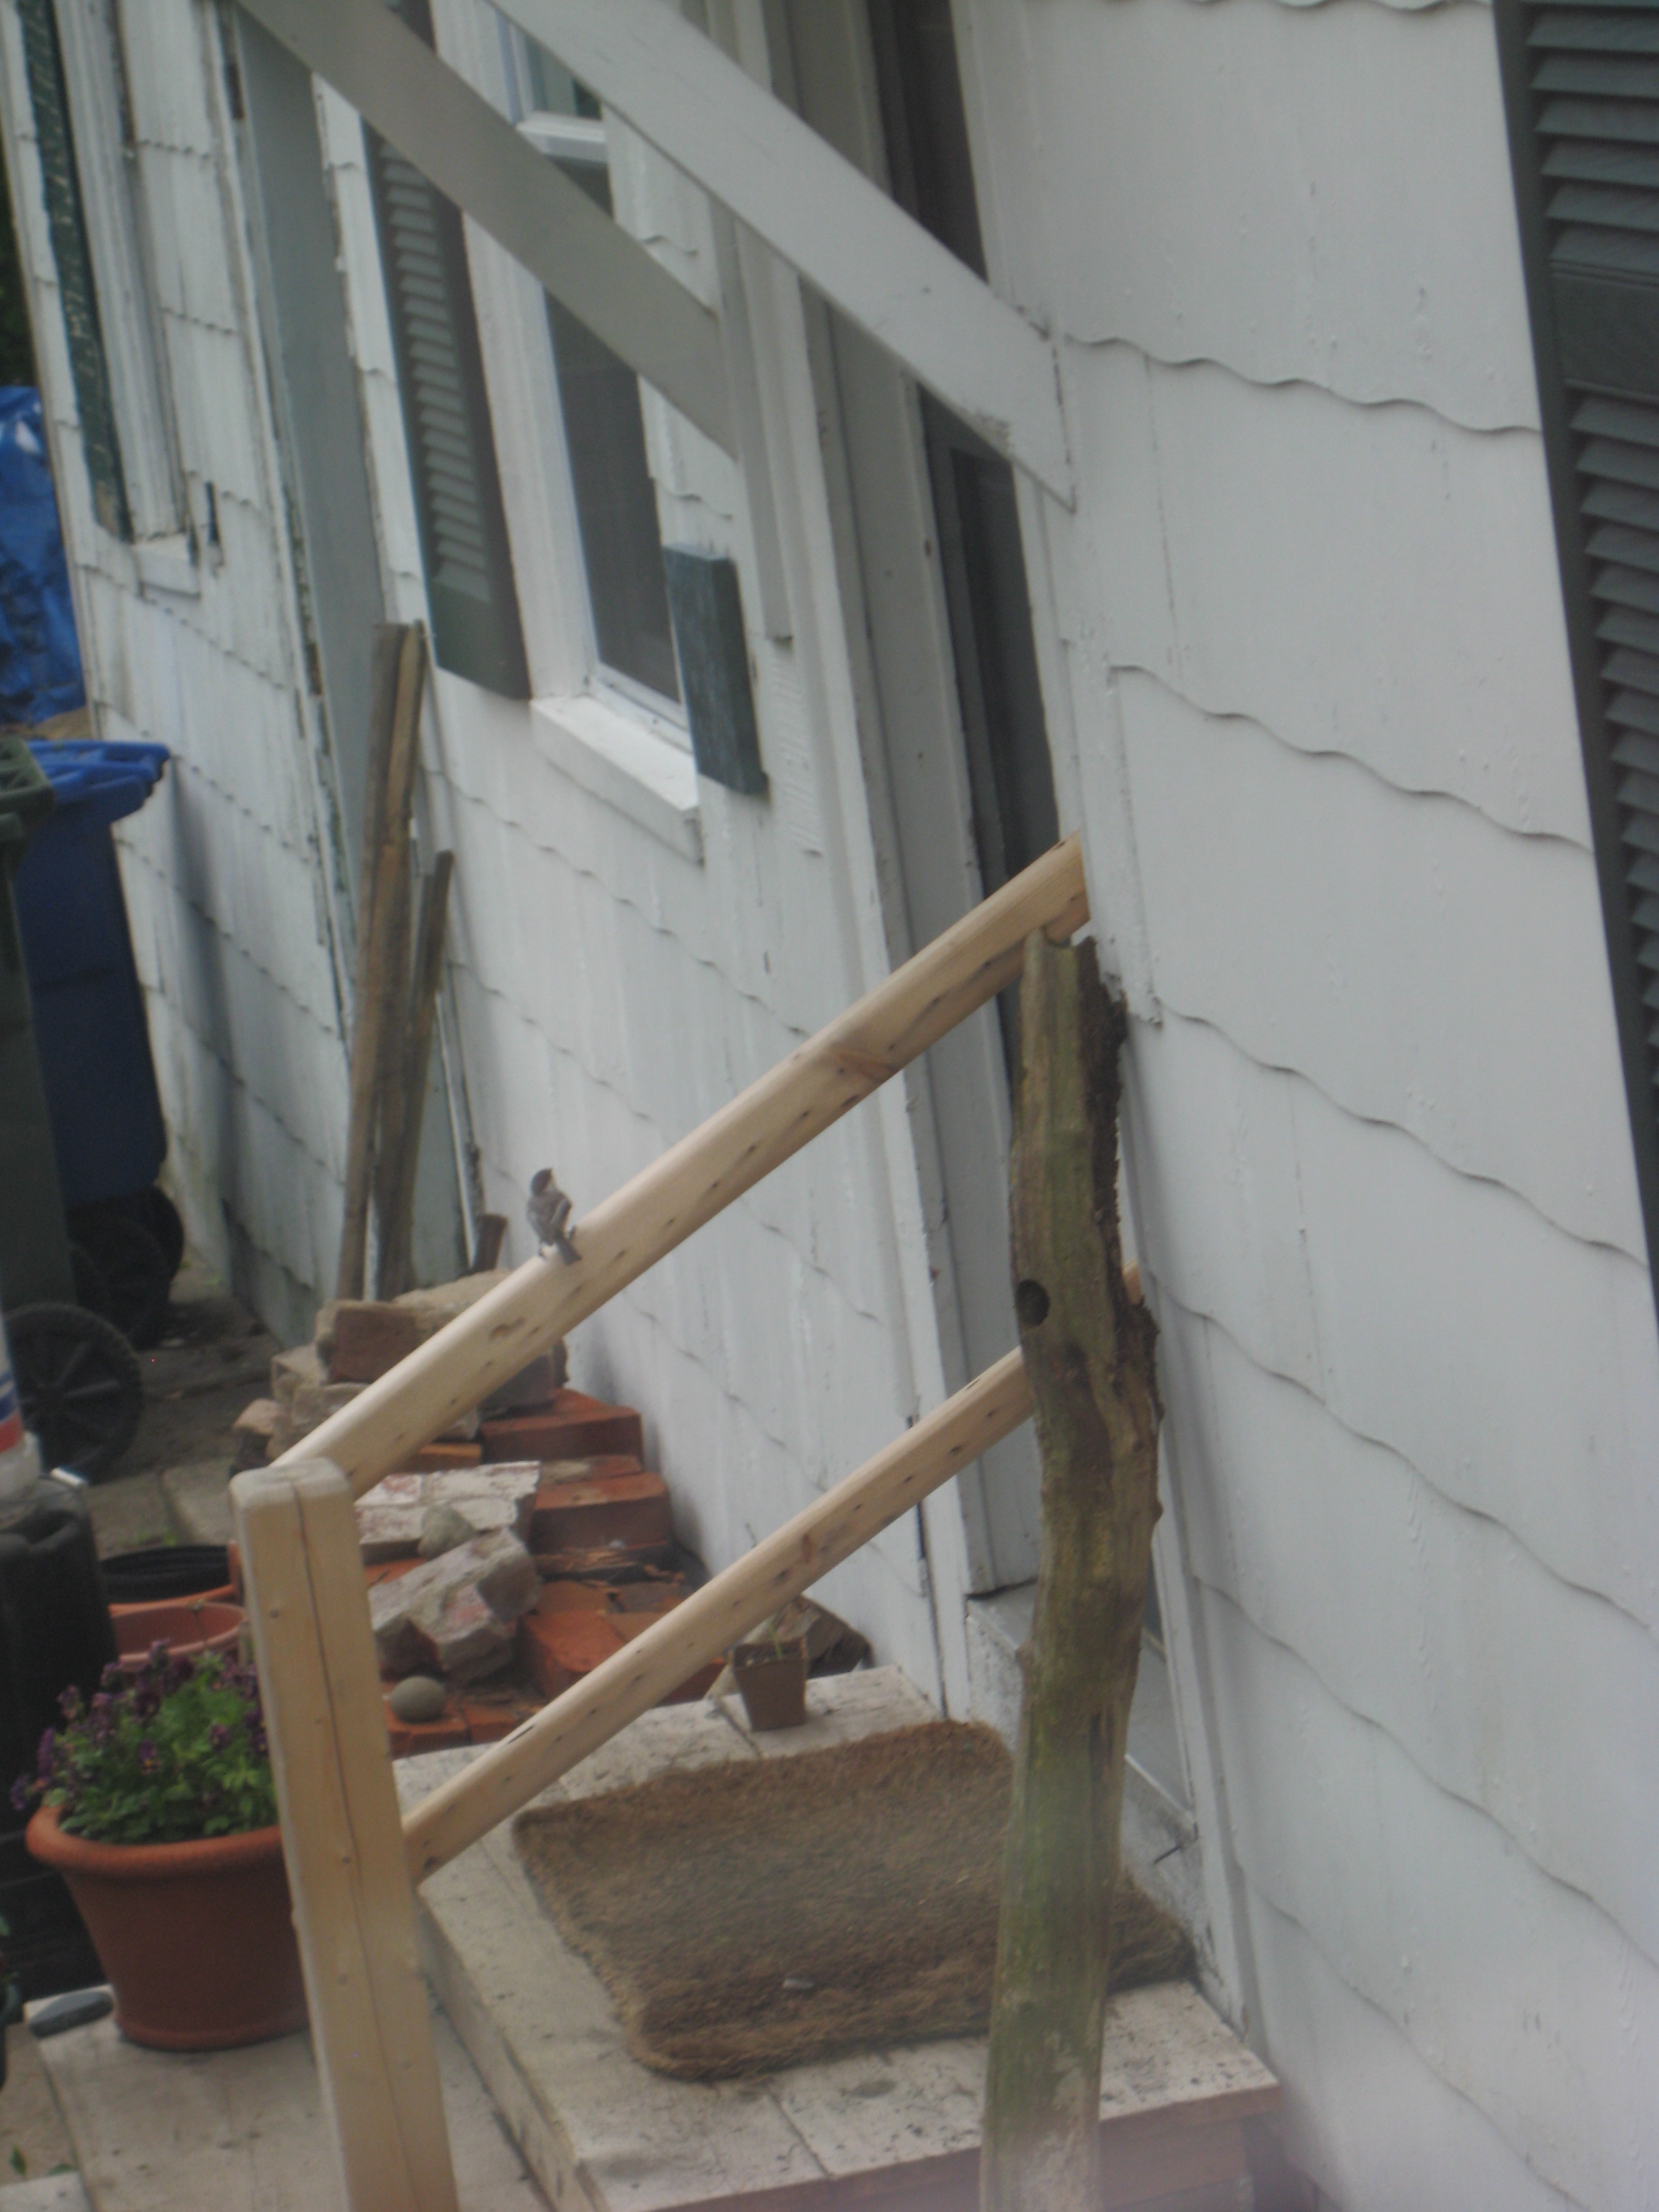
Yesterday I came across that branch lying on the ground. It had spent an ignominous winter buried under the snow. With a welcome recognition, I propped the branch against the stair railing and moved on. Within minutes, a pair of Chickadees moved in.
Becca had been watching this from the kitchen window. She pointed it out and said, “If you are going to move it, do it now!”
With no time to plan, and no tools at hand, I set the log at the back of the new foundation bed and leaned it against the house; protected from foot traffic, close to our bird bath and feeder, and next to the towering Blue Spruce.


The Chickadees are nesting. They shuttle now, non-stop, back and forth between their nest and the blue spruce. Outbound, debris is hauled from the log. They land in the Blue Spruce and release their detritus, then await their partner to make the round trip.
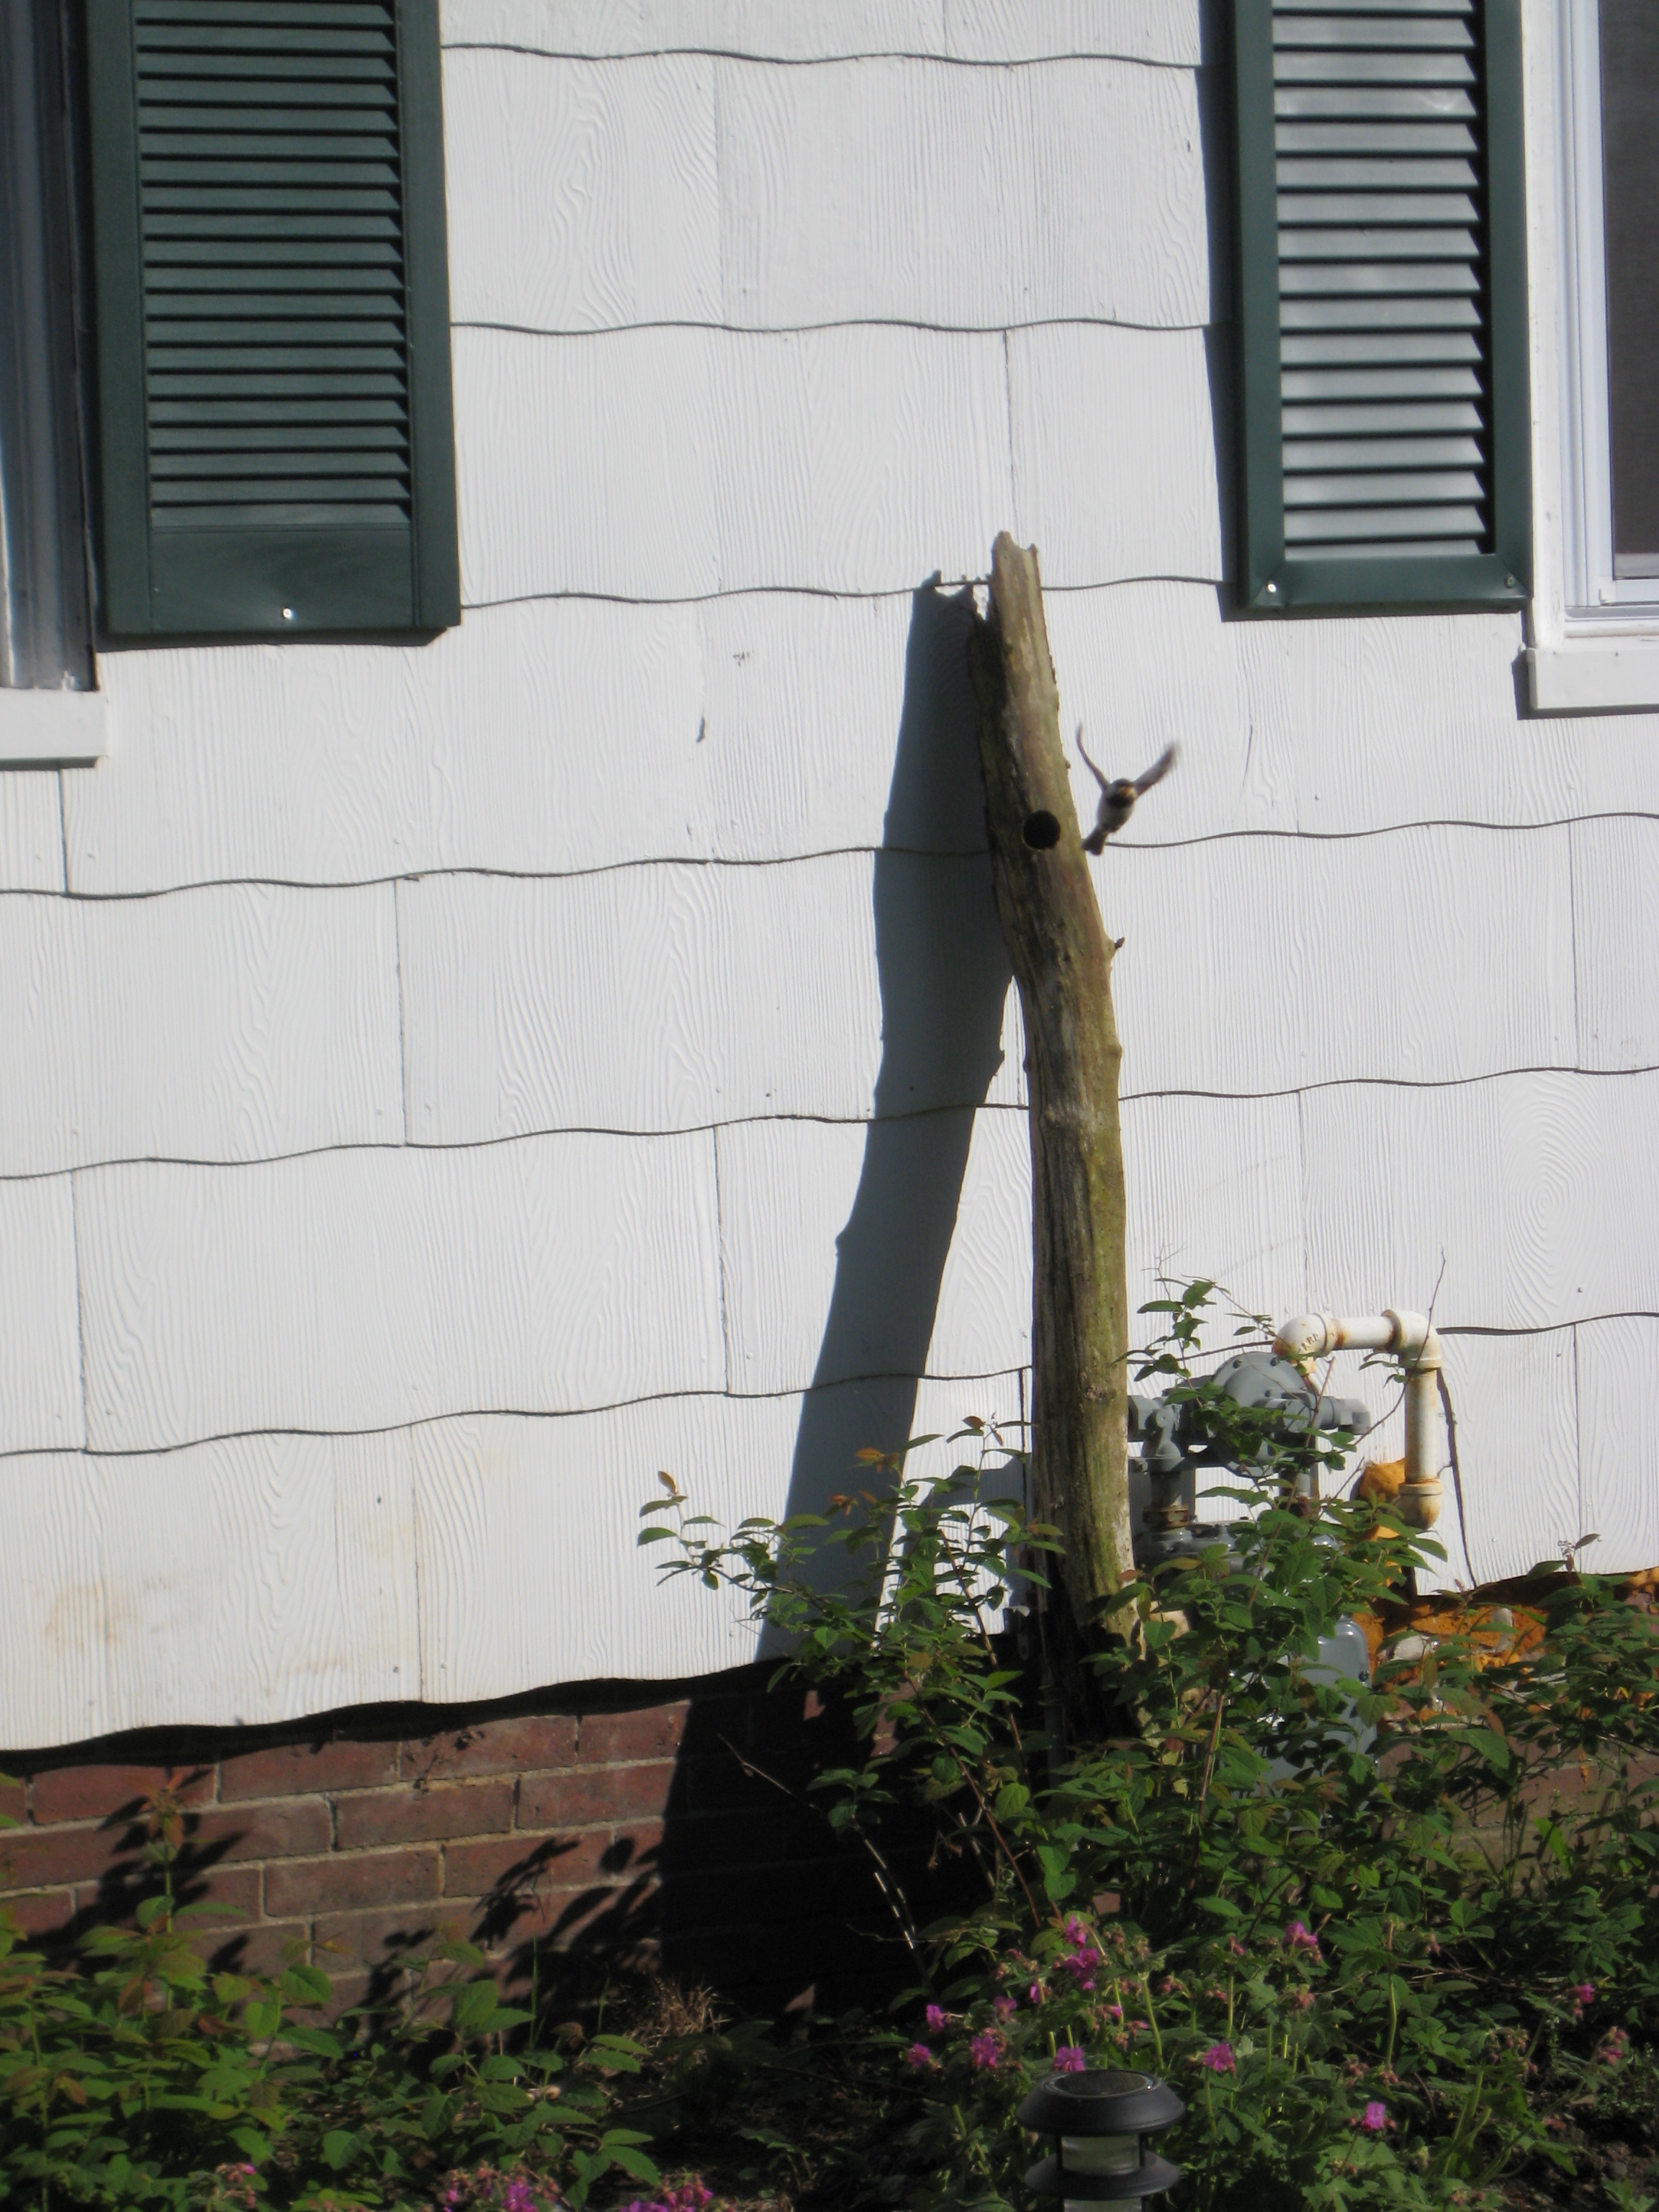
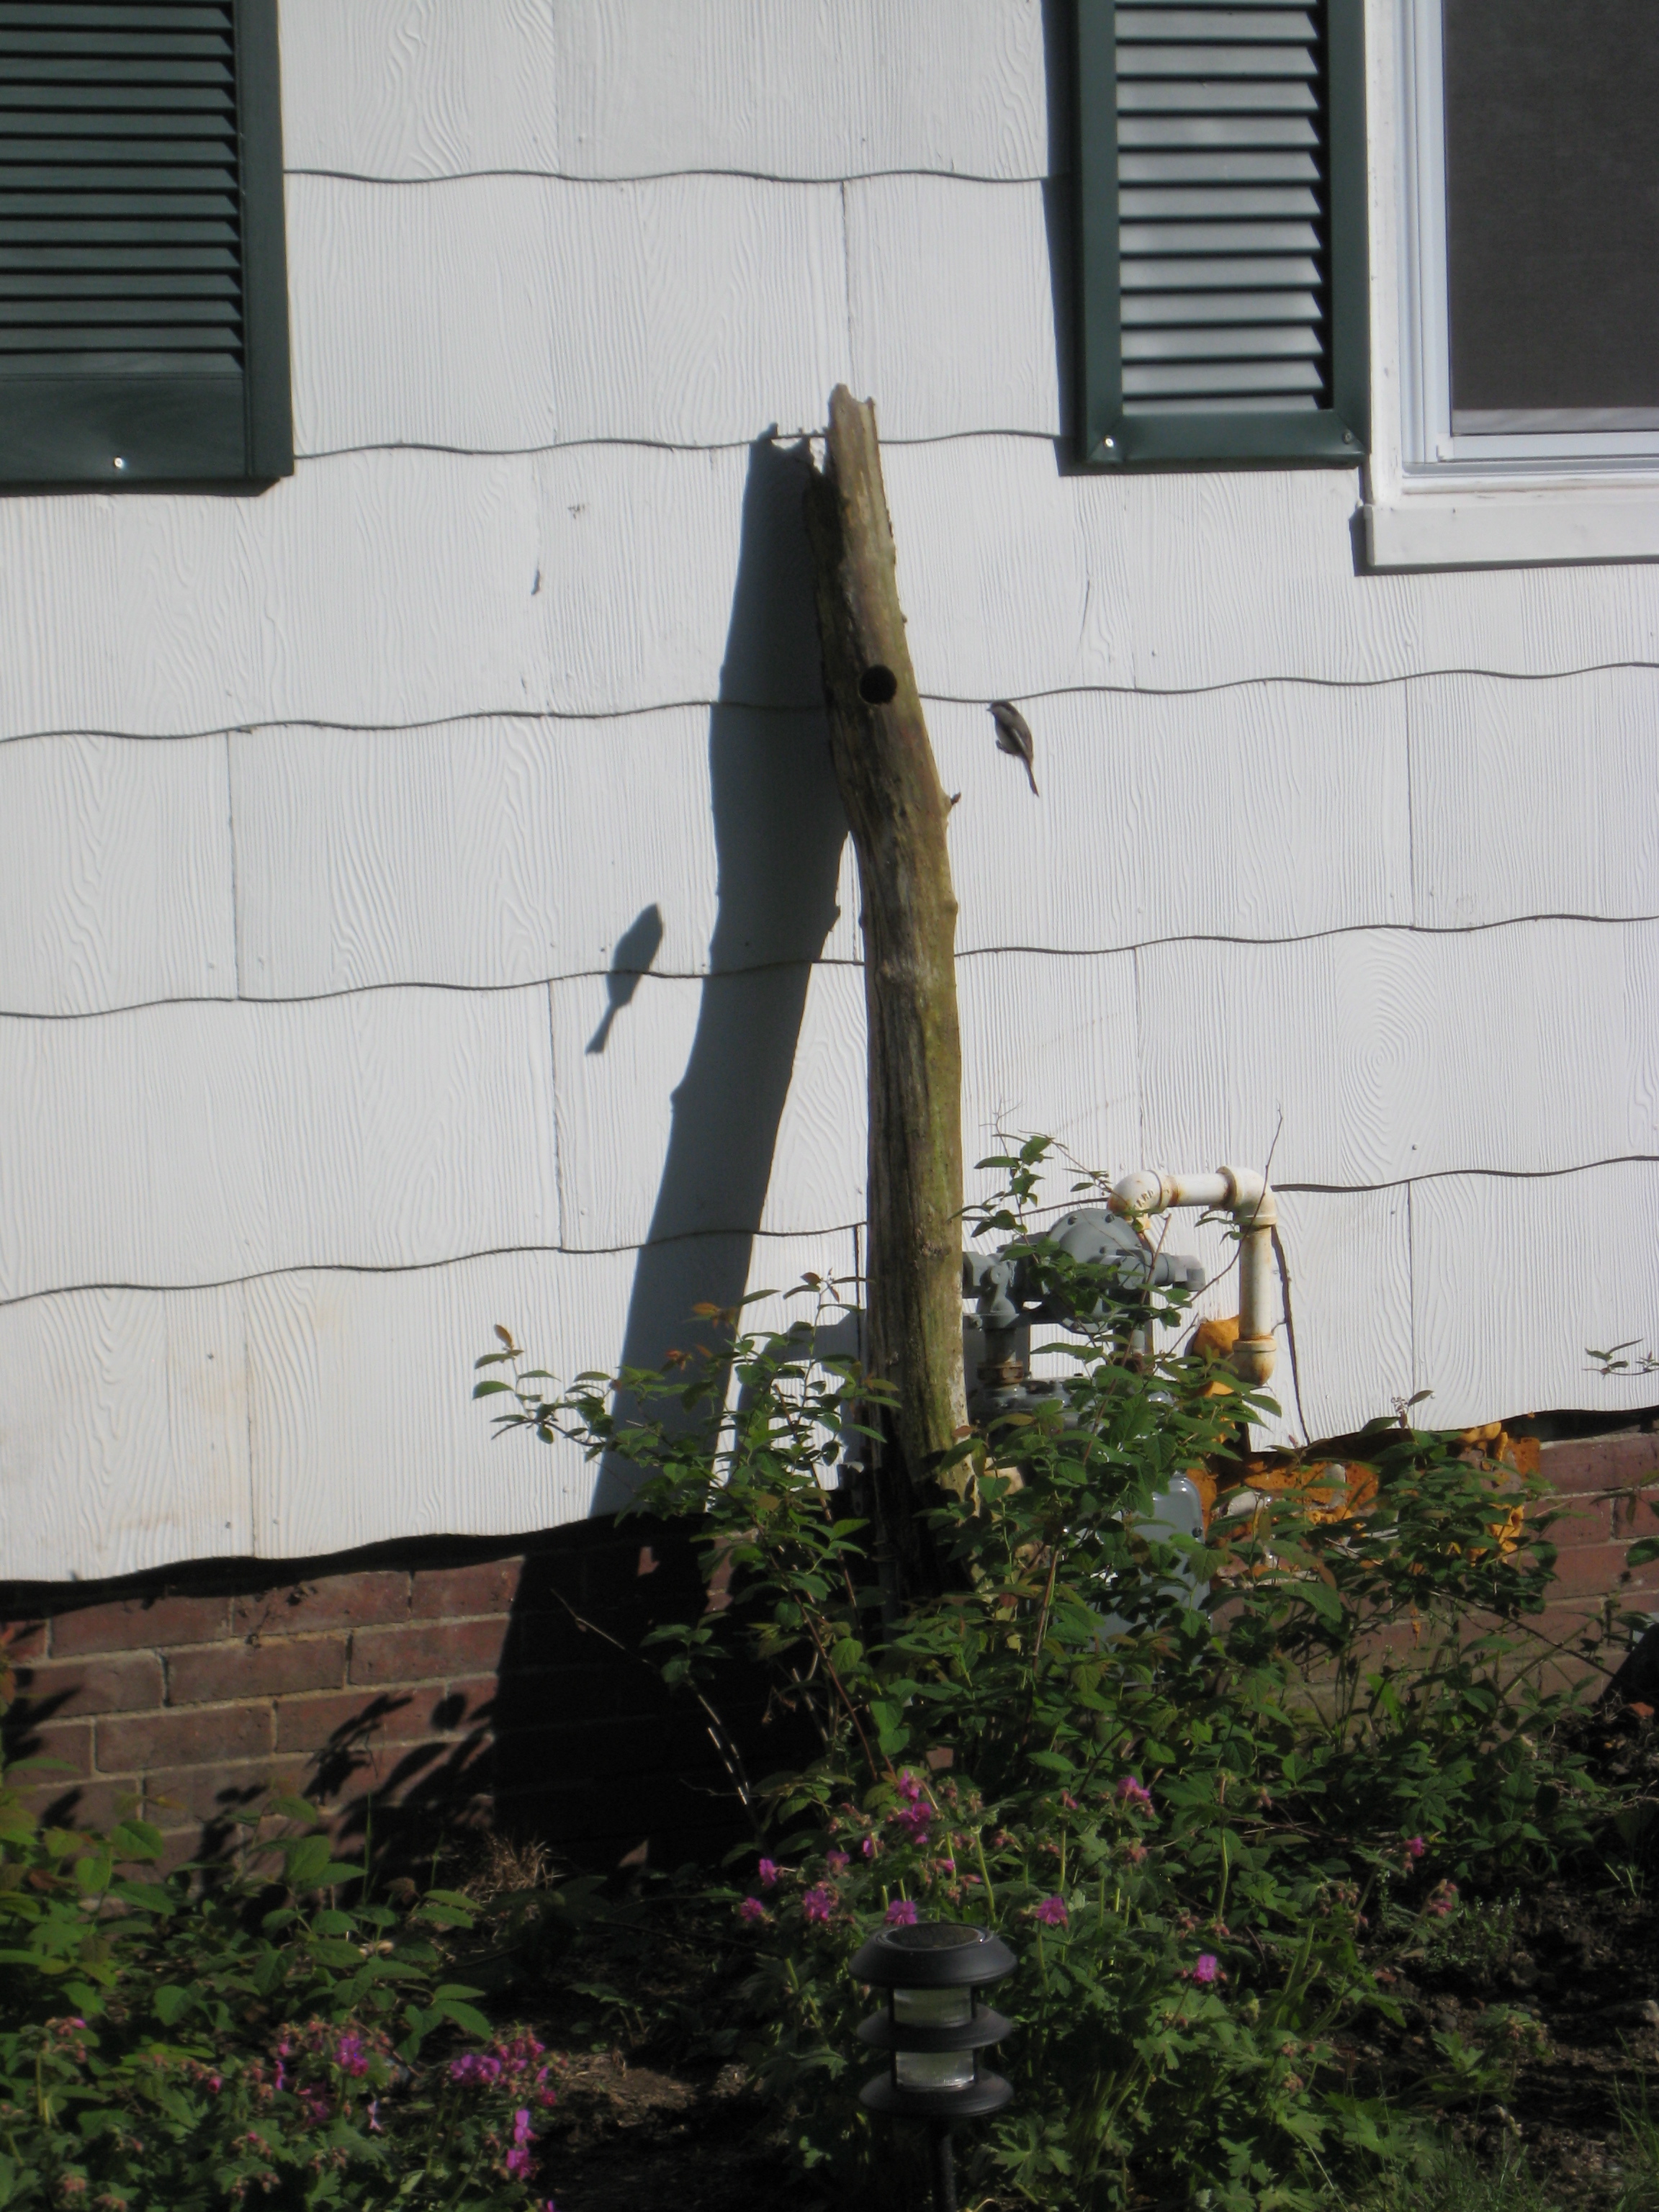
We are able to watch this from our kitchen window.

An amazing show. An affirmation, we hope, of our intentions.
Good Garden Karma
Posted: May 26, 2013 Filed under: Art & Healing, Permaculture & Home Renovation 3 Comments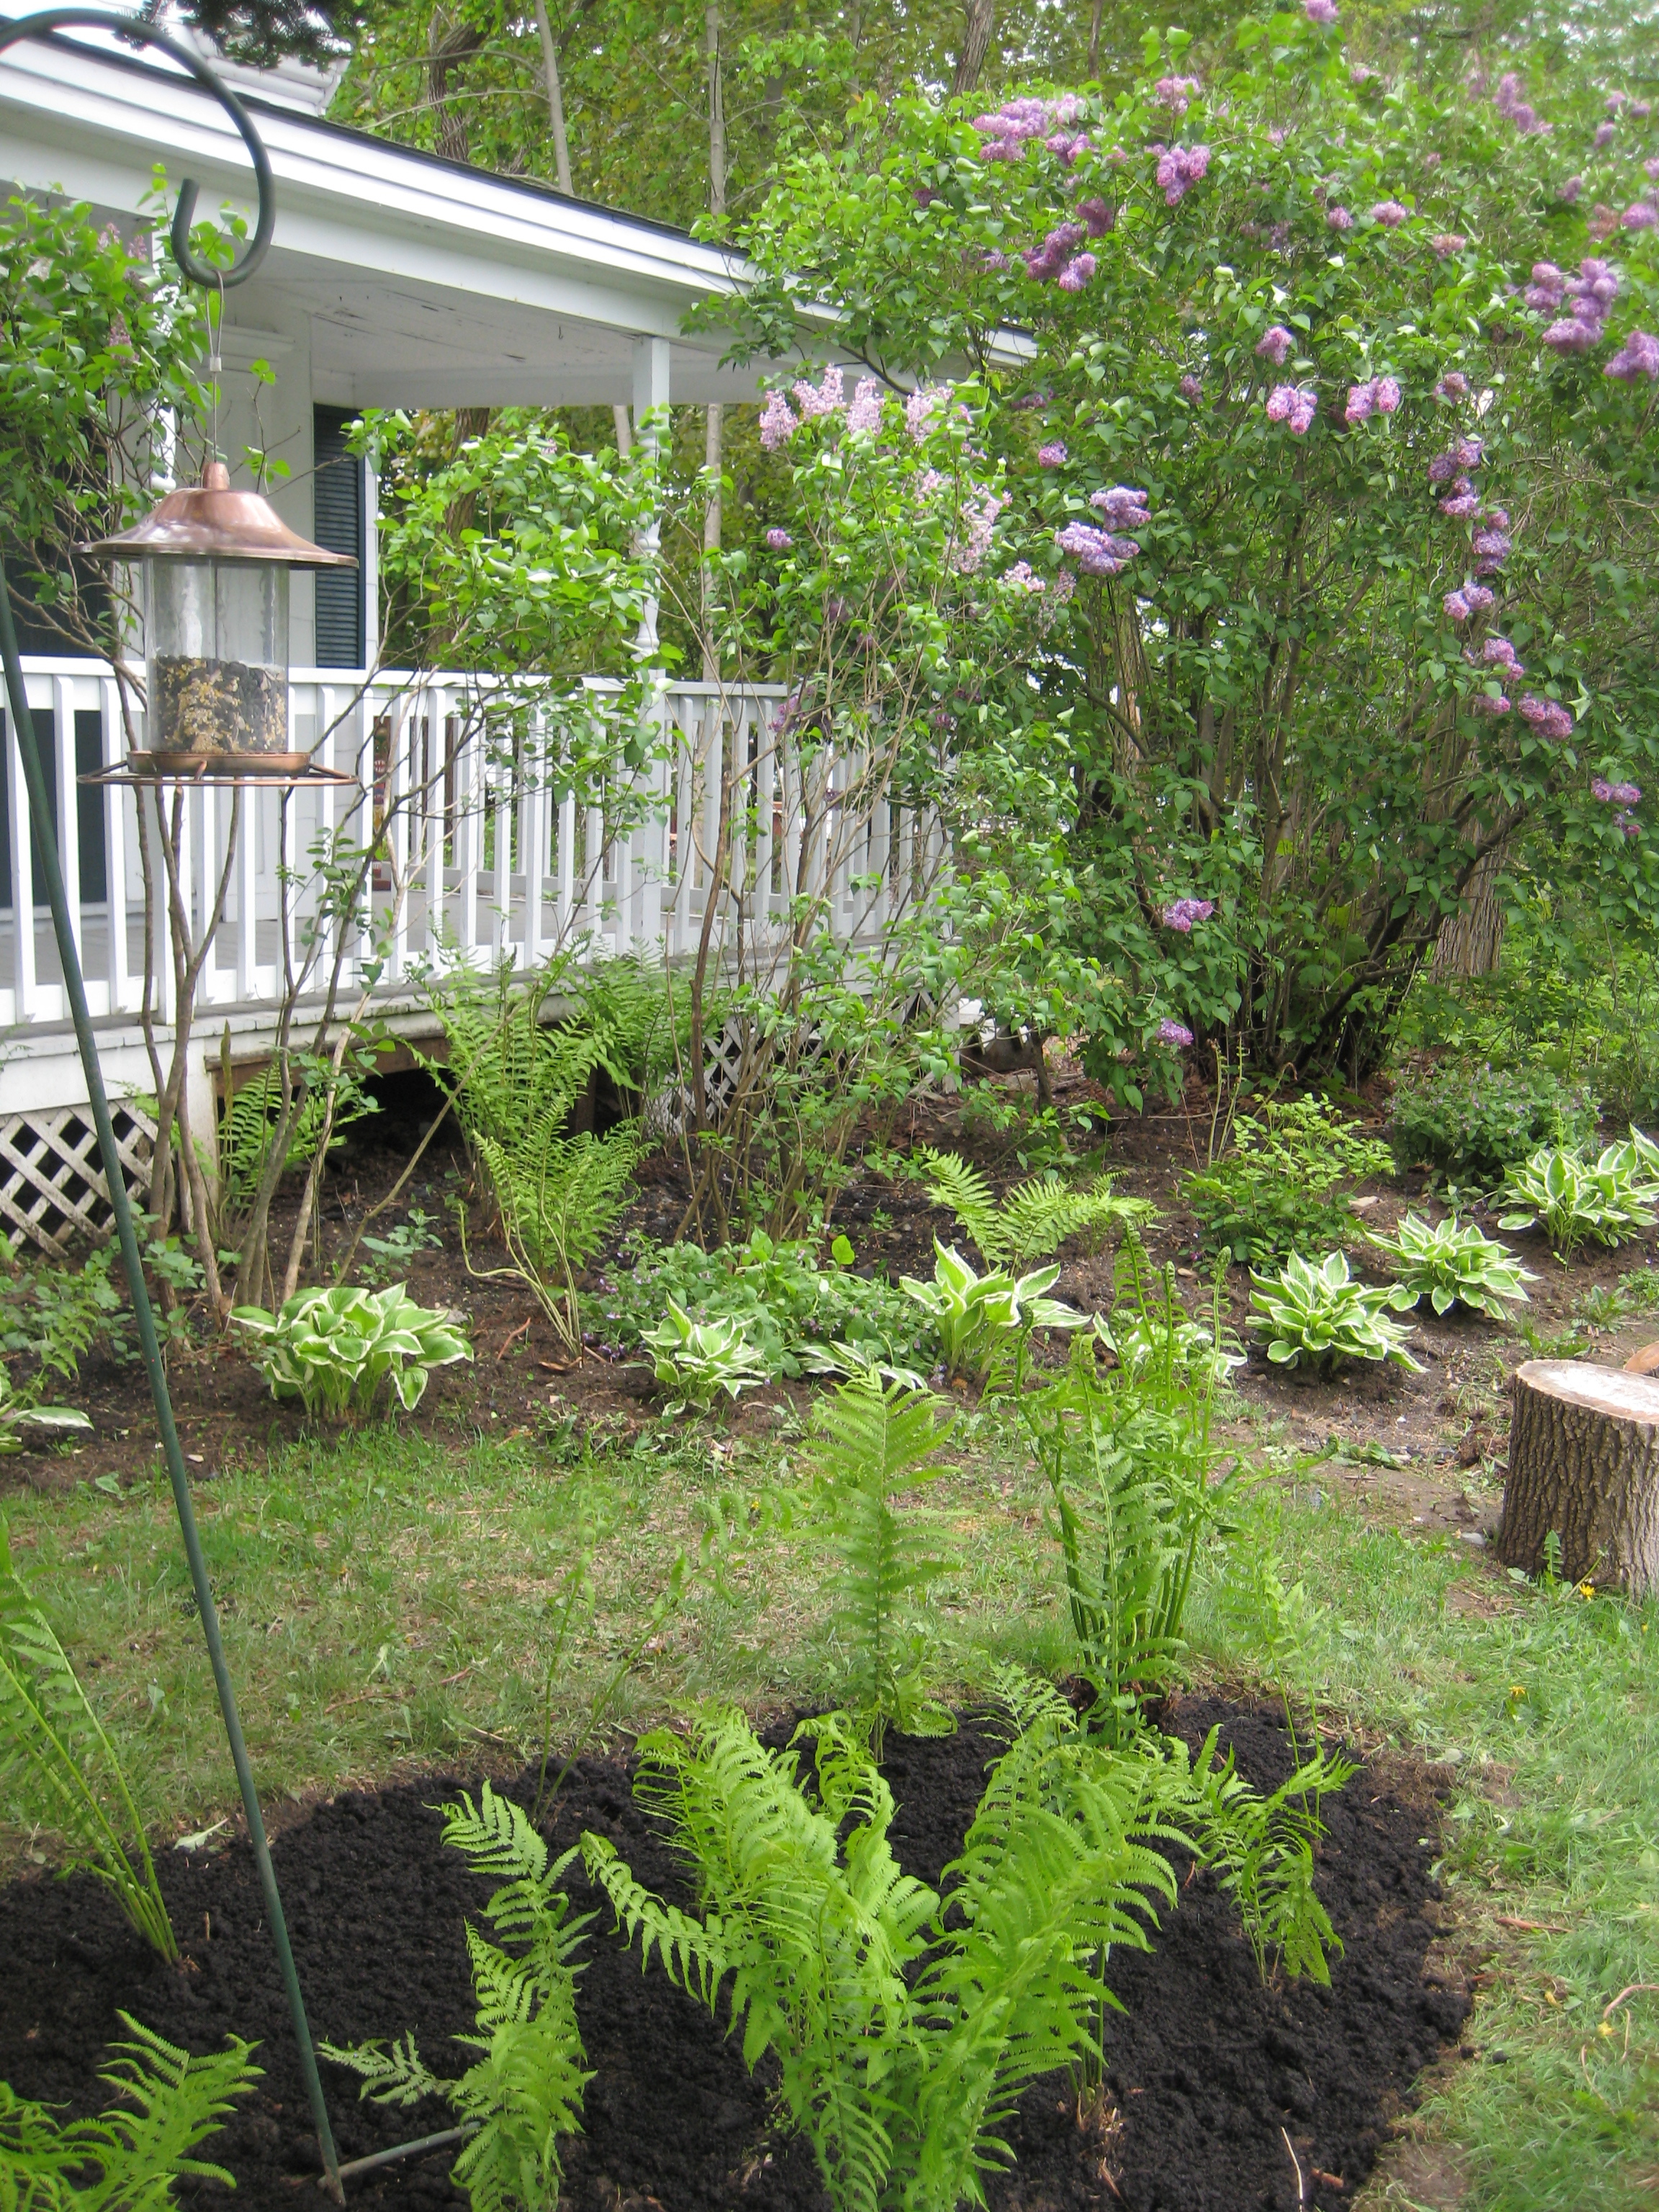
At the grey end of winter I made a list of plants for our art farm.
I opened my copy of “Dirr’s Manual of Woody Landscape Plants” – the authoritative tome on matters of shrubs and trees – and cross referenced against available nursery stock.
I have nursery wholesale accounts and looked forward to buying at discount. My wish list grew rapidly. Our bank balance had not.
The obvious approach was to disregard planning and go the “free and found” route.
There is no turning back. Nor need there be. We have to date spent $43 on all the plantings.
Estate gardens overplant. Where two Rhododendron should go, seven are planted. Trees arrive with trunks thick, the leafy canopy high and wide, accompanied by heavy equipment and work crews.
But it takes one year per inch of trunk diameter for the tree to settle into new terrain. Trees slowly overcome the transplant shock and you are better off buying a smaller tree and letting it grow into the landscape.
I know of one estate that solves this problem by handling trees like annuals. The arborist actually told me that he sometimes leaves the metal cage on the root ball to make it easier to remove and change out the trees later. Instant gratification. Ever-changing.
At the big house I manage, the planting phase was completed before my tenure. My job, my challenge is about editing. This season we attacked several problem areas.
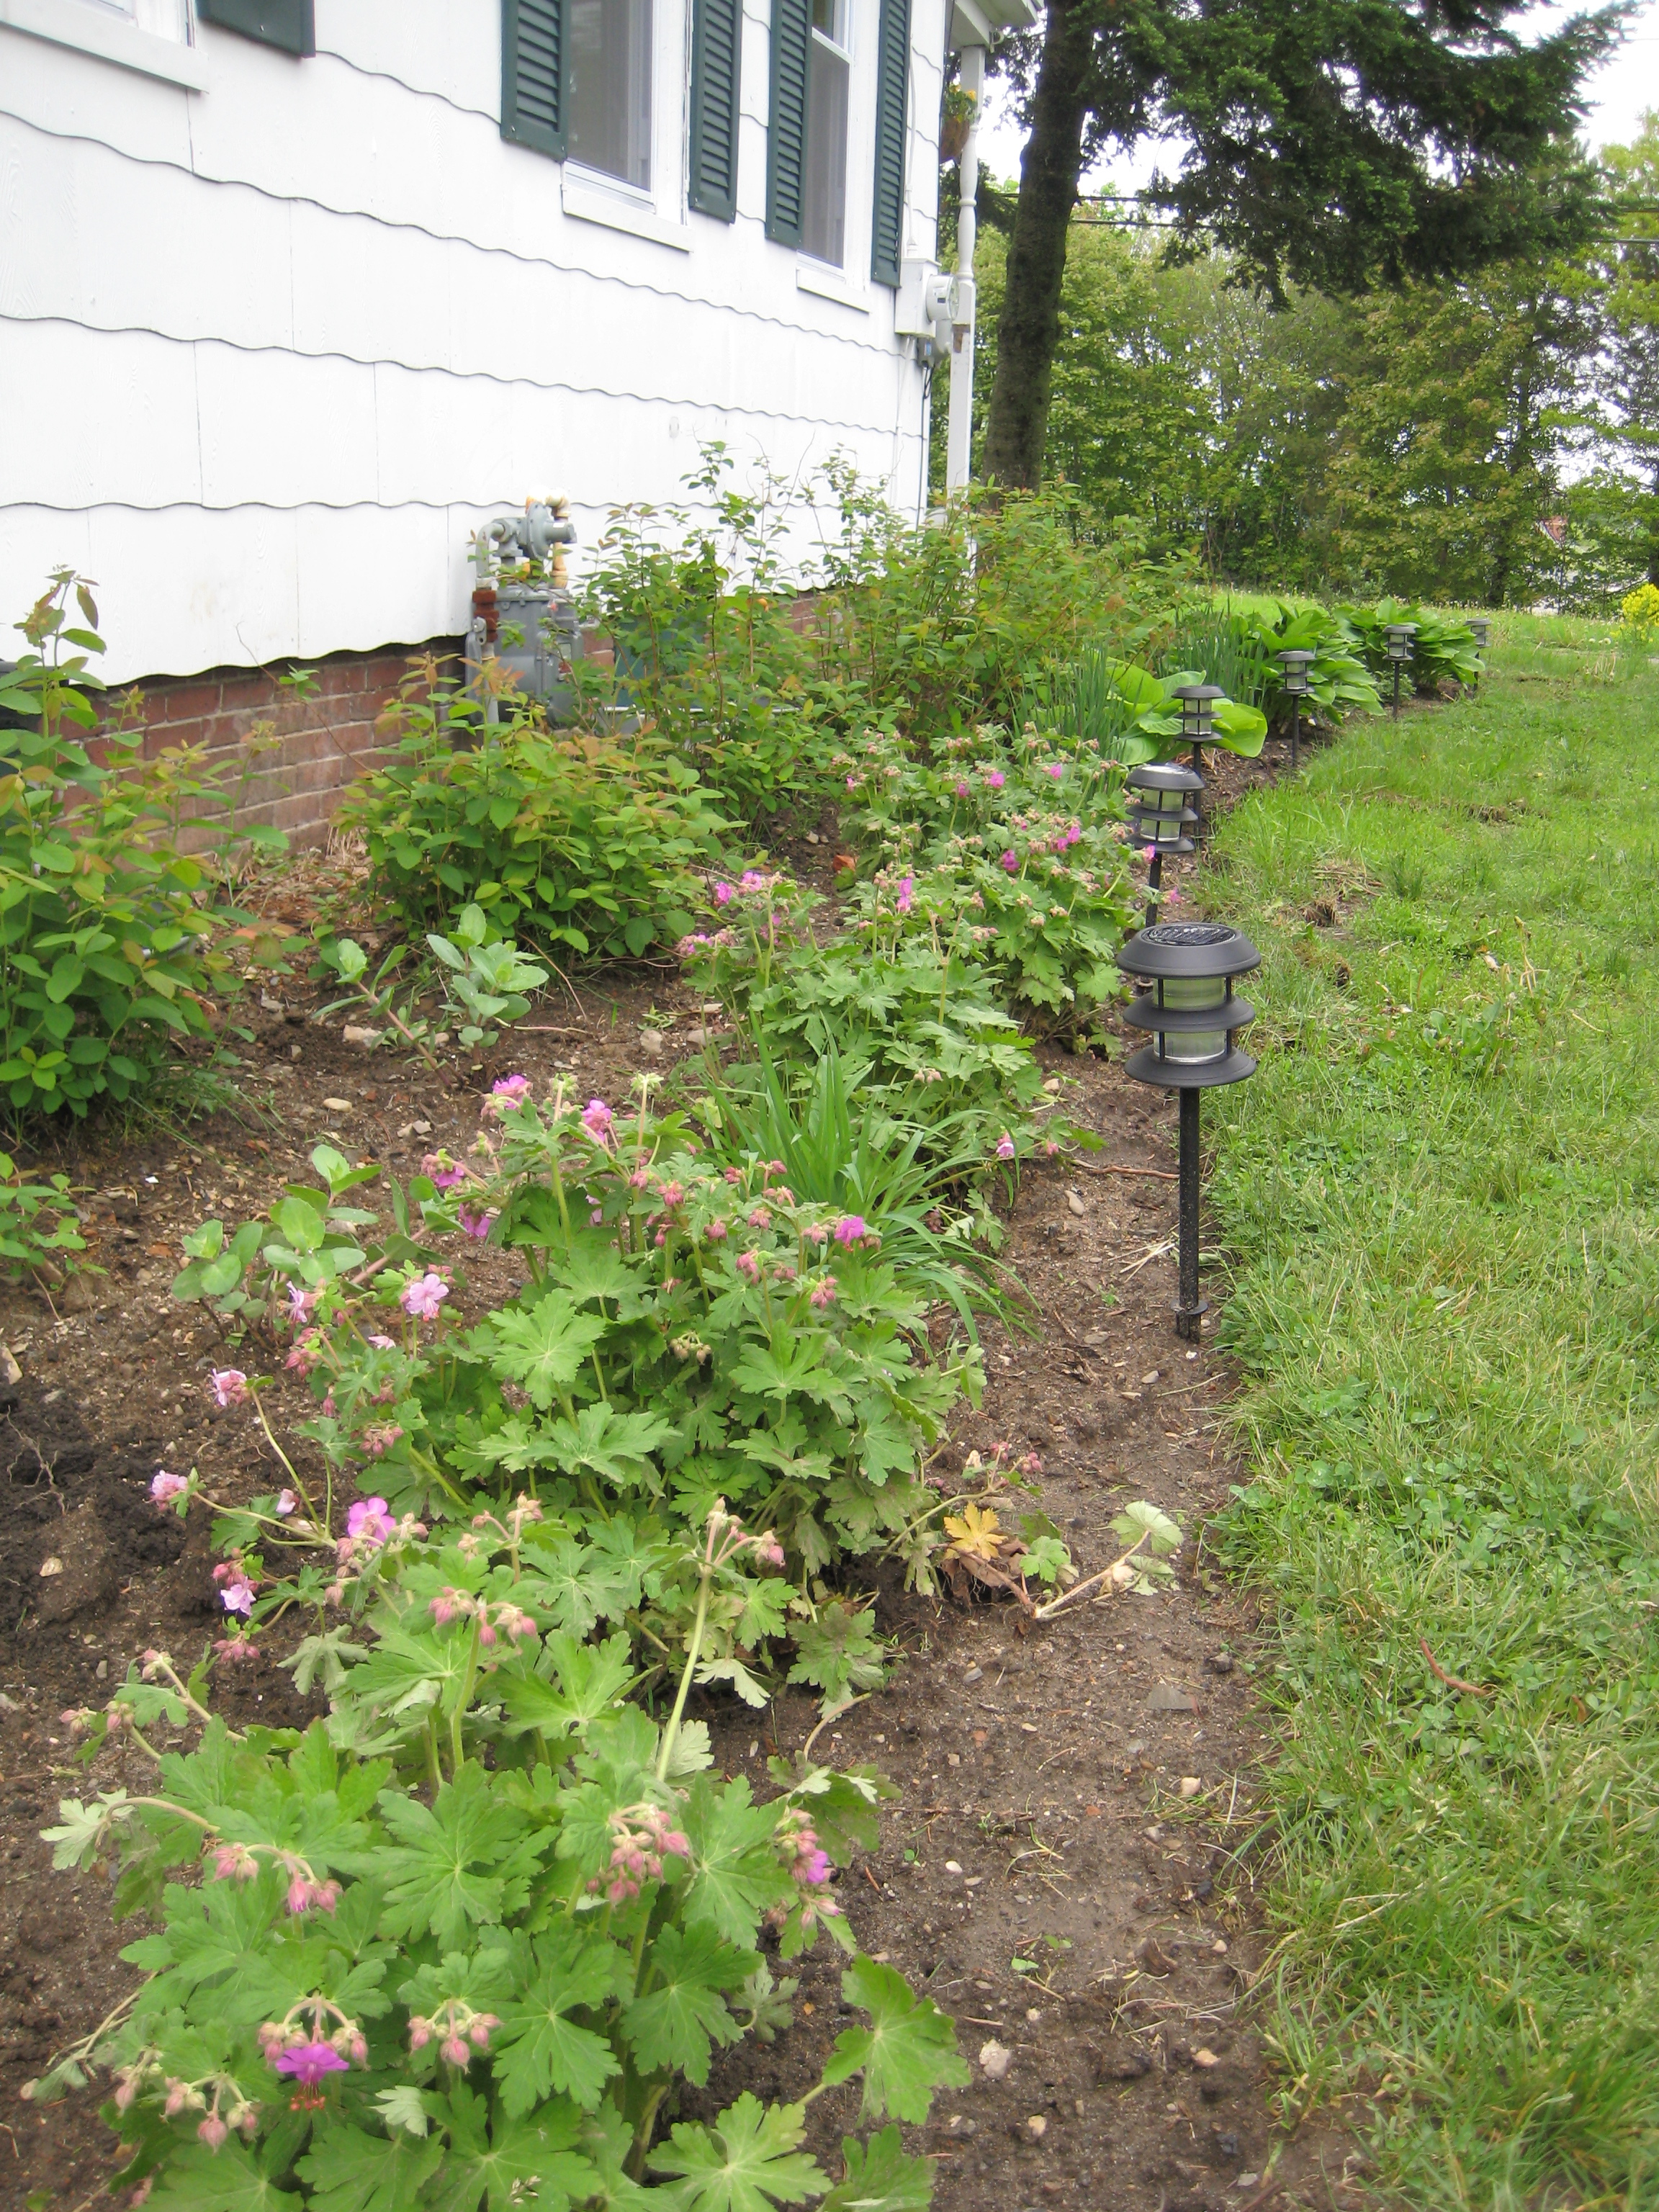
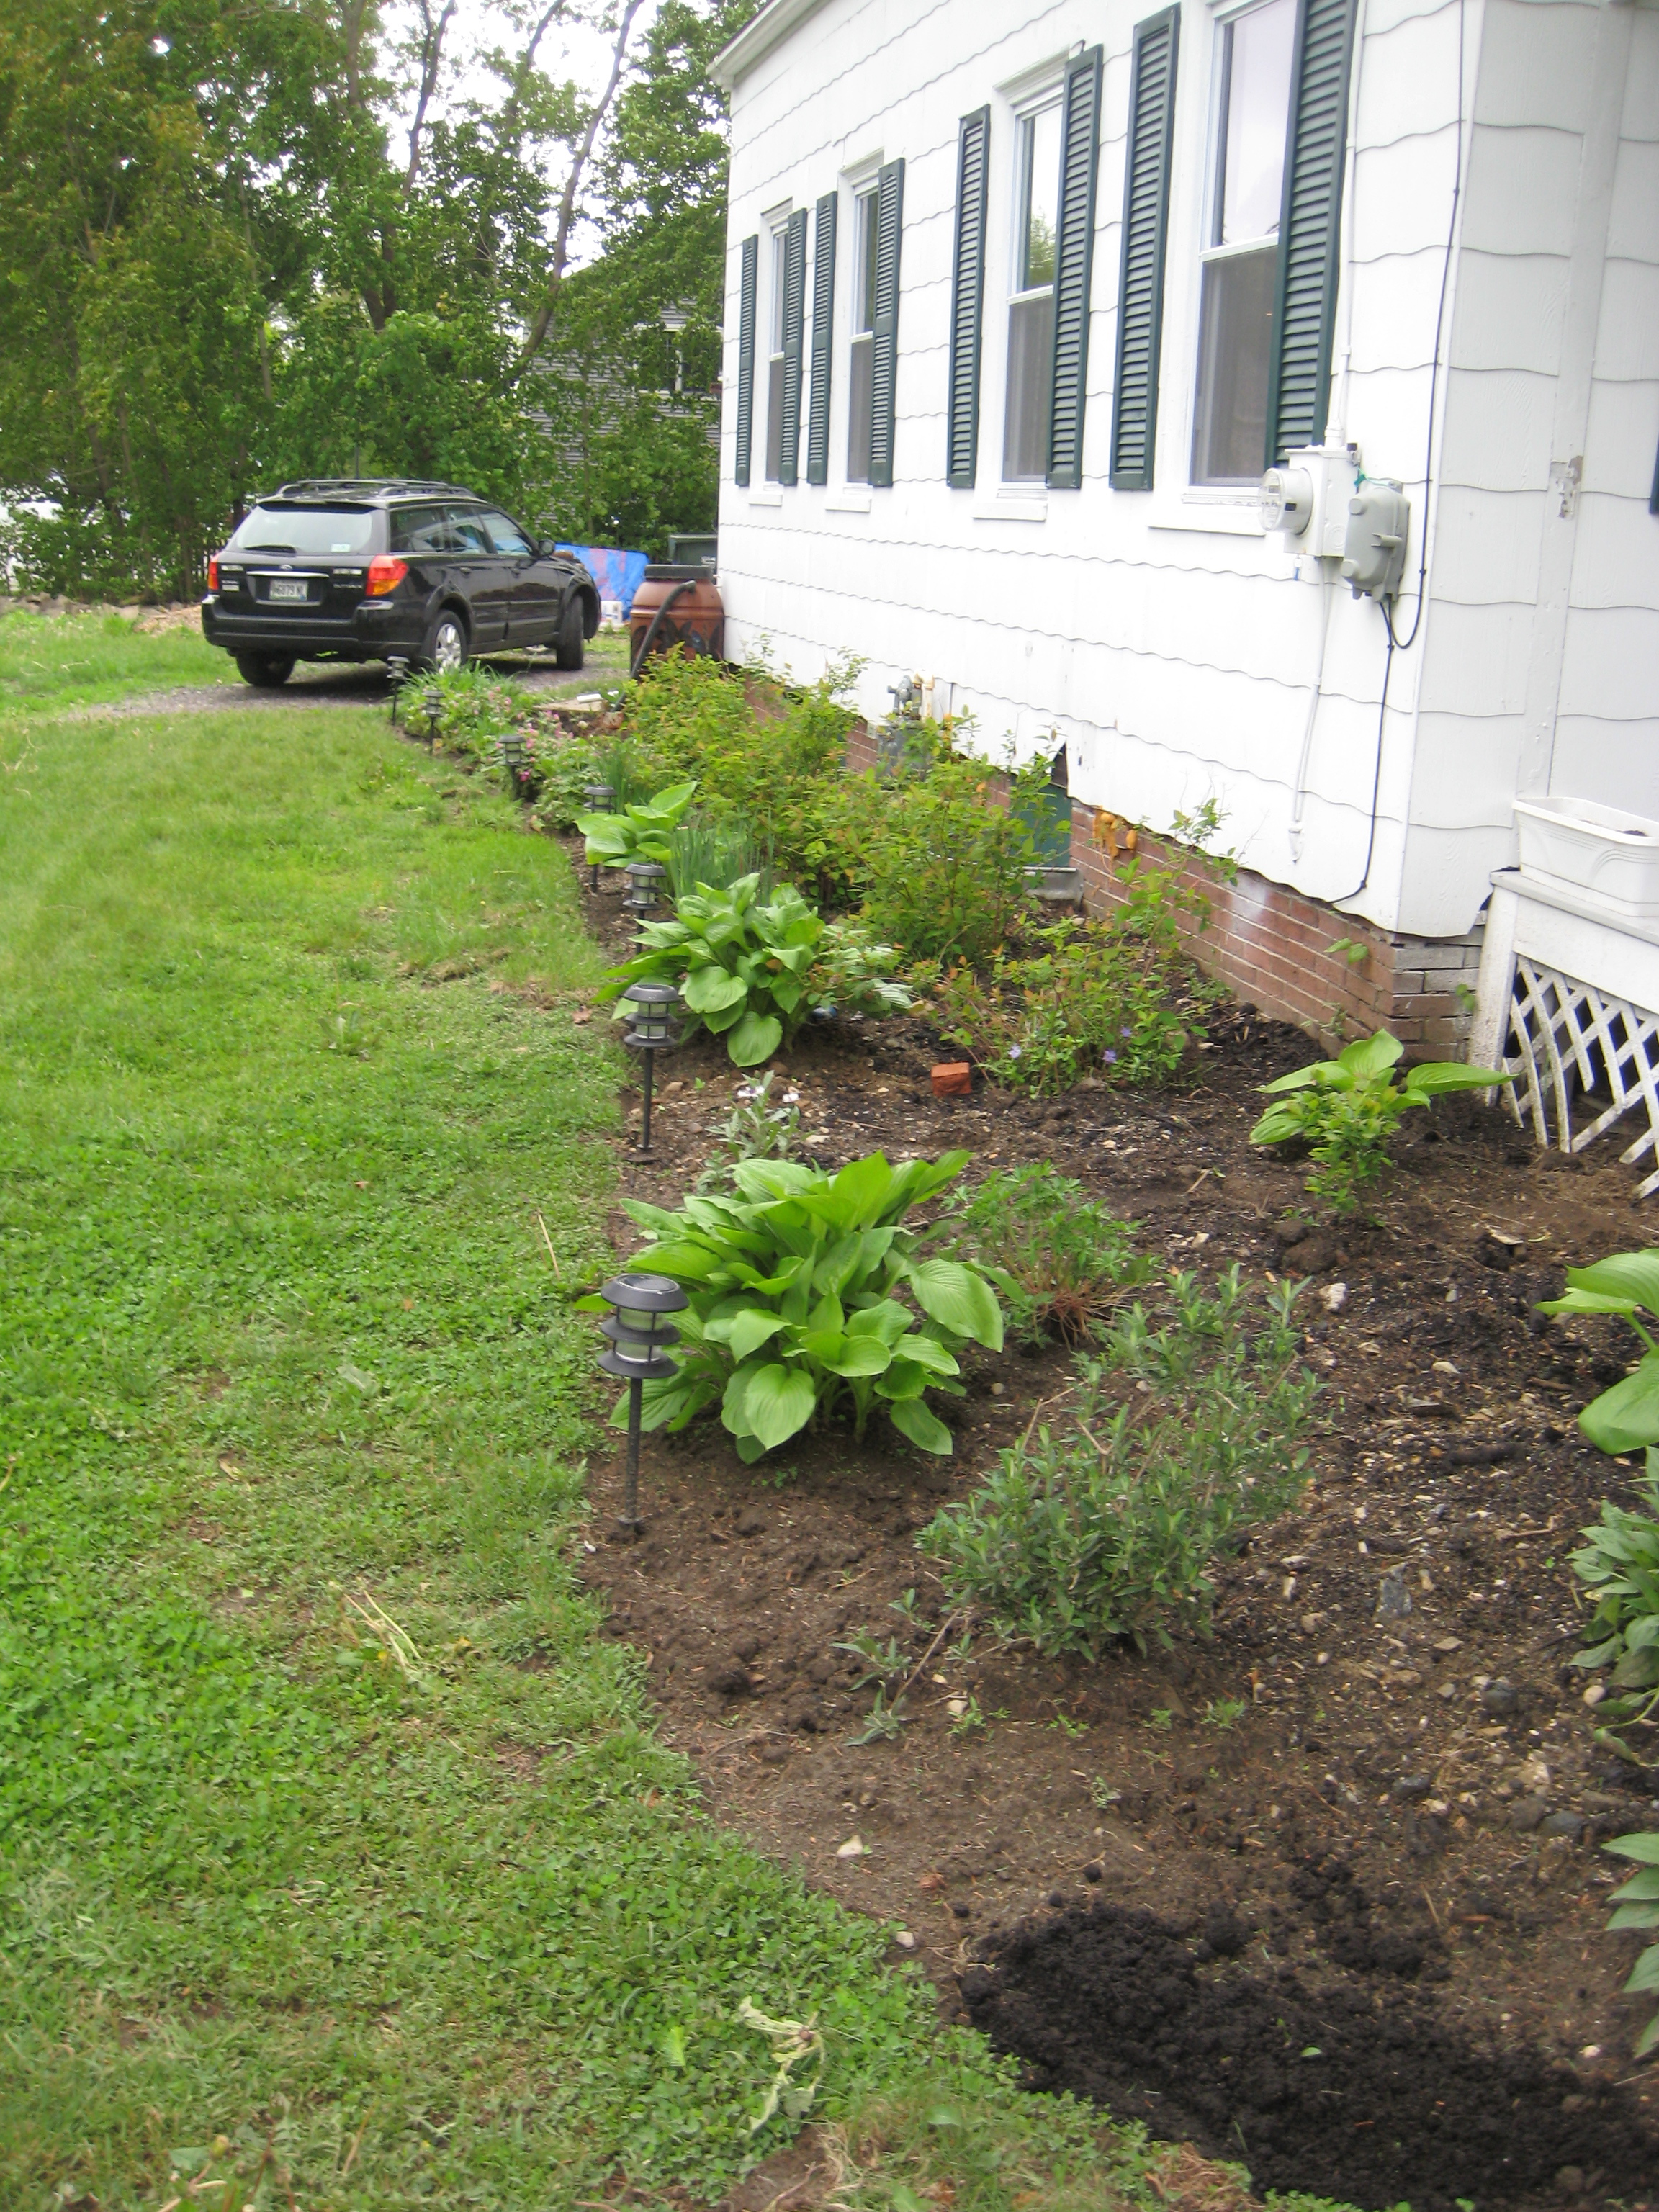
From a thicket of lilacs, dogwoods, spirea, and one still-unidentified shrub – truly the ugliest hedge anyone had seen, and no one could solve – I partially removed shrubs along a 20-foot section. Transplanted to our house this became the backdrop for our entire foundation beds, plus a privacy hedge along the street where our chicken coop will go.
Our plantings are scrawny, laughable like the Charlie Brown Christmas Tree, but with a quick pruning, generous serving of compost and space to grow they have leafed out and are ready to flower. We have good soil.

Bayberry, which is salt tolerant, expands by sending out runners to start new plants. While cleaning up the estate beds I harvested a handful of small – one gallon – shoots. Planted here along the street, and given time, they will form a dense fragrant semi-evergreen hedge protecting the shade garden at our front porch.
It will take some time.
If the estate gave us a solid start, bio-mass abundance came from our neighbor Gina. We were renters last summer, and prohibited, by our landlord, from gardening at that house. So when I had leftovers from the big house I passed them to Gina.
The return has been extraordinary; I delivered last summer a few one-gallon pots and this week hauled home car loads of 15 gallon pots: Rudbeckia, Monardia, Shasta Daisies, Pulmonaria, Lilies – common orange and Stella D’ora yellow, Astilbe, Iris, Lupine, Geraniums, Sedum. She has more to offer. I need time to make more beds.
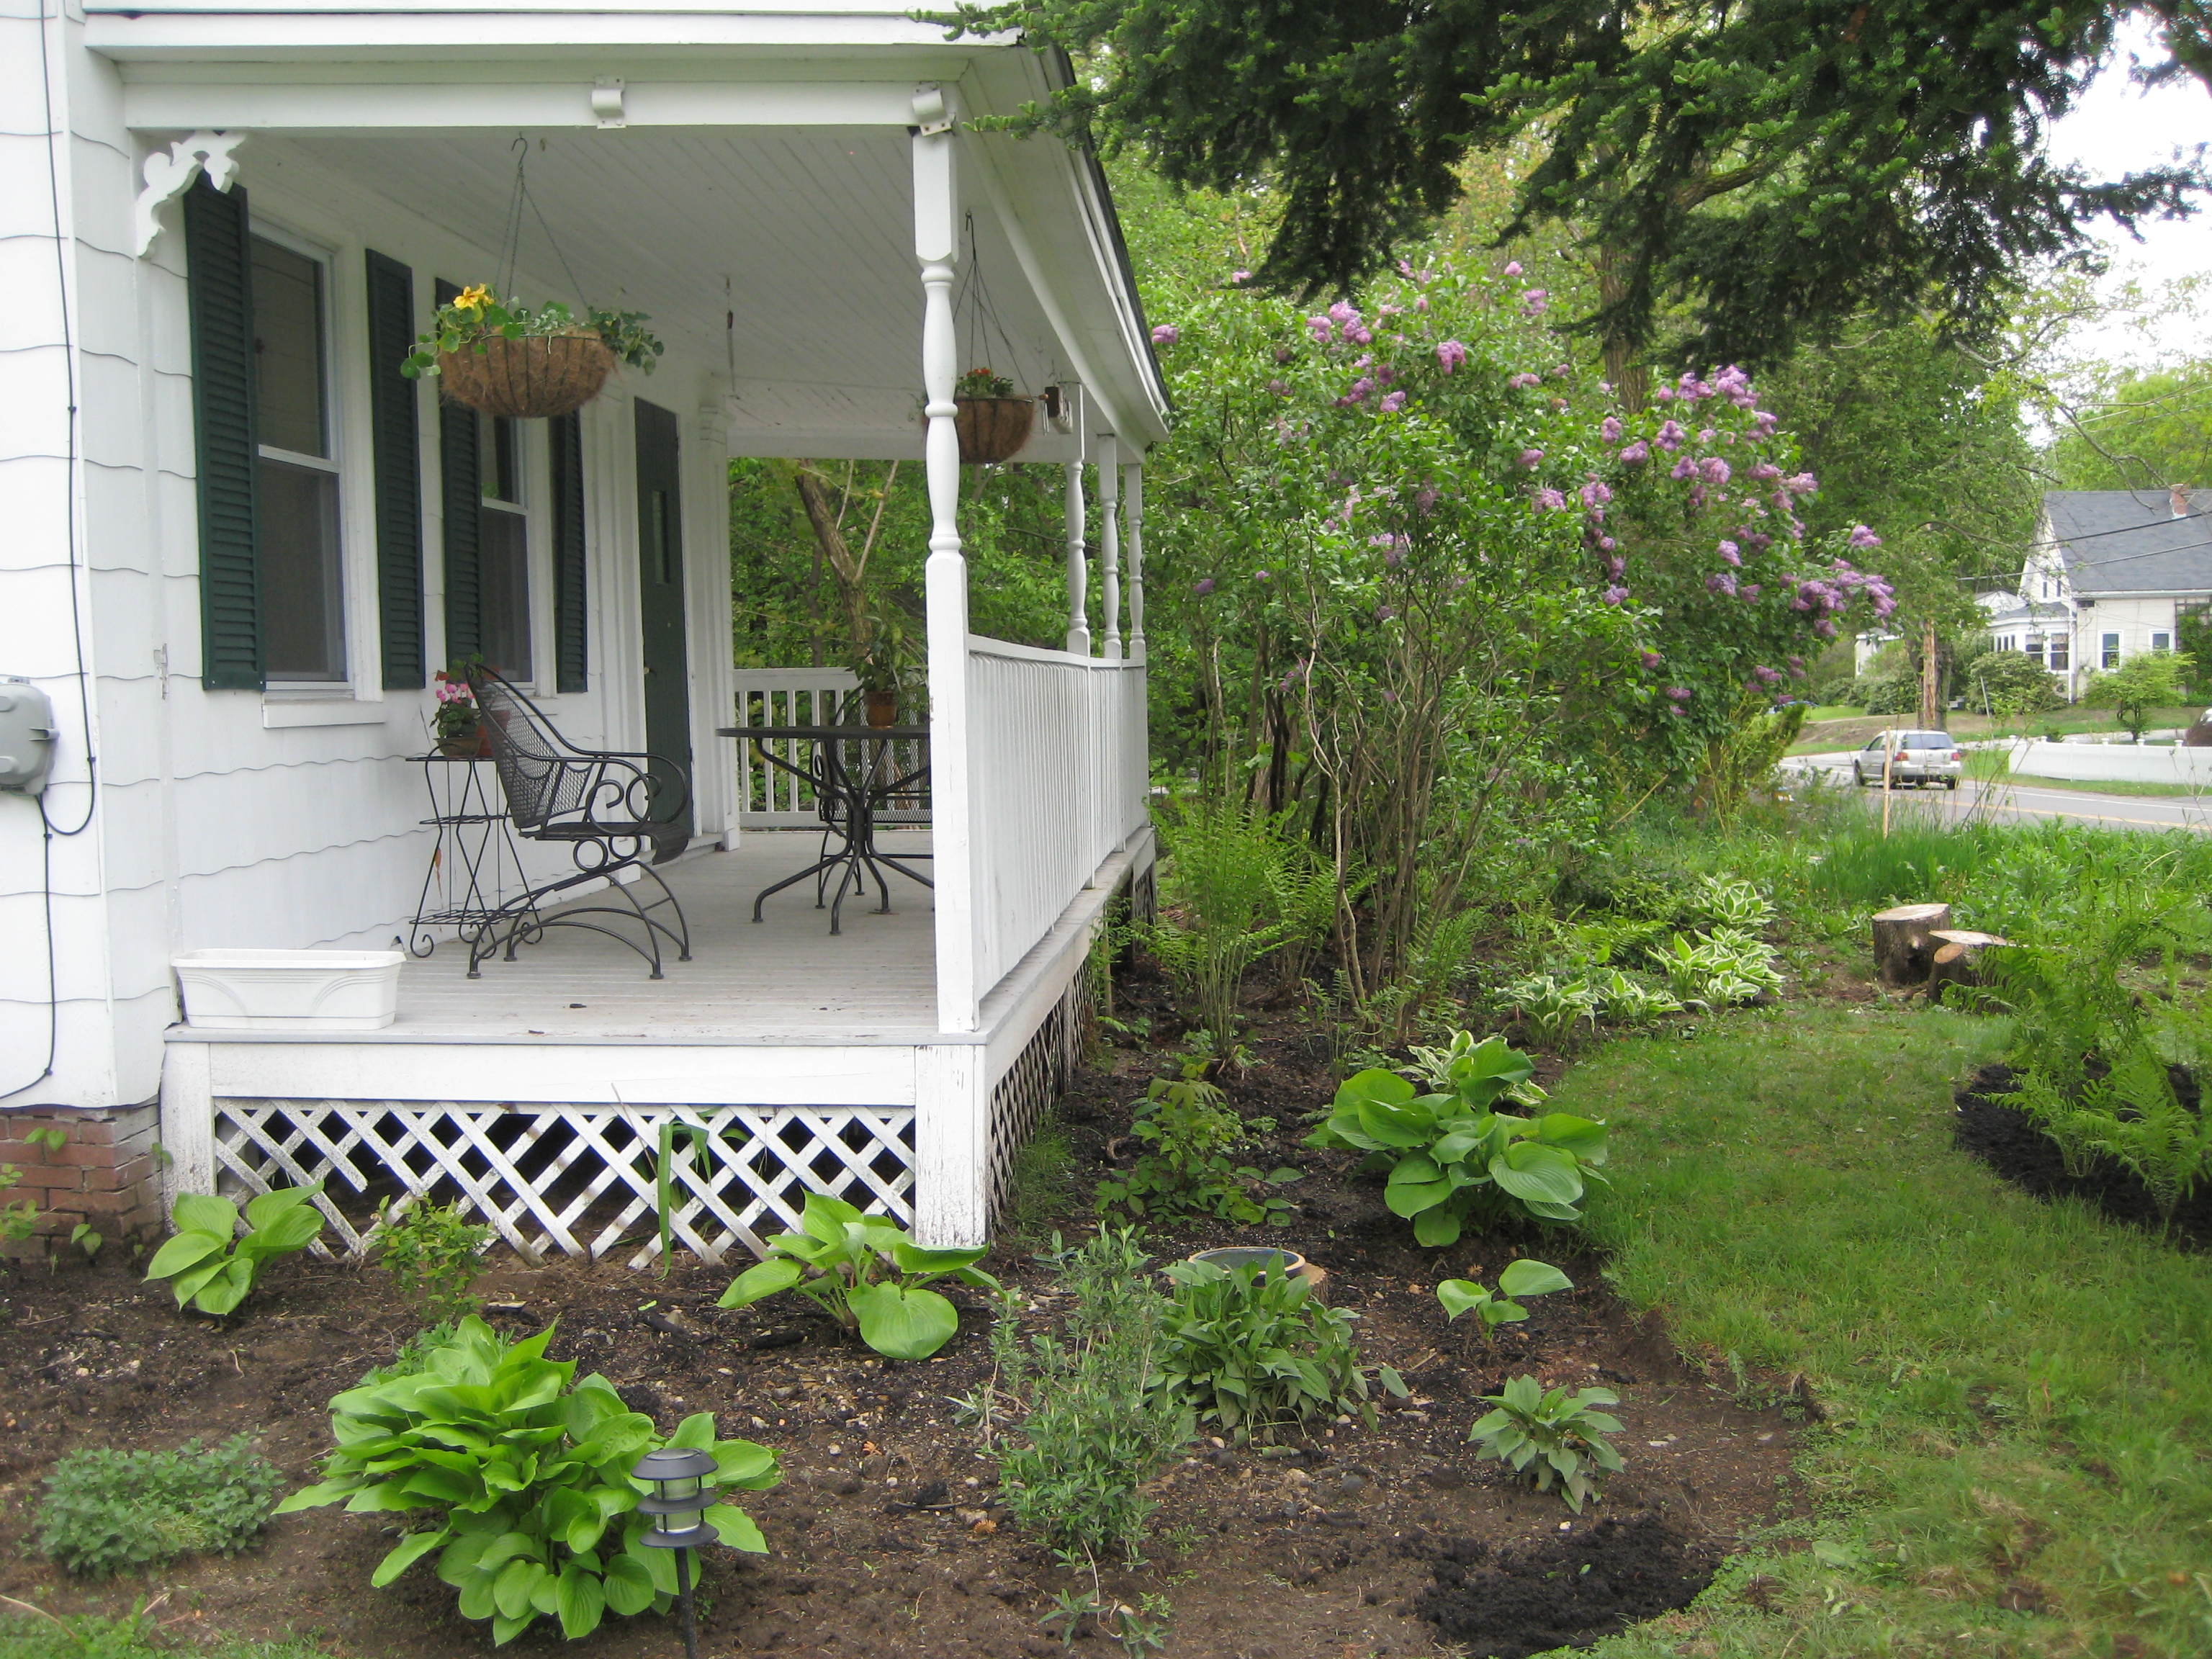
“Welcome to the neighborhood,” indeed! Pete, across the street, dropped off two highbush blueberry plants. Other friends delivered eleven blackberry canes. An orchardist gave us some grape stock, cuttings from the big house that he potted up a few years back. The roots are as long as the shoots so these are ready to grow.
We also purchased from him a Red Haven Peach tree. For the bees and butterflies I also planted Nepeta, Goatsbeard (Aruncus dioicus), and Buddleia davidii (Butterfly Bush).

The pace of arrival began to cause a backlog on planting. I found a solution to that problem.
Somewhere in search of “free & found,” most likely in either our untamed back yard, or the woods where I went to gather ferns, I brushed up against a poisonous plant. My skin is highly sensitive to the oils in poison ivy, and I have learned to be patient as it runs its course. But this season the rash took hold and spread like wildfire; think poison ivy on steroids.
In fact, my doctor said it was not poison ivy but did prescribe steroids as rexall. His diagnosis was “Type 4 hyper sensitivity reaction; immune system is on overdrive; caused by some plant material or pollen. Could be in roots or soil. Most likely from a wild uncultivated place.” Ah, toxins that protect plants, and aim to keep us away.
The steroids have worked wonders and my energy level is absurd. After a ten-hour workday at the big house, I was outside in our garden at 11pm. In a gentle rain, with spring peepers chanting in the distance, I planted, dare I say, more ferns. This time from the big house, not the woods. And this time fueled with performance enhancing steroids.

We have no budget for assistance so this has been solo work. Perennials and shrubs that arrive measured in gallon pot size are no problem. Trees with balled & burlapped roots are different by an order of magnitude.
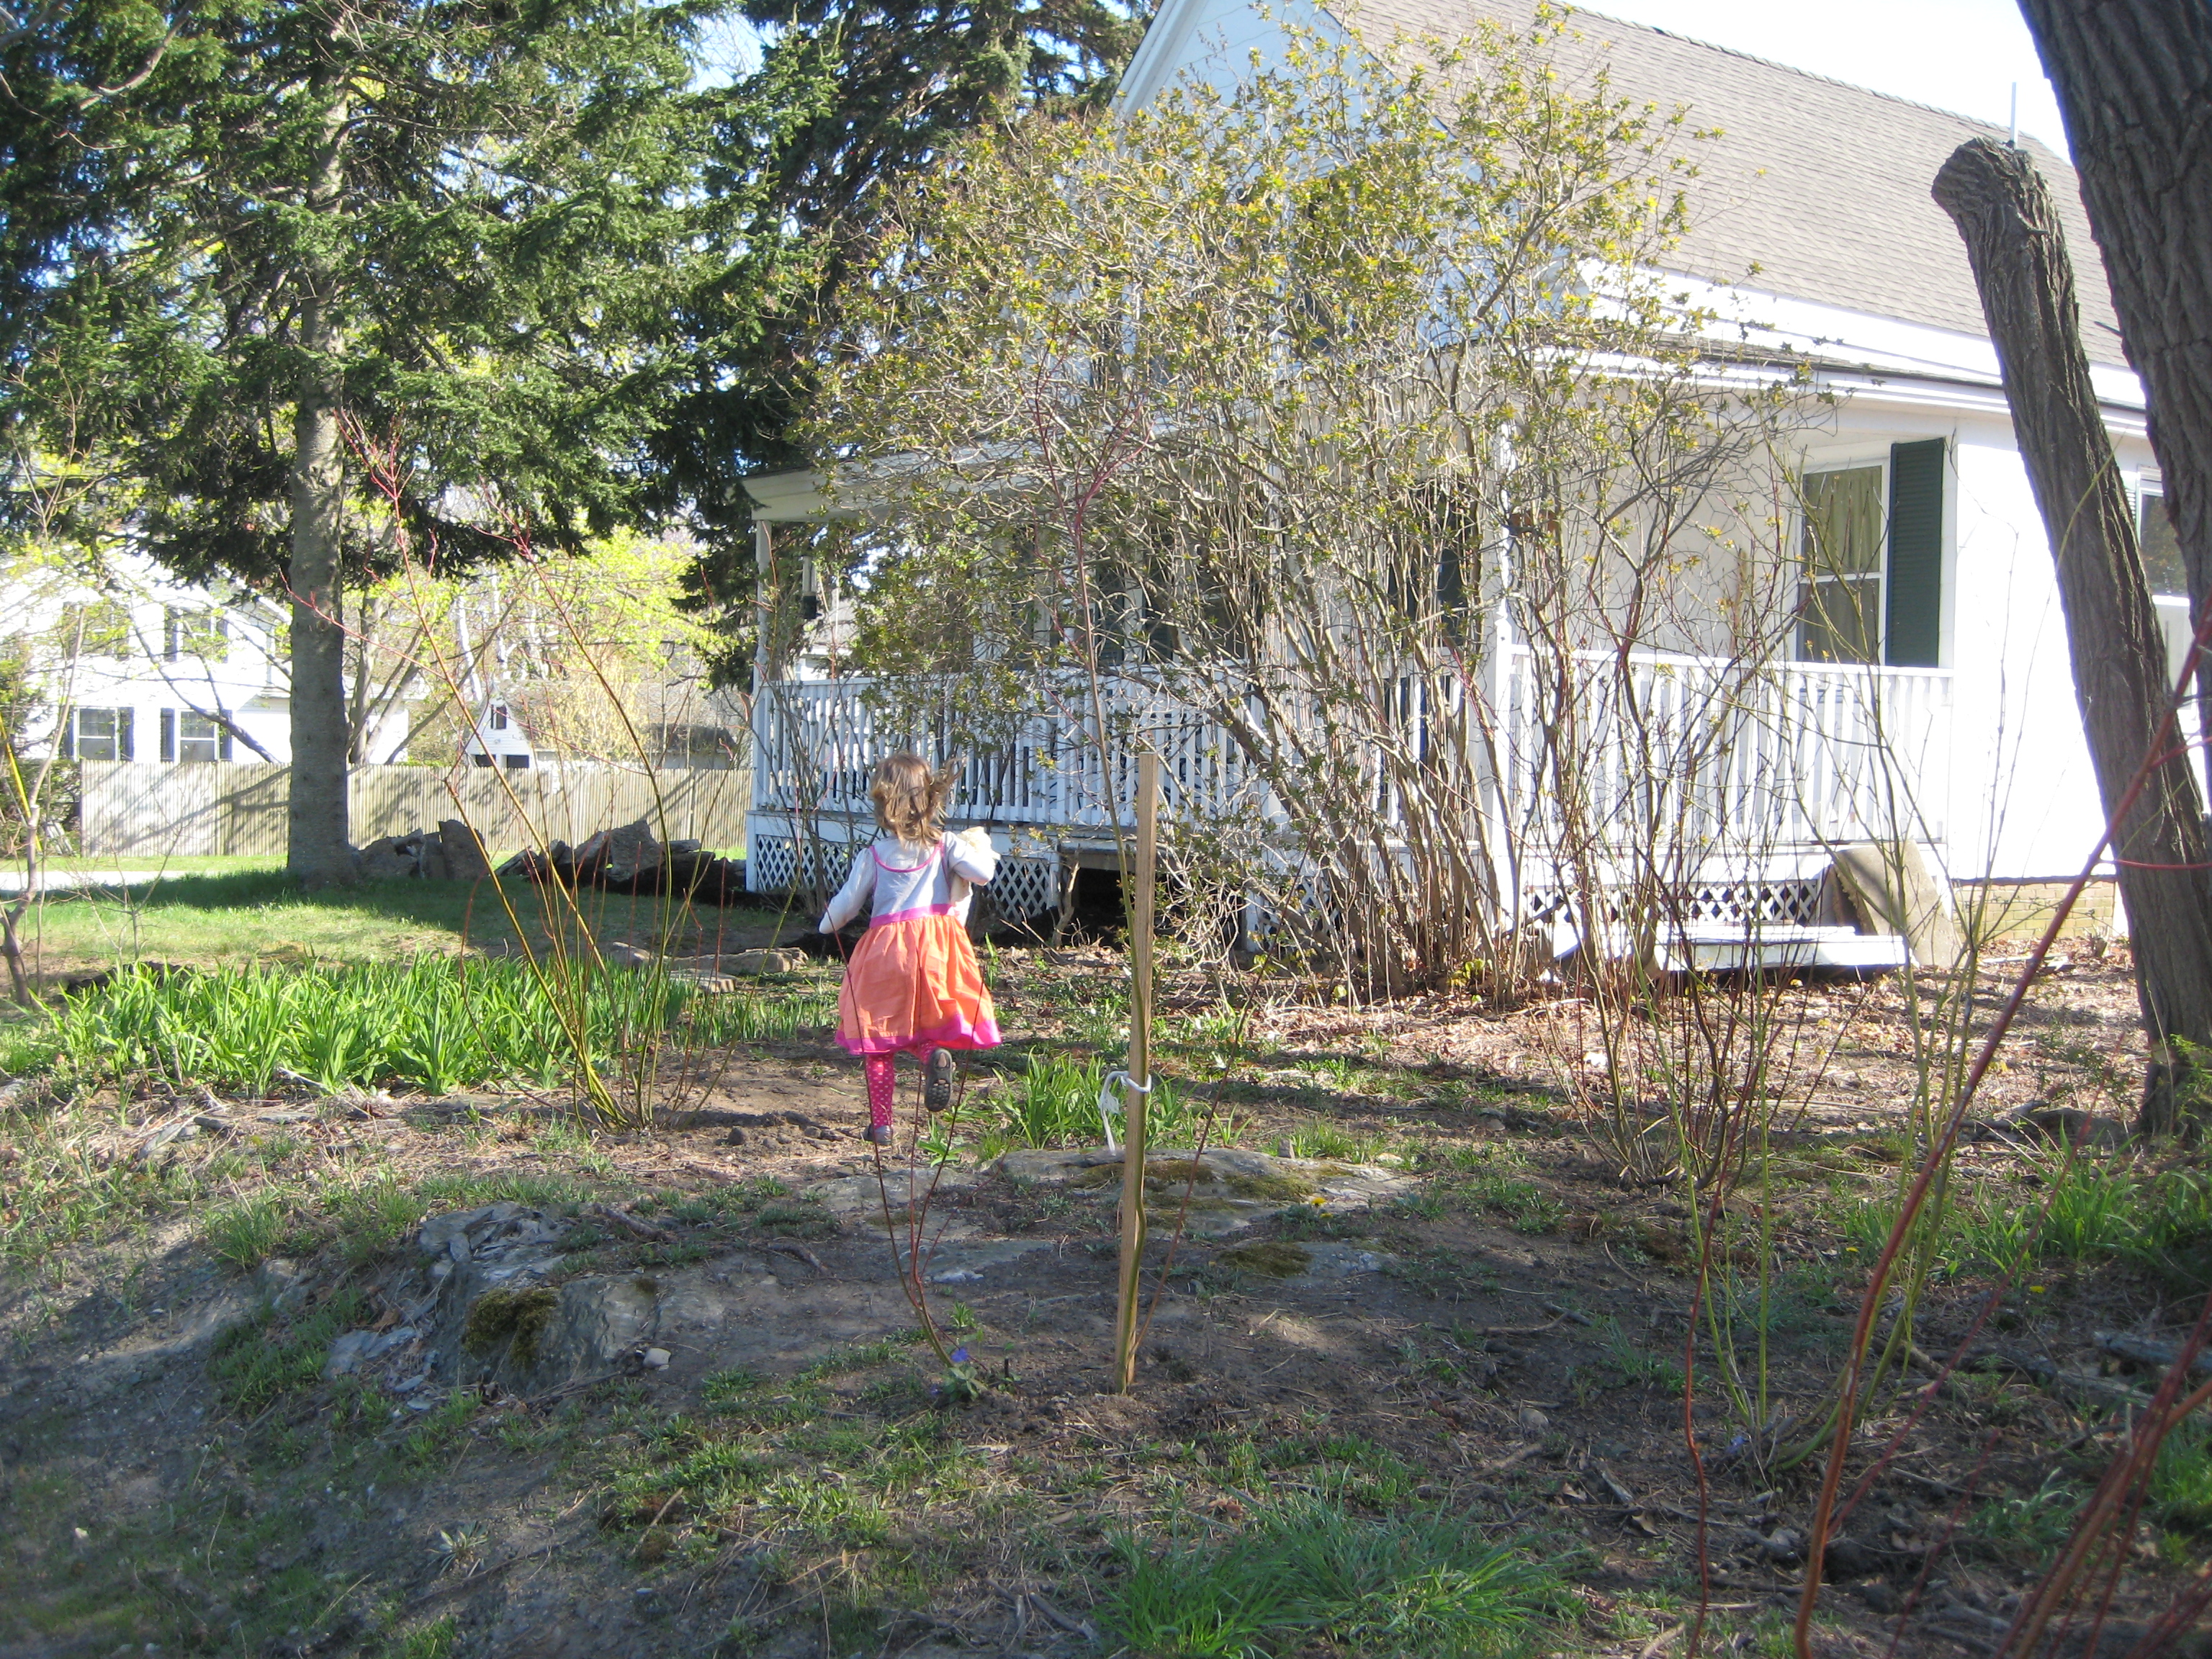
We were given a multi-stem Acer ginnala (Amur maple). The tree was a gift from my Mother. She said that she wanted to give something long lasting, to have an enduring presence on the property. We have named it the “Family Flame” maple.
Well formed, at 7 feet tall by 6 feet wide, it will grow to about 15 feet tall and wide; we gain privacy from the street while the passing cars will enjoy its scarlet flame leaves in autumn.
This gift arrived with an estate sized root ball. In the back of my pick-up truck, it became an immovable object.
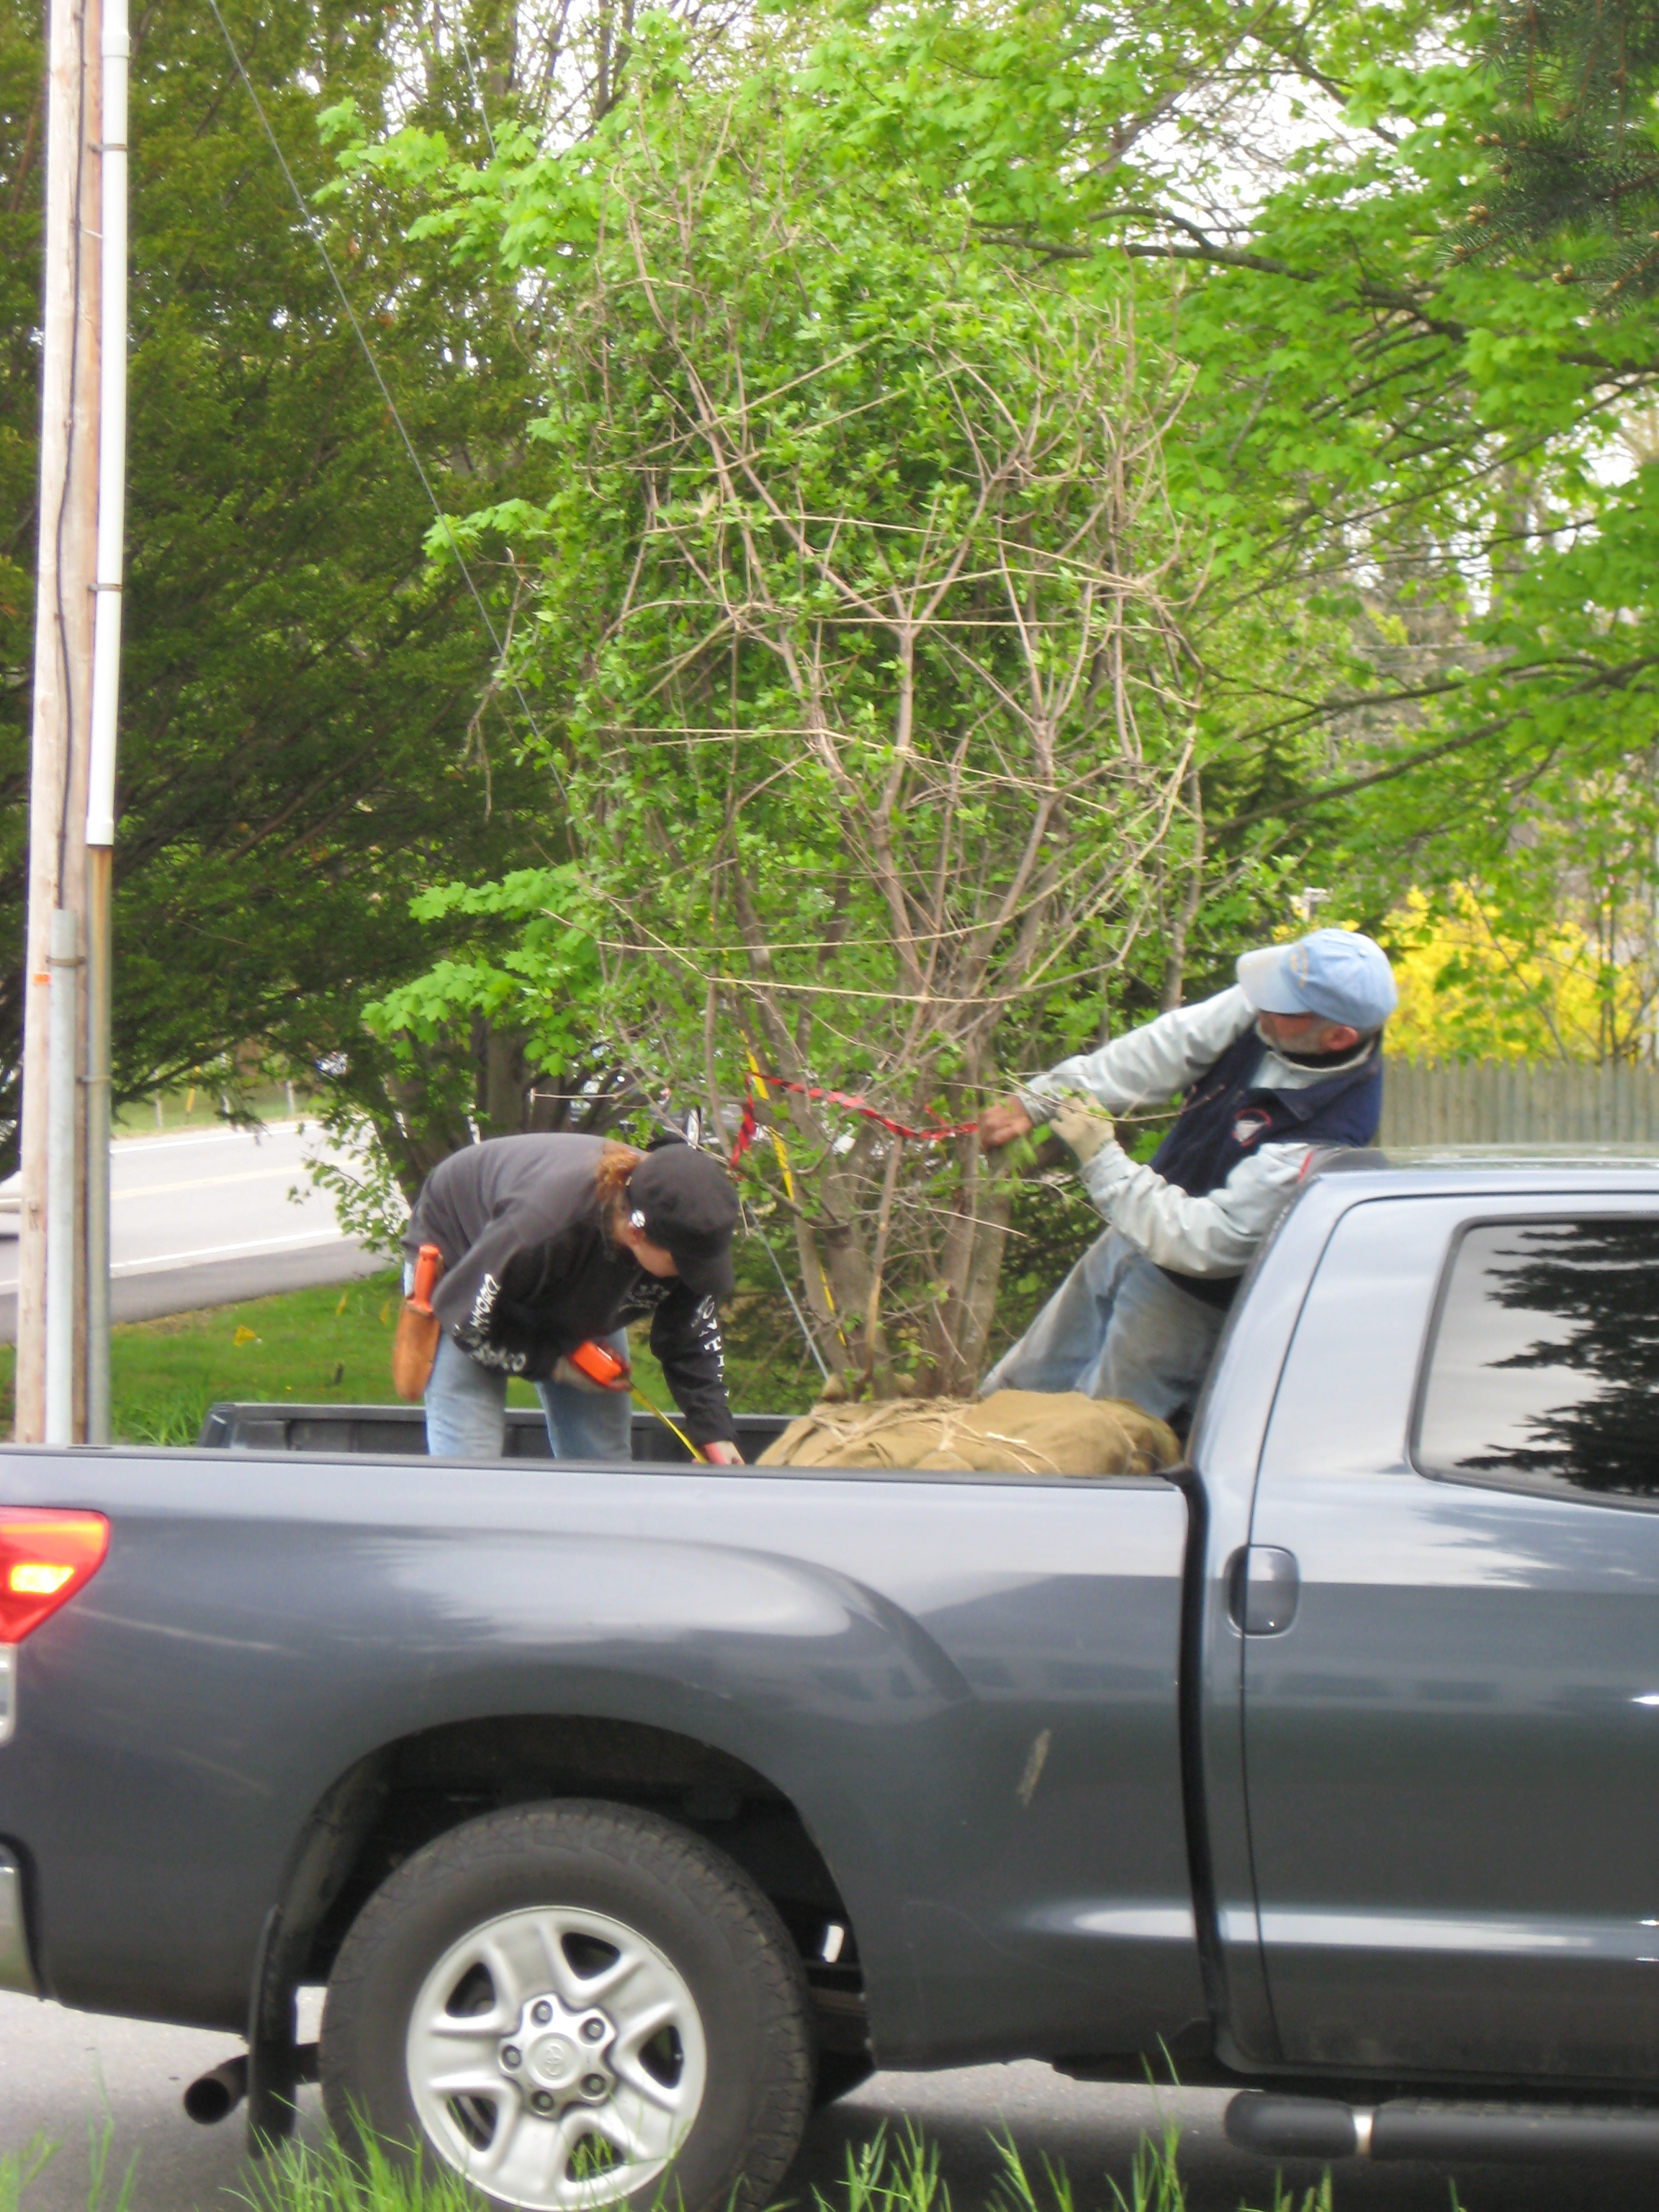
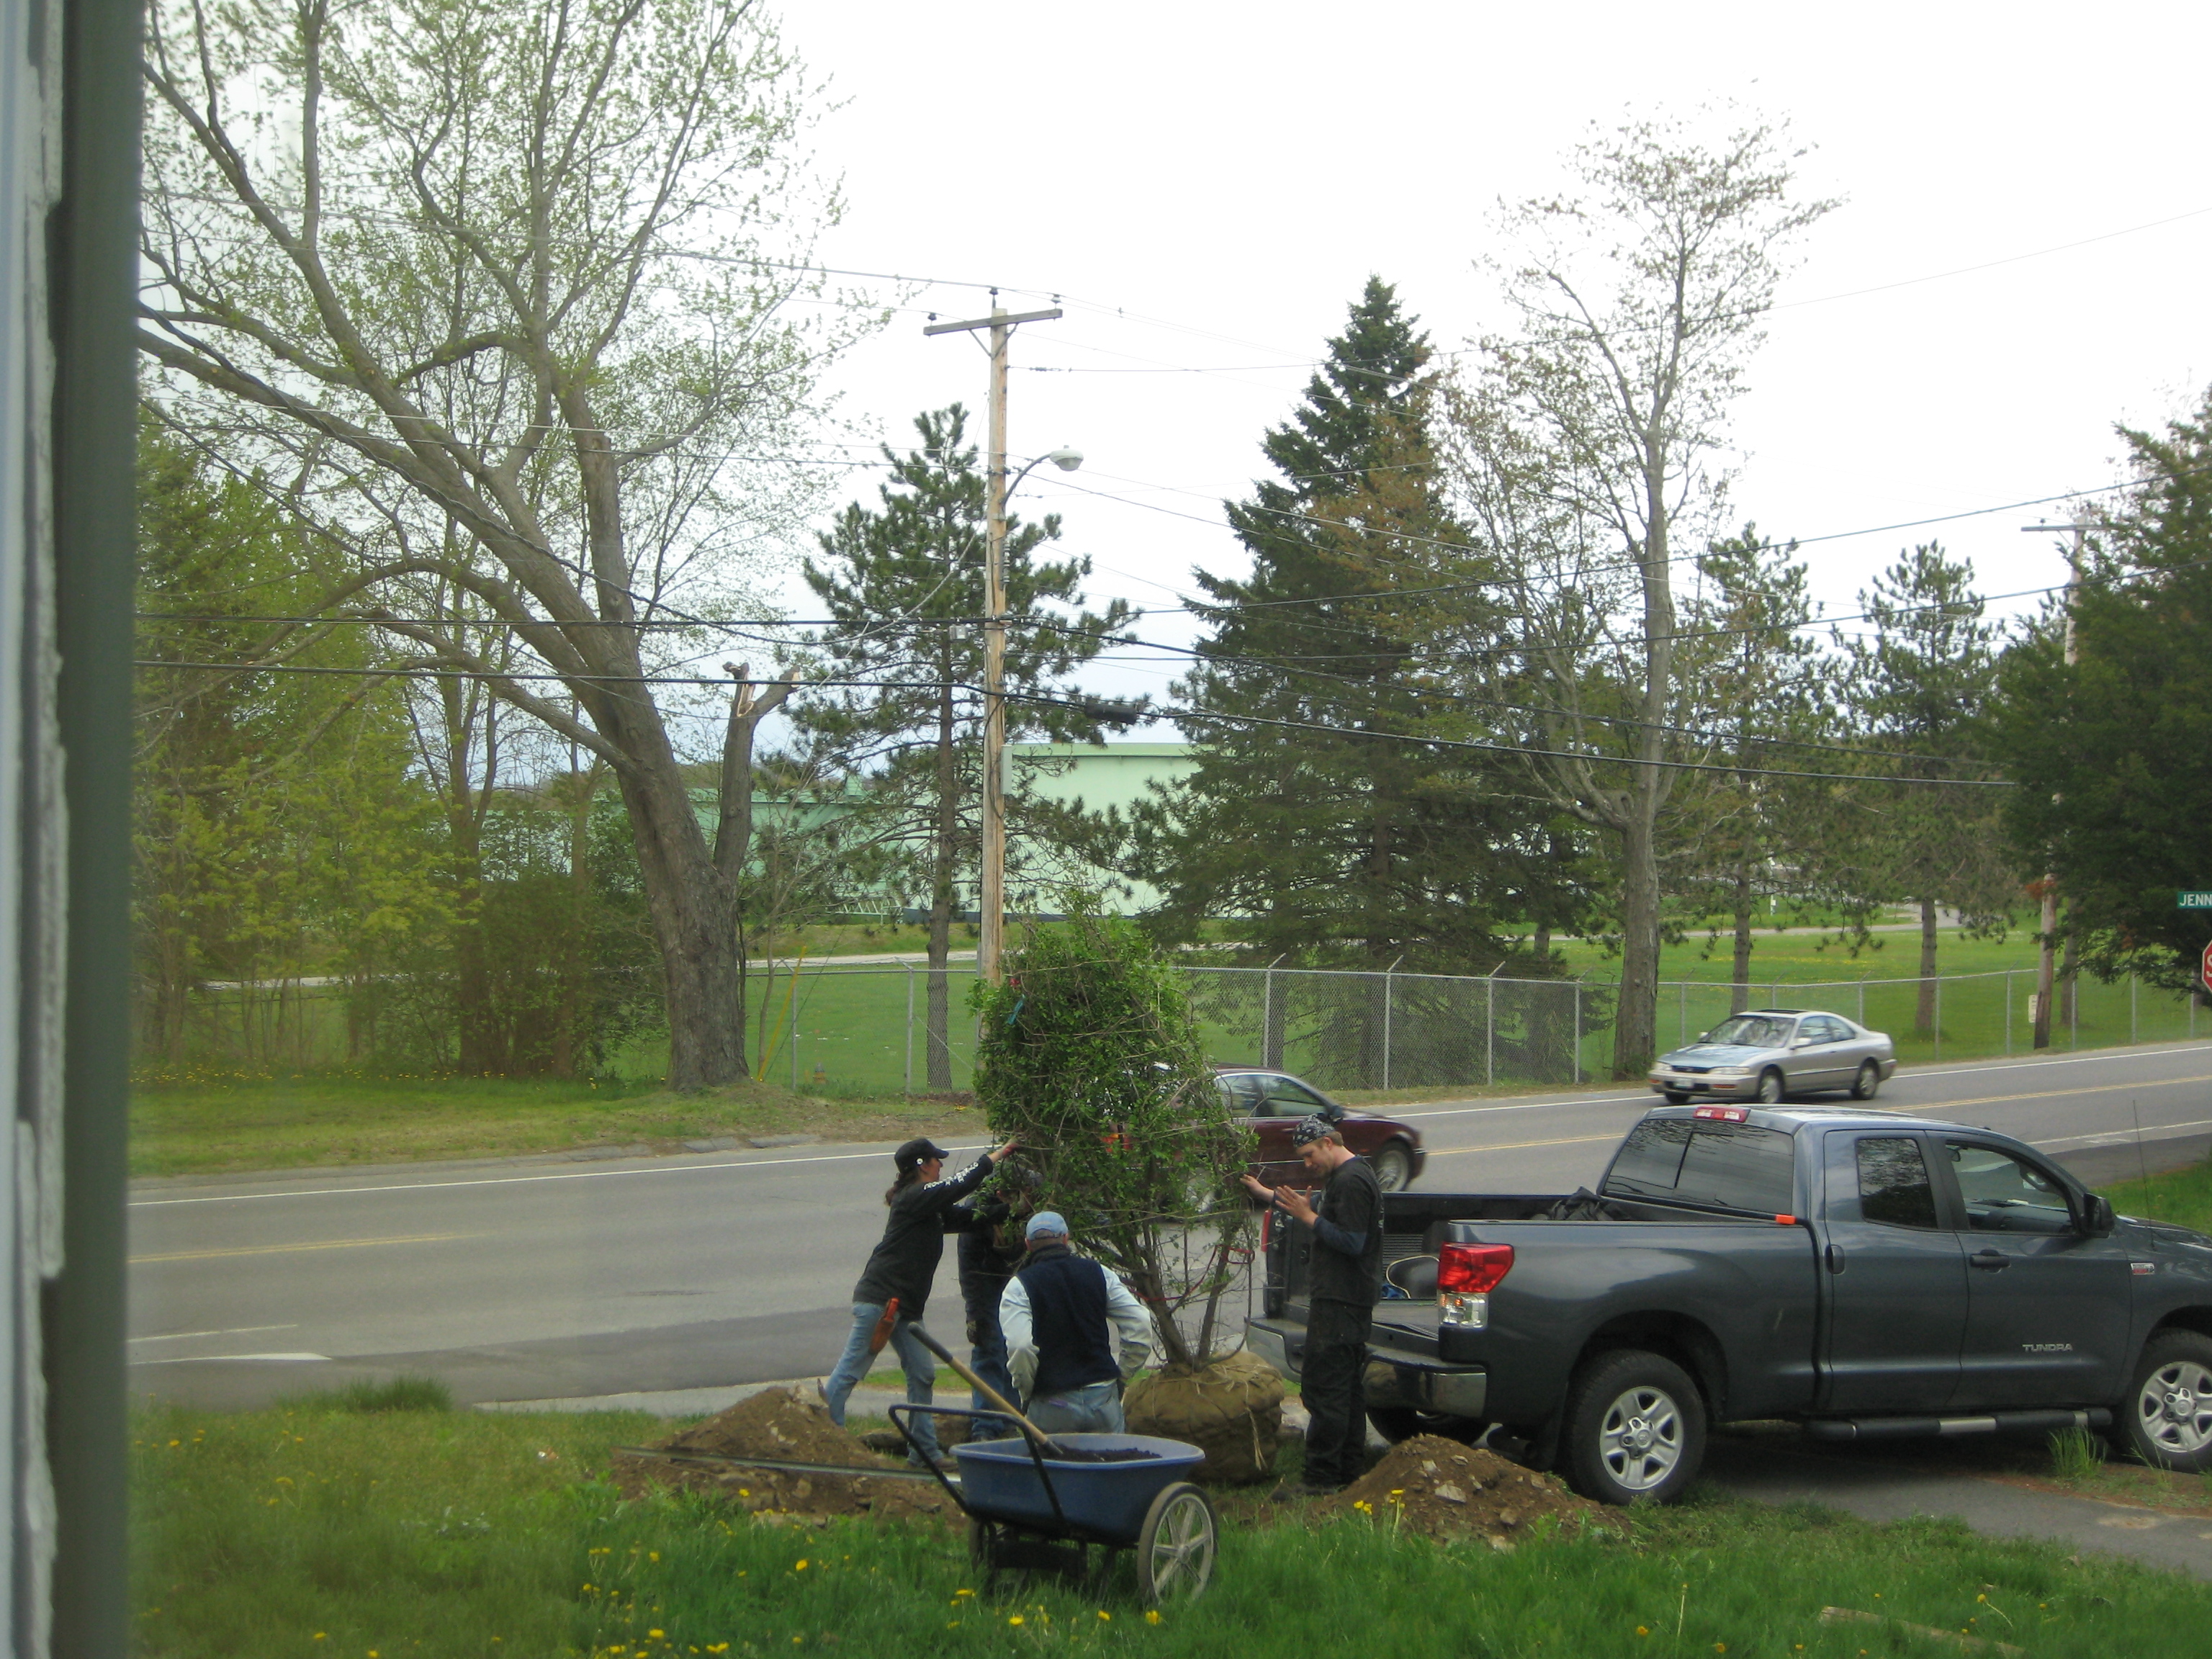
Until a neighbor drove by, shouted an offer of assistance and then recruited some young friends. Within minutes the tree was proudly in place. Our daughter ran around the yard shouting, “We thank you from the bottom of our hearts!” It was comic. And perfect.

And so has gone our first spring at this property and place of our own. Our art farm, transitioning from virtual to actual, has been about setting roots and feeding forward the good karma.
Our daughter, again, said it best, “Our tree is all about joy! Because you planted it.”
Radon remediation
Posted: May 3, 2013 Filed under: Permaculture & Home Renovation 1 CommentRadon had never been an issue, in fact, it was something I knew nothing about. Once we began negotiations for the house, it loomed large.
A radioactive gas, naturally occurring, it is the result of decay of uranium or thorium. There is a correlation to granite bedrock so its presence is fairly common throughout New England but it was nowhere in the midwest of my youth. When we moved here and rented, I was completely unaware of this risk. In two homes we lived but never thought to have any test made. Our daughter E was raised without incident.
But in the process of due diligence the topic came up, and we learned that radon is the second leading cause of lung cancer. Such is the price of knowledge; with Becca pregnant, it became a serious issue.
Our building inspection – in July – included a radon test in which the tenants were required, and agreed, to keep the windows shut for 48 hours. After a few hours, they pushed open the windows and the test became invalid.
To the sellers chagrin, we arranged a second test. After waiting ten days, the results came back at 9.7 picocuries per liter of air. And the seller’s agent gave us four hours to make a final go/no go decision.
I scrambled to gather data. In Europe the actionable level is 8 picocuries per liter of air. In the USA, a level of 4 or above is actionable. Our test was taken in the basement, and the level generally is reduced by half for each higher floor. So just slightly, at the first floor, did we exceed the level but not at all in the bedrooms. Was our problem really serious?
We heard stories of homes testing at more than 1,000 picocuries per liter of air. Our number seemed paltry. We heard stories of those problems successfully remediated. We also heard that a new home was easier to remediate than an old home.
We learned that radon’s deadly impact is not an accumulation, but a statistical event: what are the odds that a single radon atom will lodge in the lungs, then decay and disintegrate into what are known as the radon “daughters” – the solid heavy metal particles of lead, polonium, and bismuth? In a terrain of gruesome forensics, I began to read that “at the 4 pCi/L level, about 600,000 radioactive particles get trapped in the lungs every hour.” In three months we envisioned bringing a new born with virgin lungs across the threshold to grow up in this old house.
Little Books = Big Stories
Posted: March 21, 2013 Filed under: Art & Healing, Child Centered Activities 15 CommentsYears ago I was lucky enough to sit in on some book-making workshops while still living in Chicago. The process was satisfying and the product prompted all sorts of ideas to use with children. Around that same time I became interested in using stamps/stamping to tell a story. Always looking for ways to help children tell their stories and realizing that drawing could be frustrating or intimidating, I thought about cartooning, which led me to the use of stamps and stamping.
Here I combine the media for use with my four year old. She has officially entered the magical world of inventing and reciting stories and wanting us to make up our own. And in good timing, a friend recently gifted us with stamps her children no longer use (thank you Ann!).
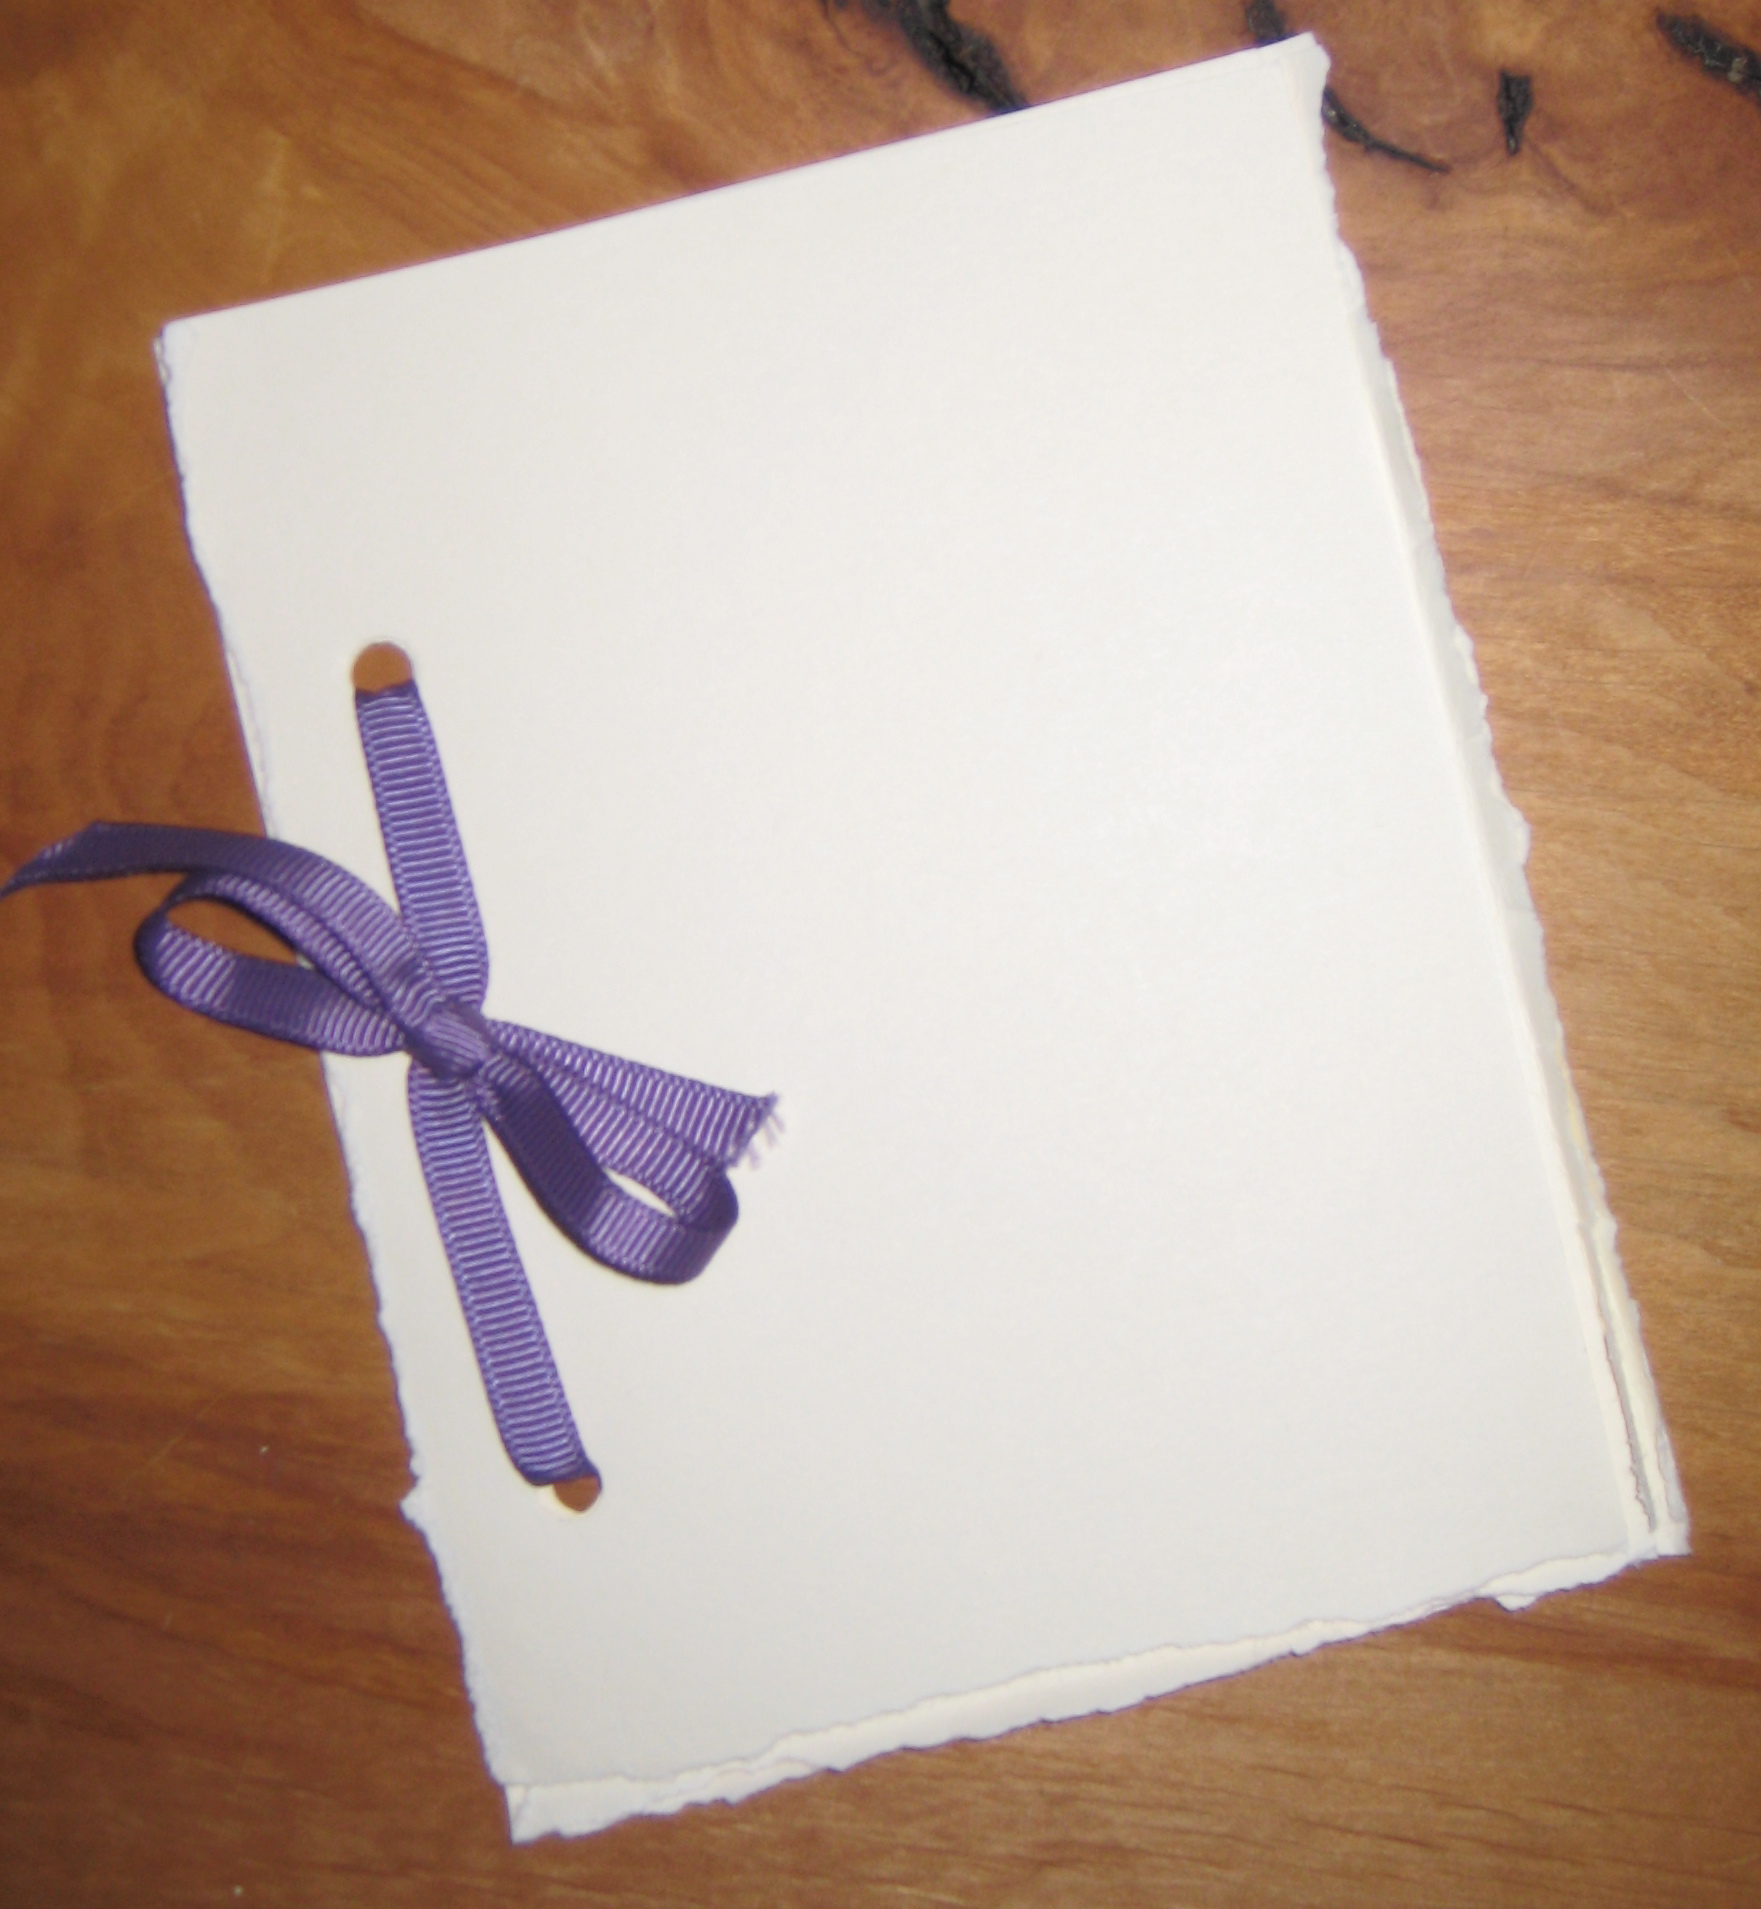
Here is a three point binding:

 Using a piece of ribbon or yarn, come up through the hole on one end and down through the hole on the opposite end. Then come up through the center hole with each end of the yarn. You can tie a bow or knot with the ends of the yarn to finish off the binding. A bead or other small object can be added here for additional decoration.


For an accordion book, simply fold a long, rectangle-shaped paper, in half, then half again and again, until you are satisfied with the number of frames you have. I glued a second folded paper to my first to expand the pages I would have to work in.
 Once we had our books prepared, I made a started sample to show my daughter the concept without giving her the whole story.


My daughter quickly got to work, silent at first then chatting away about what was happening on her pages.
 And here is her finished book…
 “Once upon a time there was a very lonely frog and he wanted a playmate and he stayed in the water all day long. He waited and he waited and he could not miss abong.” (couldn’t get to the bottom of what that last word means!)
“The hummingbird decided she would have the day off with no one.”
 “Night came and the stars came out. The frog was still waiting for a friend. He yelled out to the darkness.”
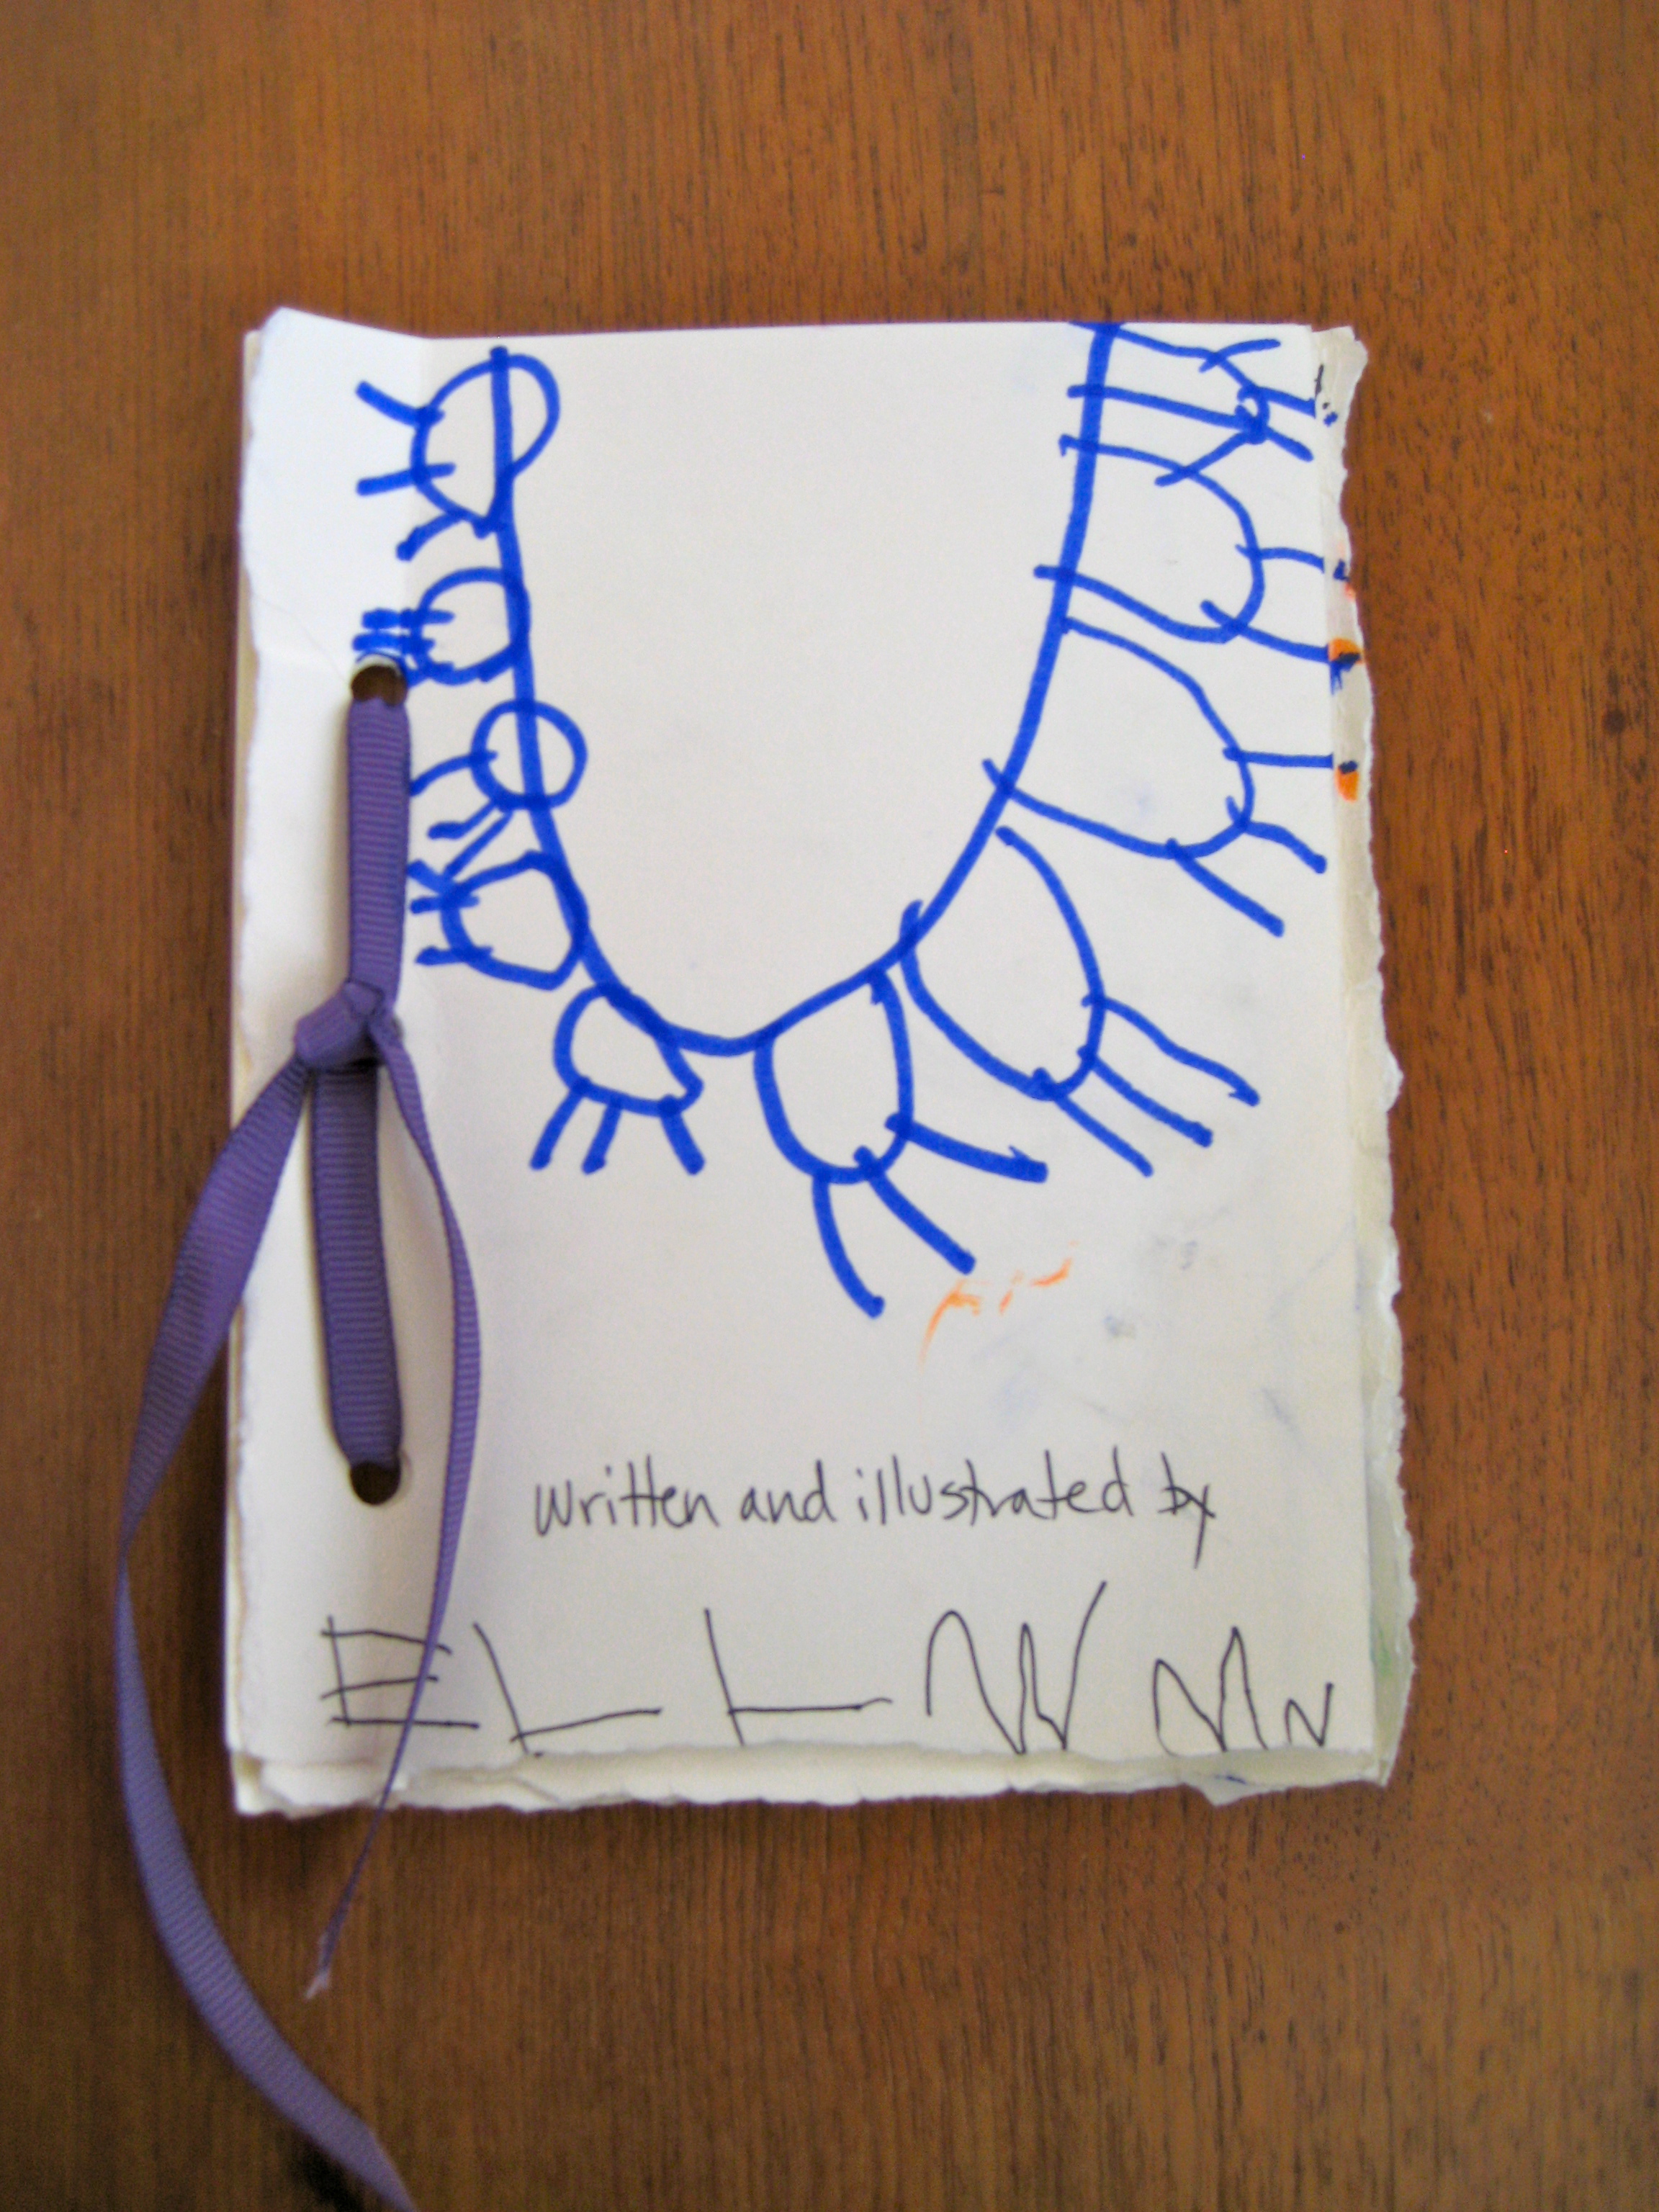
 “In the morning he noticed he had a new playmate and they had a big wedding and they kissed and kissed and had big cakes and pies. They had a BIG party. The End.” – the blue half circle with symbols are the “decorations”
 What would be the next logical thing to do once you’ve finished making your own book? Share it!

THE END!!
Affirming life and love
Posted: February 15, 2013 Filed under: Art & Healing 5 CommentsAs readers of our blog may know, Becca and I were married standing beneath the Tree of Life, a Live Oak Tree in Audubon Park, NOLA. Our blog about that tree receives the most hits among all of our writings.
As a symbol of life and love, great is the power of those trees. Dr. William Waring has drawn upon that power in a deeply moving testimony to his love for his deceased wife. We are posting this story, written by Claire Galofaro, as published on 14 February in The Times-Picayune.
‘Kissing trees’ at Audubon Park pay tribute to 60-year love affair

He started out just planting a tree, a tribute to a beloved wife buried too soon. He sat beneath it and read to the tree, like he had for his wife in their 60 years together.
He tied ribbons around its trunk, and installed a plaque at its roots: “In memory of Nell-Pape Waring,” it read. “Beloved wife, mother, physician and friend.”
But 89-year-old Dr. William Waring still thought his memorial in Audubon Park inadequate to honor the woman he loved so madly.
“Look at her. How did I ever get this girl?” he asks now, genuinely astonished, while admiring their 60-year-old wedding photo. “Wasn’t I a lucky duck?”
What was wrong with the oak tree, her husband figured, was that it stood there alone in the park, where they had spent so many hours together.
Waring decided to plant a second tree close enough to the first that, in time, their branches could grow together. So they might be a pair once more.
“They’ll be known as the kissing oaks,” said Dianne Weber, director of horticulture for the Audubon Institute. “He lost his life-long love and he came up with this. It brings a smile to your face. That’s love.”
His wife was funny — she liked dirty jokes just as much as great literature, he said. She was bold and strong, a doctor before the medical profession welcomed women.
They lived near the park and walked there, read there, together for decades.
When she died in October, he donated the first live oak in her honor and had it planted near the Magazine Street entrance, where a 90-year-old water oak had been lost to termites.
Months later, when he began to worry that that tree might be lonely, he returned to the Audubon Nature Institute with his idea for the second.
Weber helped him pick one the same age and height as the first, around 10 years old and 20 feet tall. They found a tree with a branch arching off, in a pattern that could, with luck and sunlight, touch the tree already planted.
An 18-wheeler hauled the second tree into the park last week, and a crane buried it in the ground, far enough away that the two trees wouldn’t compete for sun or rain, but close enough that their branches might mingle one day.
Waring tied a matching red ribbon around its trunk.
It will take the trees two decades to connect, then another three to fully intertwine. But then the pair might last for hundreds of years, Weber said.
She’s already spotted squirrels running between them.
“My father is an extraordinarily romantic guy,” said their son, Peter Waring, an architect in town. “And there’s no question, they had a life-long love affair. I think he feels fortunate to have had her for 60 years.”
Dr. Waring recalls the date he met her – July 1, 1951 – as easily as he remembers his own birthday.
He was 29 years old and the chief of residents at Johns Hopkins Hospital in Baltimore. His father was a doctor in Savannah, Ga. His father’s father was a doctor; the family line of doctors went back some 200 years.
That morning, he walked into the office of the chief of pediatrics.
He saw only the back of her head at first, and the look on his boss’ face, utterly charmed by the woman across his desk.
“He couldn’t resist her, and neither could I,” he says.
 Dr. Nell-Pape WaringDaniel Erath, NOLA.com / The Times-Picayune Archive
Nell-Pape was 24 years old, a New Orleans native and fresh graduate of Tulane University’s School of Medicine, where she was one of just a few women in her class. It was the first day of her internship at Johns Hopkins. She was beautiful, like a movie star, and smart enough to be a doctor, he thought.
He had a habit of going to the hospital cafeteria for breakfast before the sun came up. He started seeing her there every day and, when he asked why she’d come so early, he suspected she was making up excuses. He thought, just maybe, he saw a glimmer in her eye.
So he asked her out for a picnic. She said yes.
A year later, they were married. He still carries a photo in his wallet of her on the day he proposed.
“She was infinitely wonderful to be with; we never had a spat,” he says. “I don’t know what the secret is. It might be a different generation now, something just changed in expectation.”
The Warings had five sons, and she quit her residency to raise them.
They lived in Japan while he was a battalion surgeon for the Army. They moved to Florida, then her parents died and left them their house near Audubon Park. So they moved to New Orleans and began their walks together.
“They existed pretty much for each other,” said their youngest son, Dr. Patrick Waring.
The couple prayed aloud together in bed each night. And they read to one another, often for hours on end.
Once they read a play about an old couple riding on a train, who’d been together for so long they could read each other’s thoughts. The Warings began signing their notes to each other with just OMOT and OWOT – for old man on train, and old woman on train.
After a 22-year hiatus from medicine, as her children got older, Nell-Pape Waring finished her residency in 1974 at Charity Hospital. She specialized in allergies and practiced for more than 30 years.
Two of their boys, meanwhile, became doctors, like their parents. Two others are lawyers; the other is an architect.
Late in life, Nell-Pape Waring had a form of Parkinson’s disease that made her shaky and prone to fall.
She was hit by a bicycle in the park and fell down, broke her hip and required replacement surgery and months of rehabilitation. She took another bad spill down the stairs and cracked her head open.
In the last months of her life, she could barely get out of bed.
Her husband would help her to the table so they could have lunch together. Then he’d help her back into bed. He read to her, like he always had.
William Waring knew he didn’t have much time left with her. And he worried.
As a doctor, he’s watched many people die.
Some cry, some thrash in last-minute agony or regret.
But on Oct. 20, a Saturday, he tucked her back into bed after lunch. He told her good night, that he loved her and he held her hand.
She died peacefully in her sleep several hours later, at 6 p.m., just as the sun began to set.
“There’s an emptiness now, a grief that you can’t imagine unless you’ve loved someone so immensely,” the doctor says. “I always felt lucky to be associated with her. And I am so sorry she decided to leave me.”
On nice days, he plans to haul a folding chair to their trees in the park to sit beneath them and read her books like he did for a half-century.
He might try, he said, to live 30 more years just to see their branches touch.
Sick Day
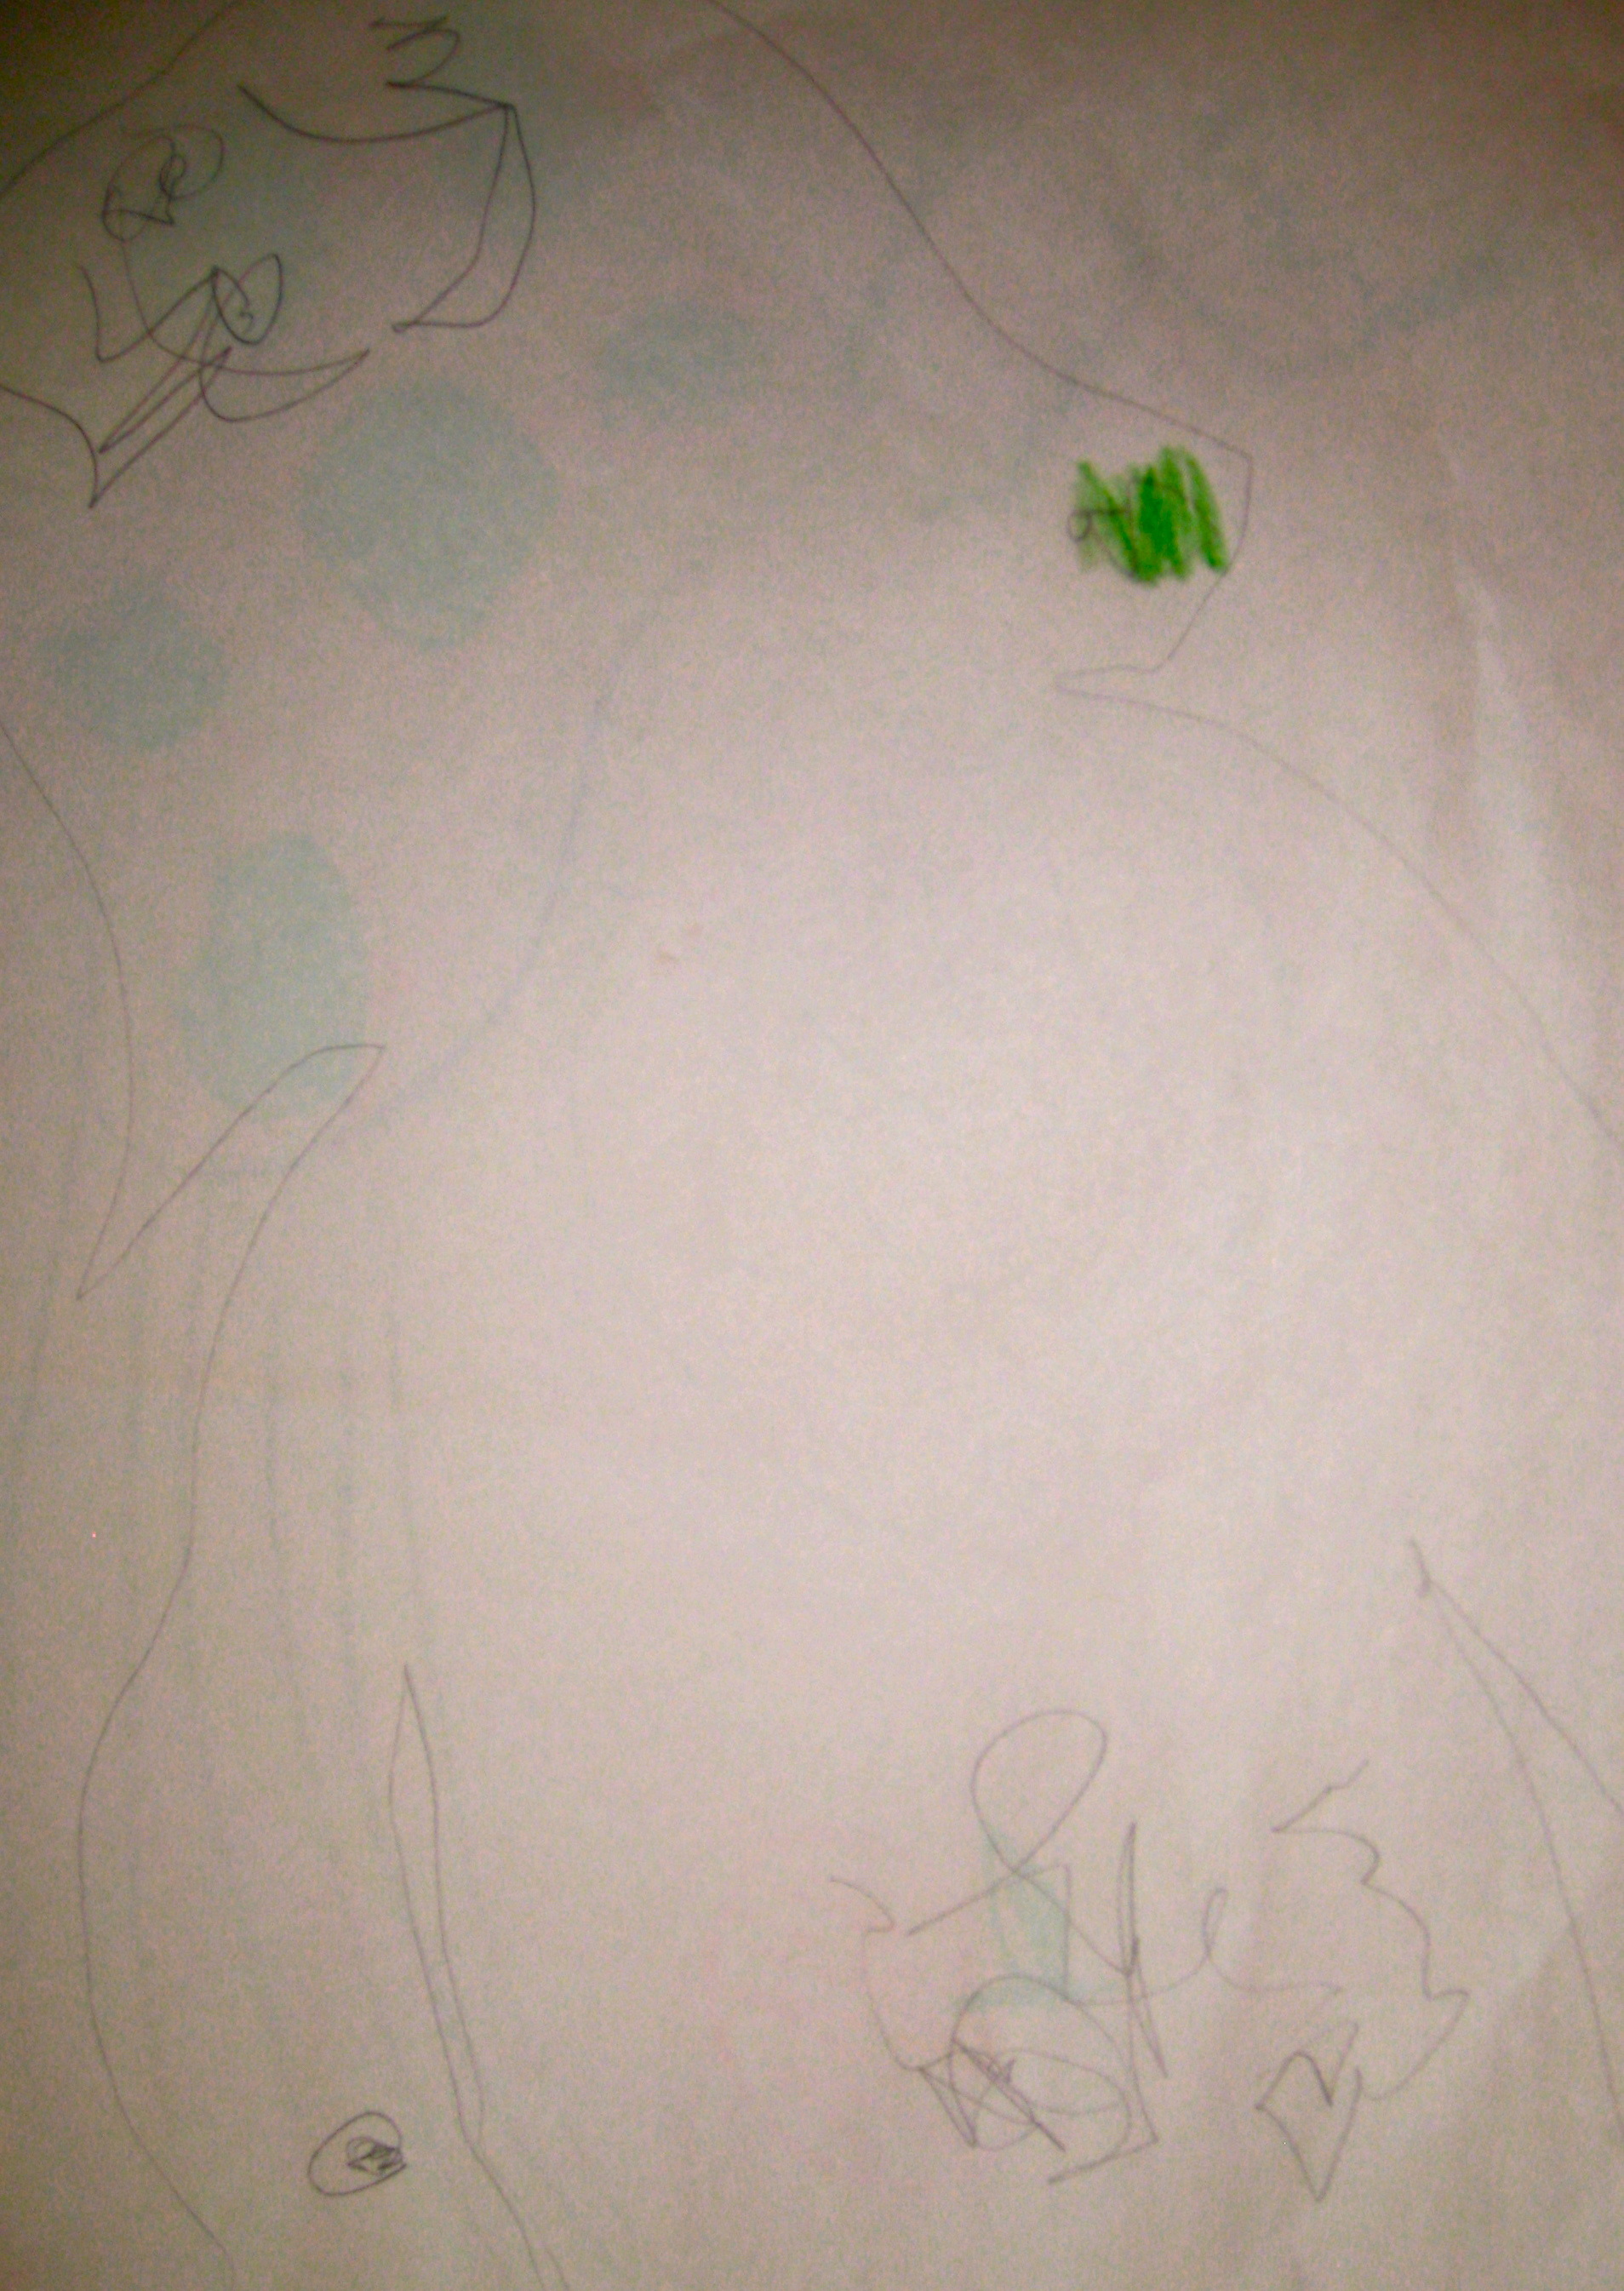
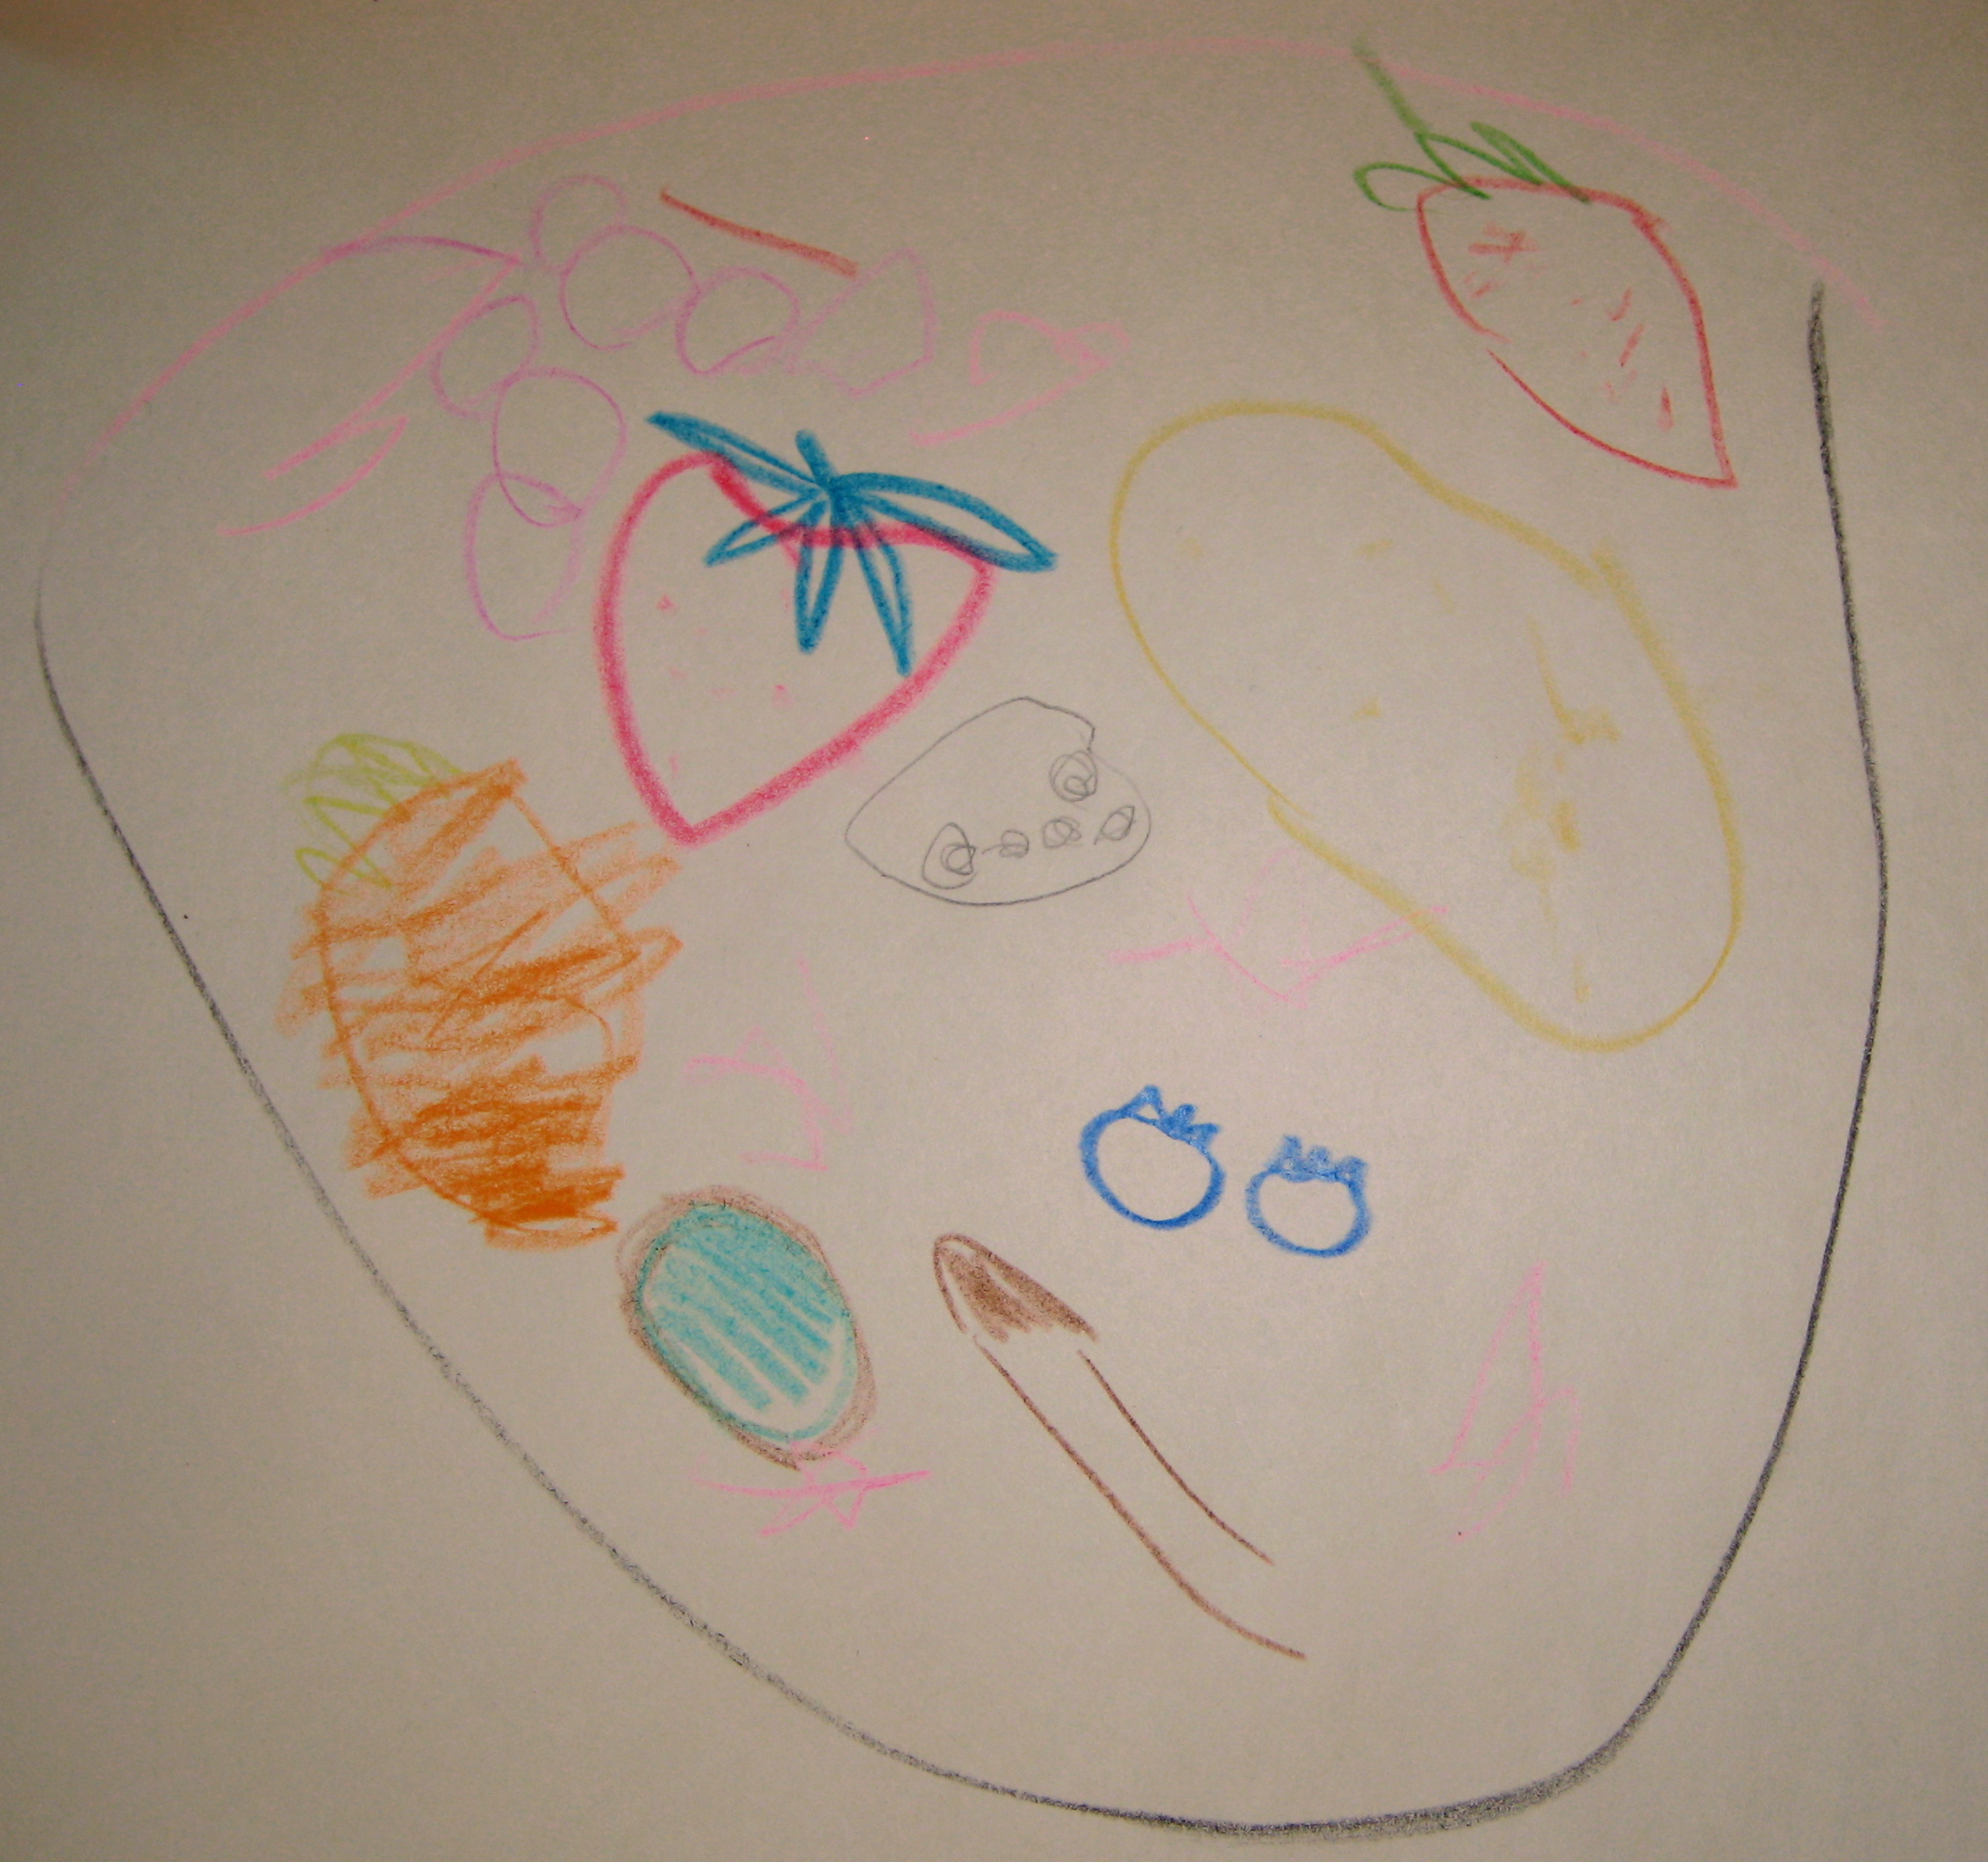
Posted: February 2, 2013 Filed under: Art & Healing, Child Centered Activities 2 CommentsAmid the popsicles and PBS shows were stabs at identifying where the germs were in our bodies…not the easiest of images to see but do note the “germs” drawn by my four year old on her body tracing in the stomach, hair (!) and head spots. The elbow area is well, just her elbow!
 Next we made a picture of what could help us get better. She suggested a “rainbow salad”. Below is her bowl full of fruits we drew together. Overall, a nice distraction and opportunity to connect with what is happening in her body and how she can help herself!
Cardboard Kitchen
Posted: January 9, 2013 Filed under: In the Kitchen, Permaculture & Home Renovation 2 Comments
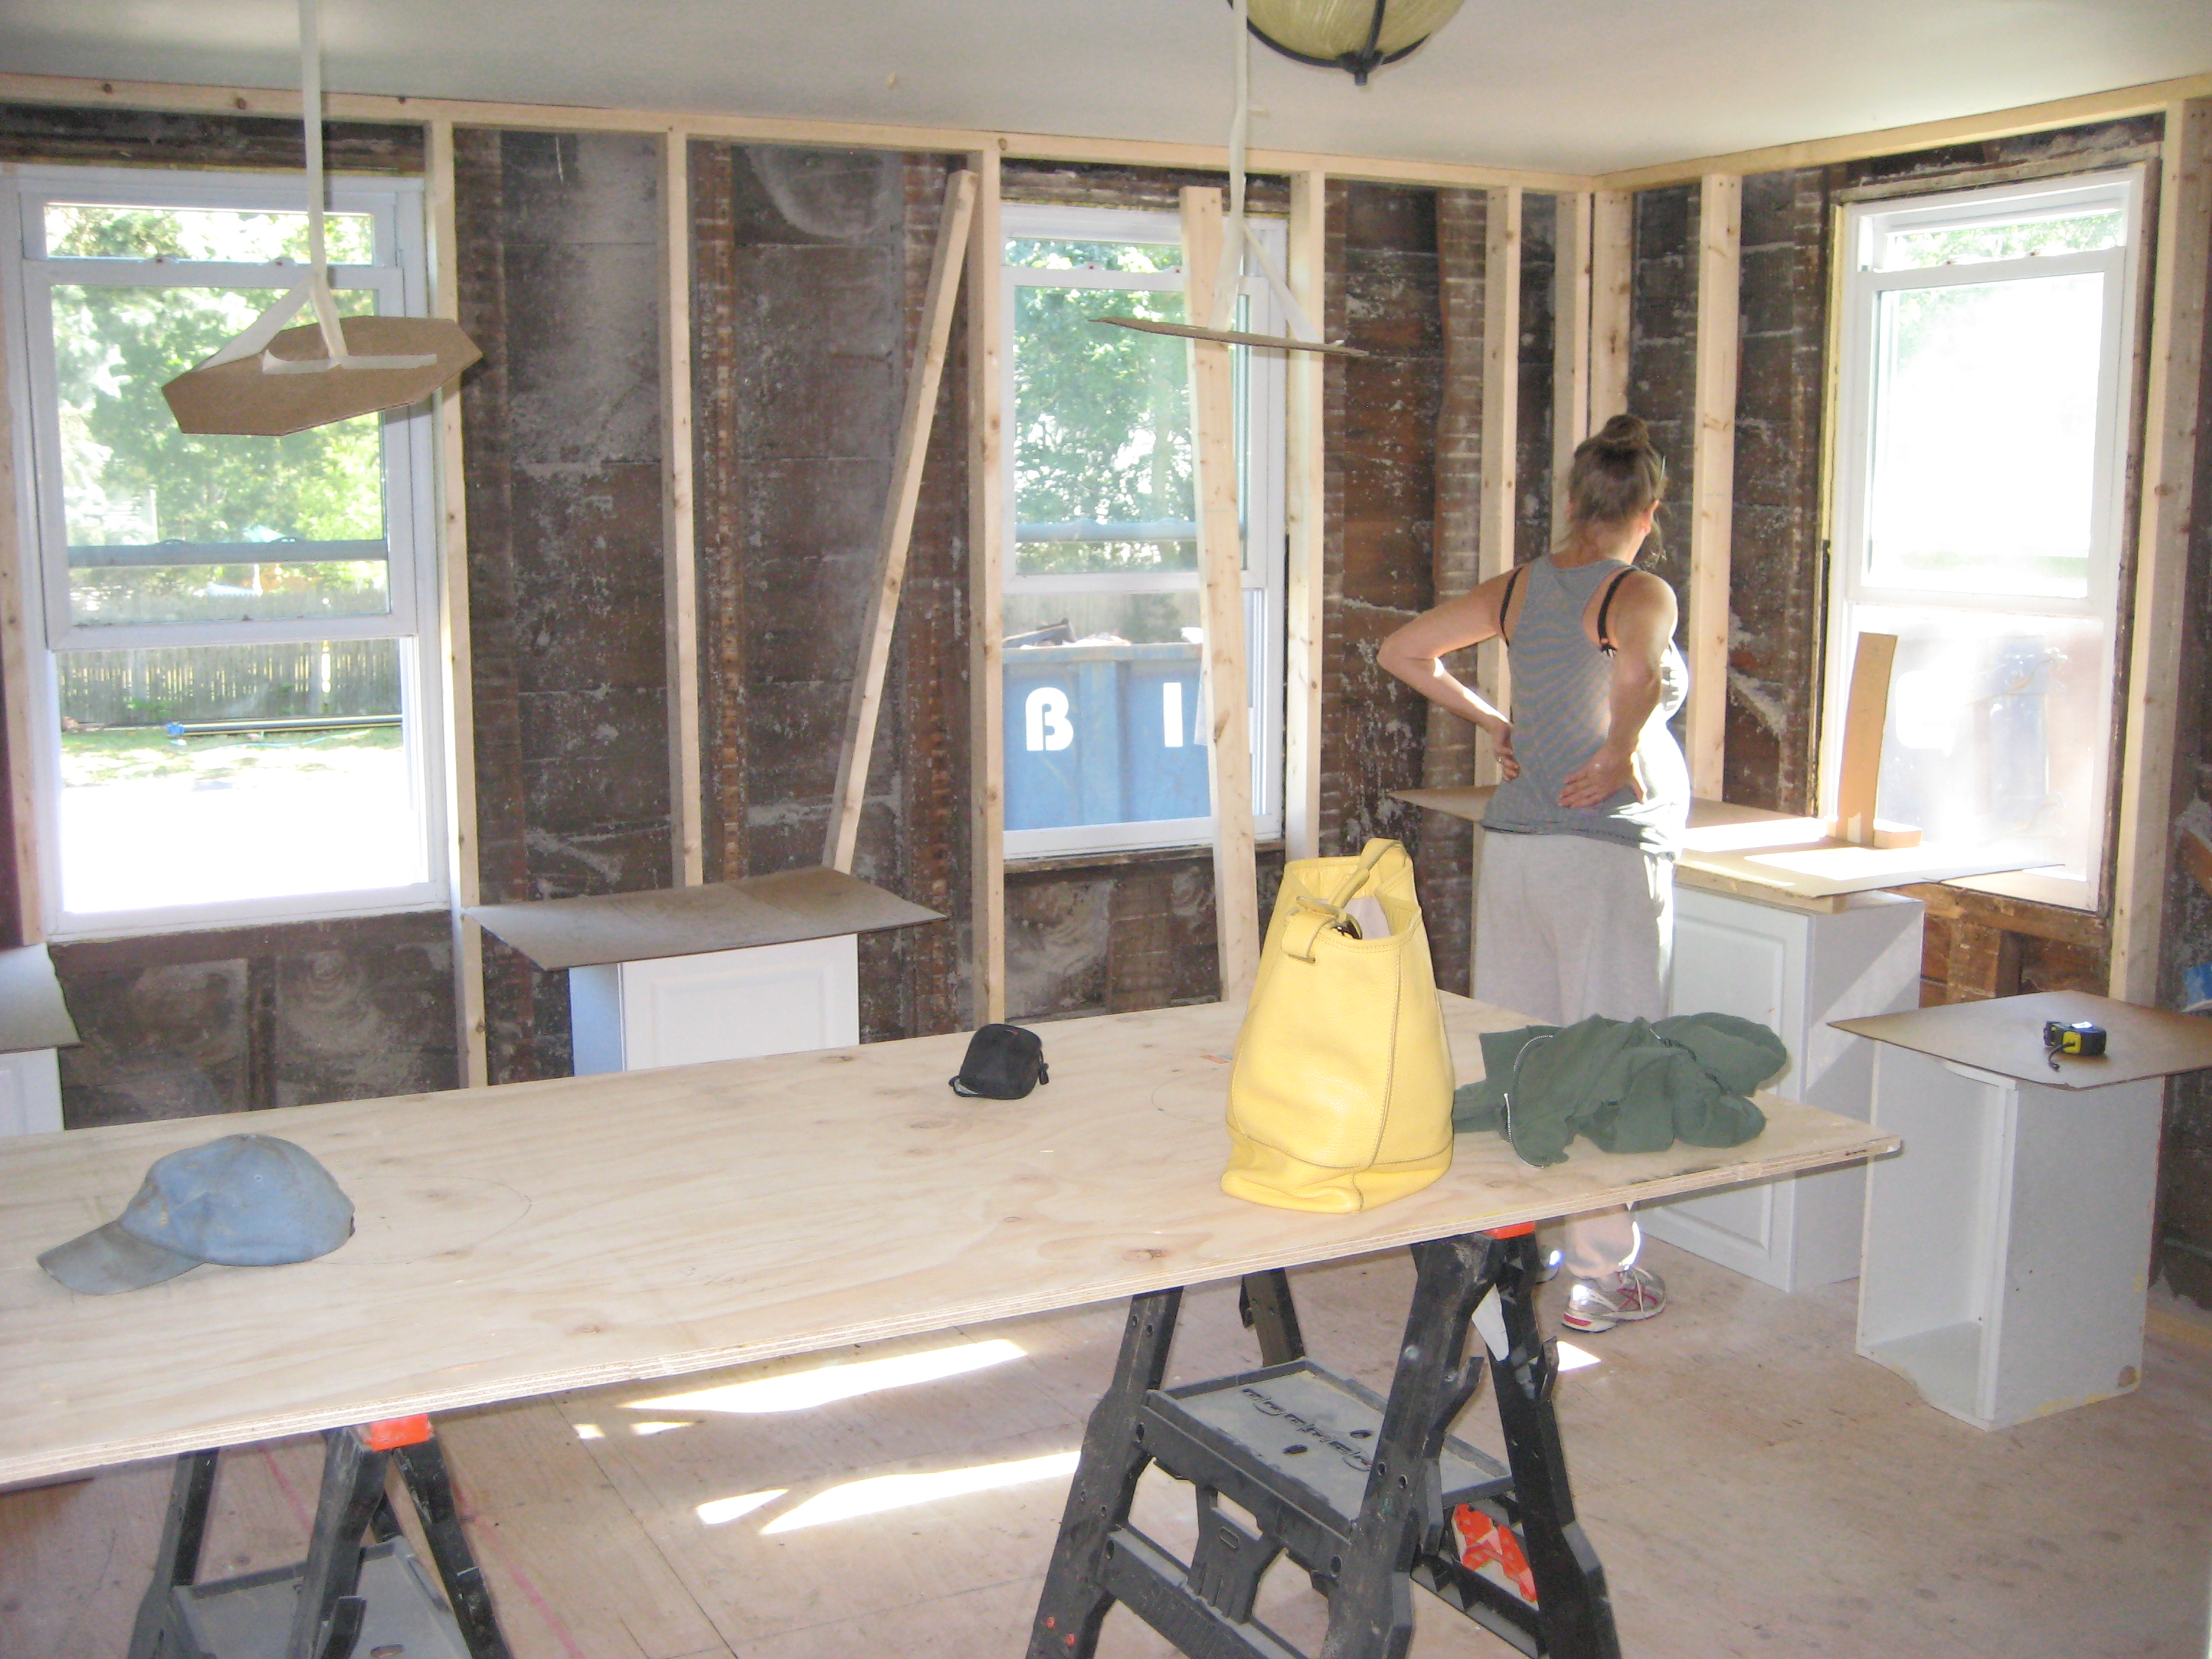
In pregnancy week 28, late September by the calendar, we grabbed cardboard, an x-acto knife, some markers and headed over to the new house.
This was no art project. I wanted to mock-up the kitchen and walk through the layout of cabinets and the island. I wanted to see how it felt having several people in that space. Better to make changes before they would cost us money.
Scale drawings had been made but what looks good on paper can be deceiving. It paid off; we decided to increase by two inches the distance between the island and the range, and decrease slightly the width of the island – the island is planned at 37″ wide x 84″ long. The island will be comfortably large, but that added floor space will pay dividends on crowded holiday meals.
Our farmhouse has four windows along the south wall, and the only logical place for the kitchen was in the south-west corner. The window sills are 28″ above the floor while standard counter height is 36″. There was no way I would let the counters span in front of the windows (as the previous tenant had done), but that meant I would have to build custom cabinets.
As an act of denial, my initial plan was to use some 2x4s and plywood. Just toss them together and then later build lasting cabinets. But that short term thinking gave way and I ended up using cabinet grade 3/4″ plywood for the carcases. I still haven’t decided on, nor milled up, the face frames. That can wait.

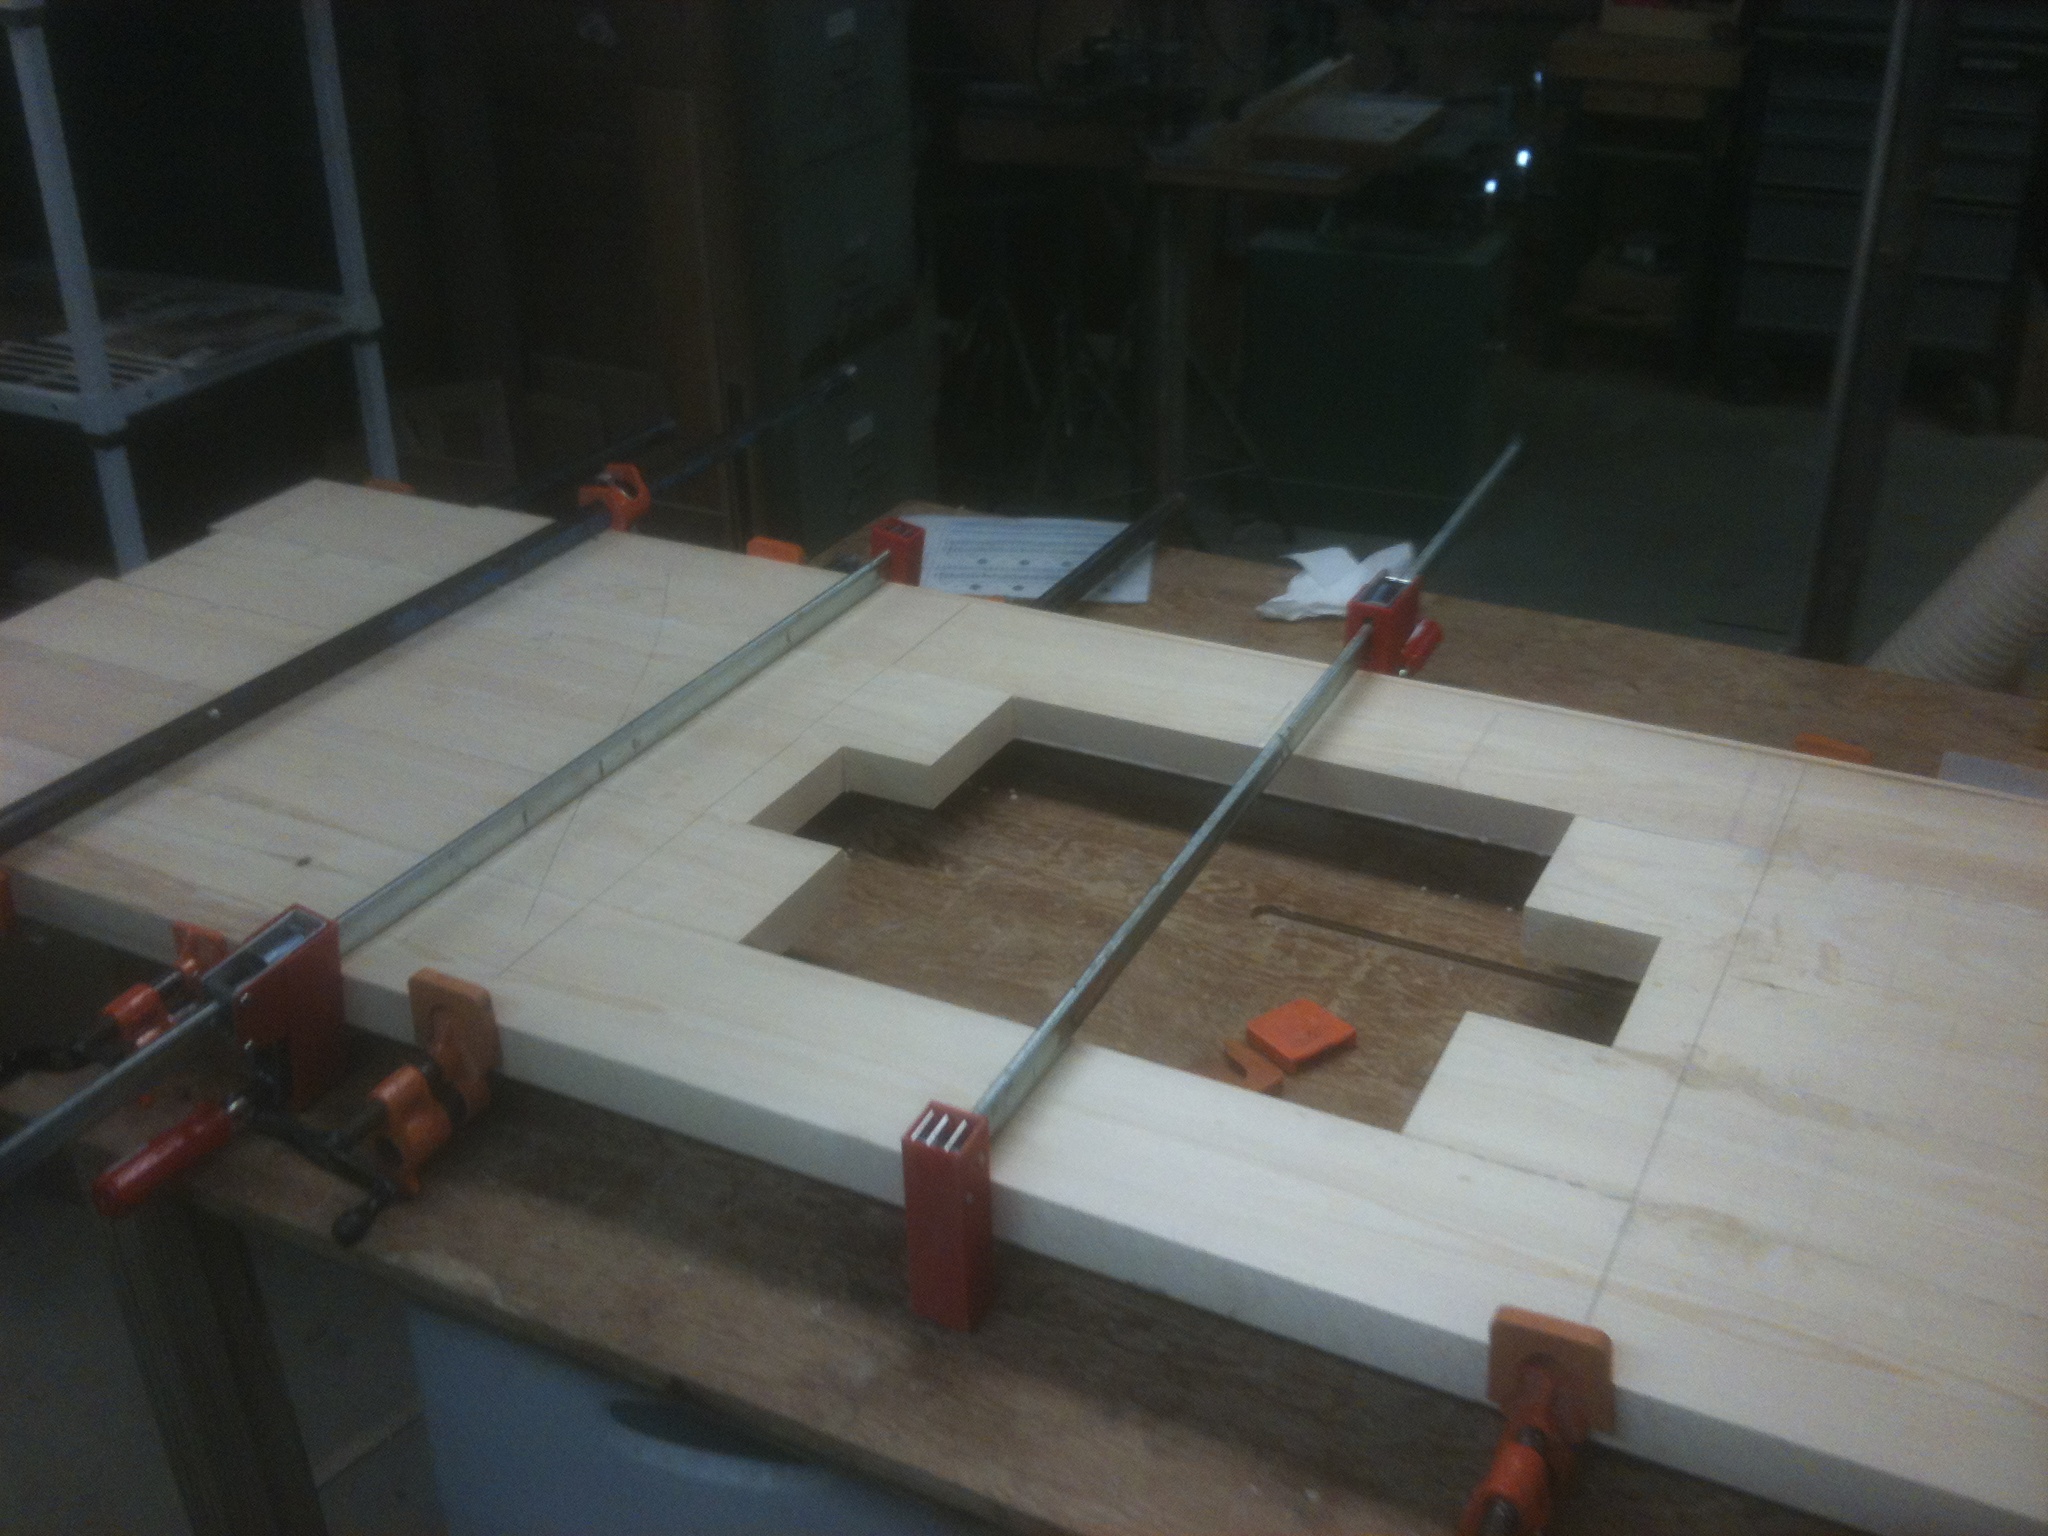
For counter tops my preference would be concrete but there was no way we could afford that. I settled on clear spruce but the sawyer only had enough 8/4 (2″ thick) in stock for the sink counter. Just as well. My budget was getting strained.
I glued up the boards and then ran them through a wide belt sander at a local wood shop. They charged $60 per hour, but it didn’t take very long; an added expense, yes, but worth it to ensure the counter top is absolutely smooth – especially important when putting a bullnose on the edge.


For the cabinets flanking the gas range – the 28″ high cabinets – I resorted to pine boards left over from a tree fort I built as part of my day job. Chock full of knots, this wood is about two grades below #2 pine, but it was free and using it cleared up space in my shed.
For $30 I purchased a slab of white Italian marble from a local kitchen fabricator. They are happy to discount their scrap, but it has an unfinished edge. Not a problem for me. I like to bake and marble is a first rate surface for kneading doughs. Surprisingly, the lower cabinet height is easier on my back and shoulders when kneading.
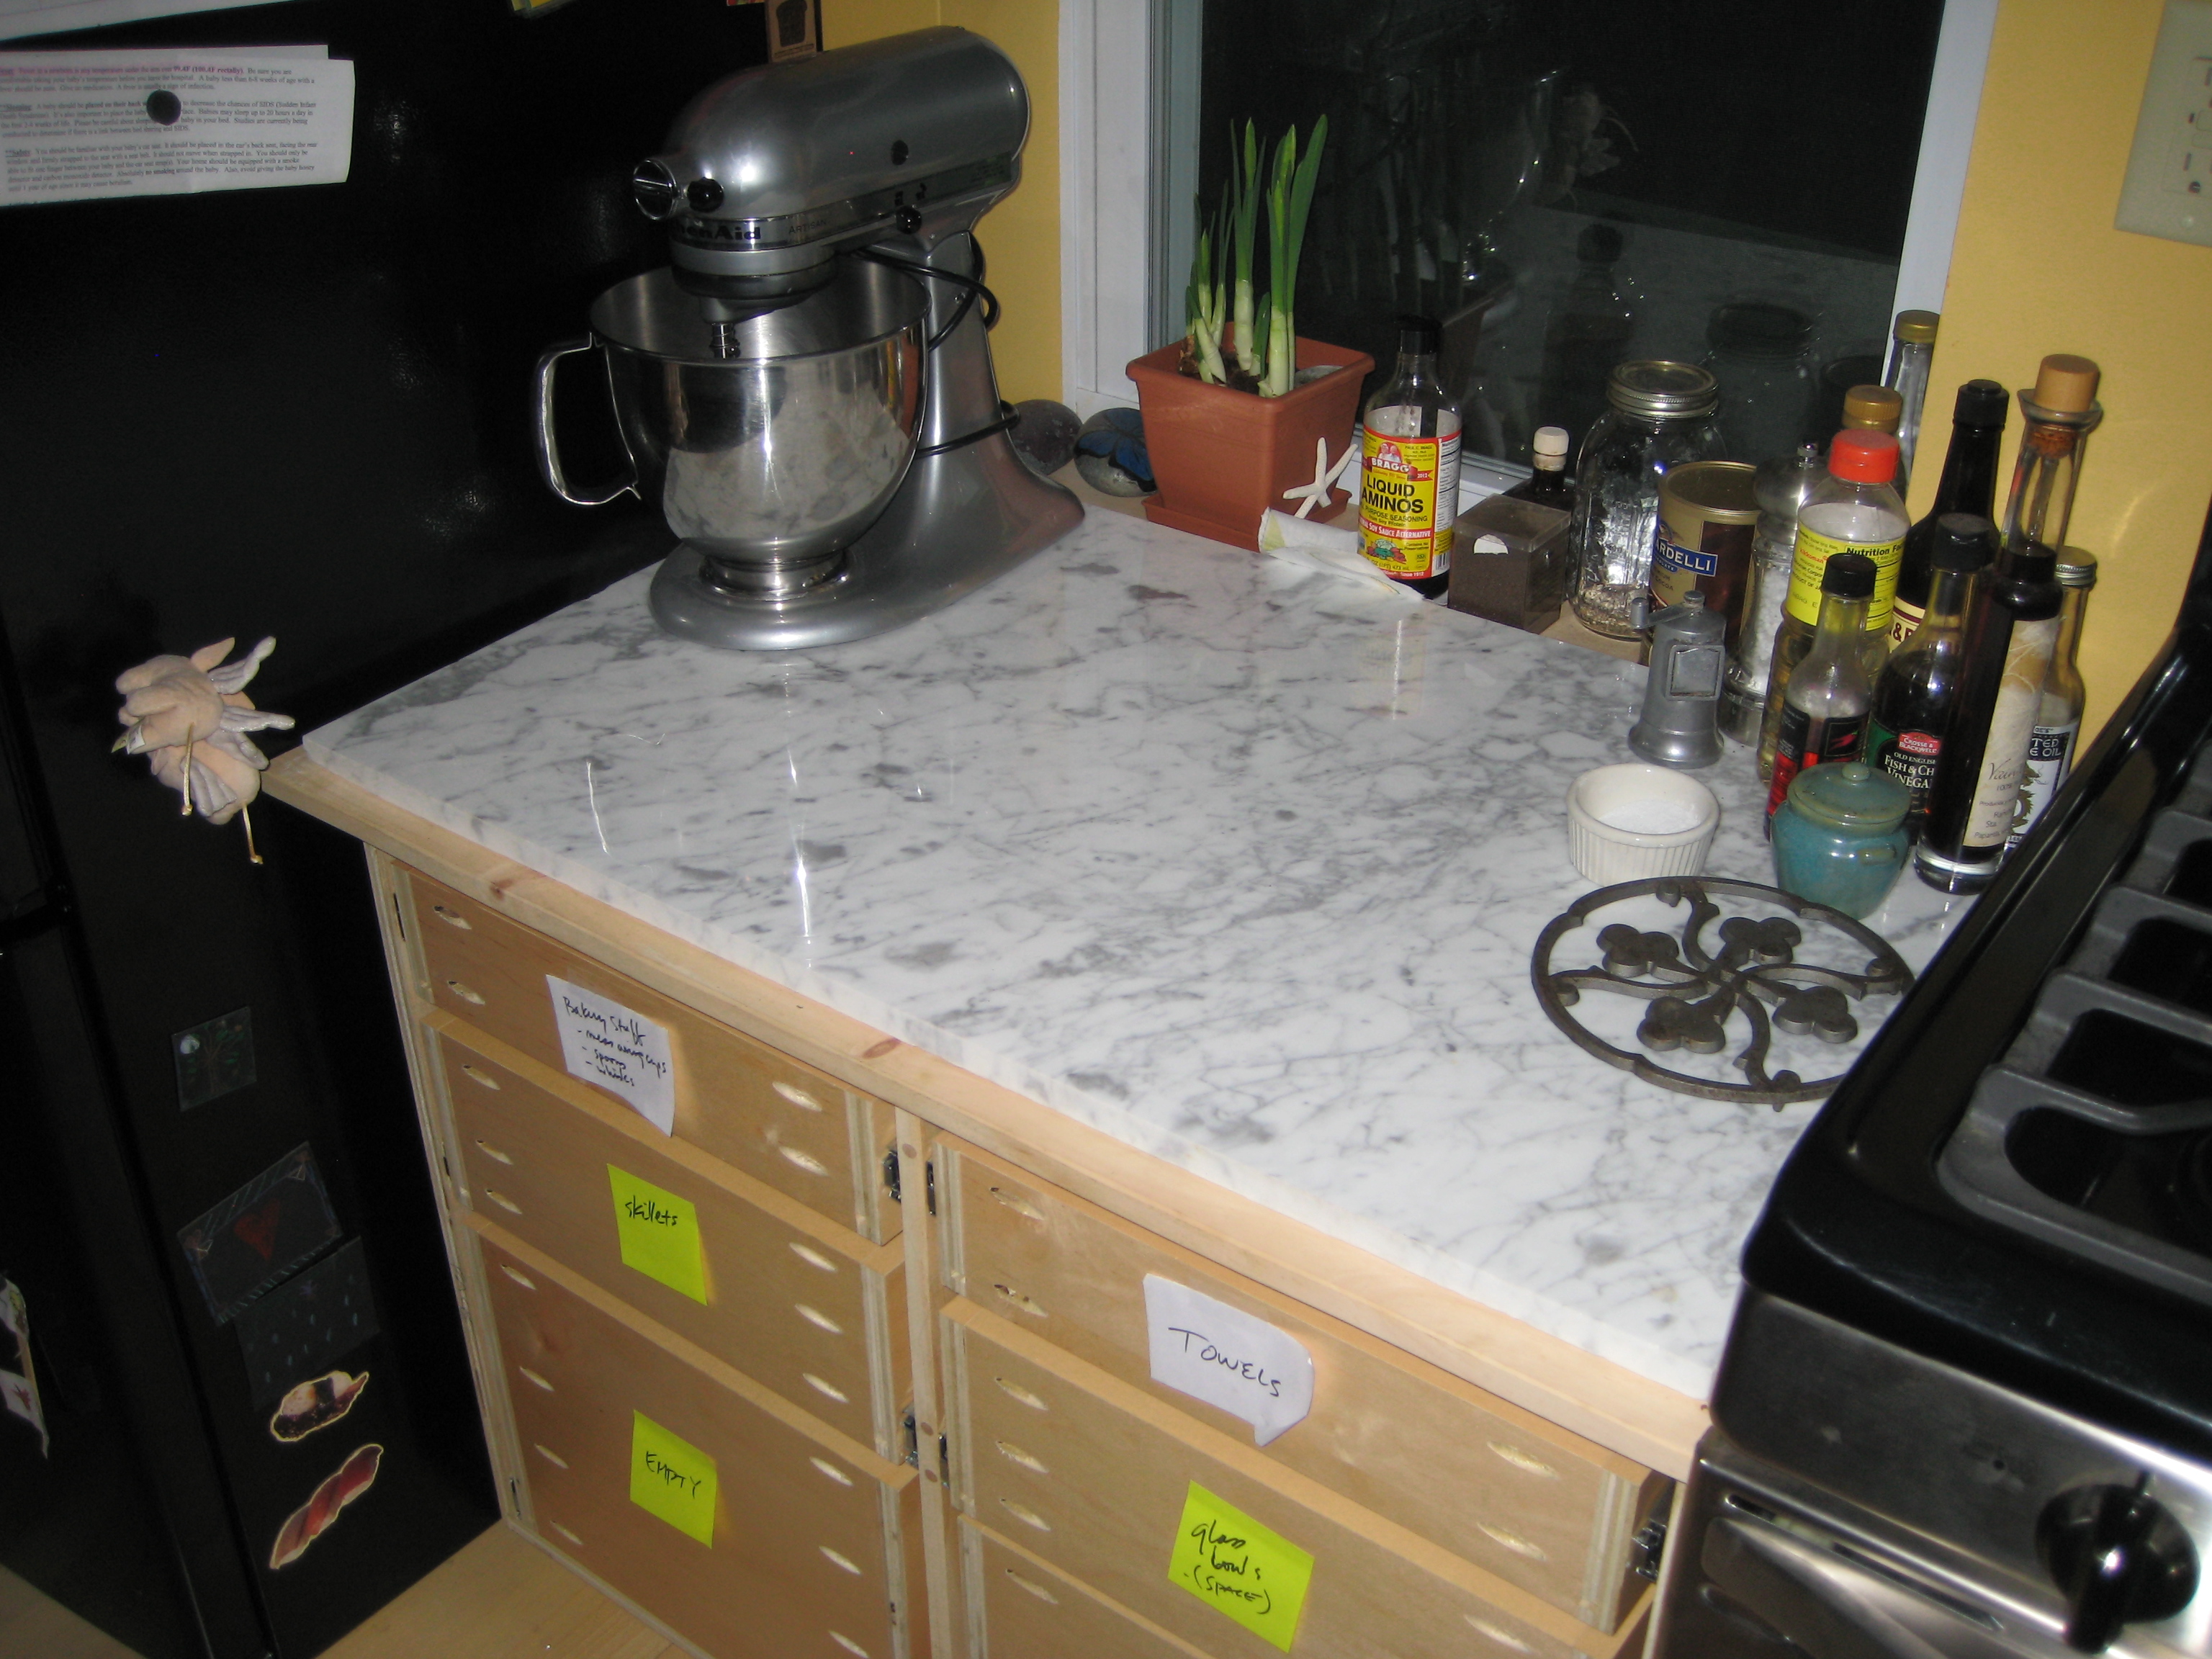
Scrap evolved into a design theme of our kitchen. But if you look in the right places, scrap can be as good as gold. A pair a solid cherry shaker style cabinet doors came my way. A friend had discarded them, without the panels. By chance, at the big house I had some leftover 1/4″ cherry veneer plywood so I easily made the panels for the doors. I will apply linseed oil.

The doors were designed to go overhead – the curved rail would go at the top – but in my application, under the sink, I will mount them upside down so the pulls are at the top. What I am saving in cost and labor more than makes up for any oddity there.

To benefit from the full southern exposure of our windows, I cut two shelves from a leftover 1/4″ thick glass table top. I screwed a cleat into the jambs and set the shelf where the two sashes meet. It provides an ideal location for growing herbs and bulbs all winter long. The remaining table top glass will make a nice cold frame for our gardens.
Our one splurge in the kitchen would be the two pendant lights that hang over the island. In the back corner of the showroom at Fogg Lighting in Portland, I found a simple galvanized metal shade, part of the Milk-Man collection made by Hi-Lite Manufacturing. They are available at Lowes and other distributers on the web.

The splurge was not so much the light – these were, after all, the least expensive pendant on the showroom floor – but the cord. Black or white cord is free. I would have chosen black, but I was persuaded to find a third option.
My Uncle Donald was a furniture buyer and spent his career traveling the world buying art and antiques. For forty years he made an annual trek, circumnavigating the globe from east to west: Singapore was the best market for brass, Bombay for silks, Florence for furniture and art work, London for…just about anything. His trained eye and sage counsel was “Don’t make the cord the focal point. Black will stand out, white will distract the eye. See if they have cream.”
(We had several long conversations with Donald about room colors. His advice there: “Don’t paint the ceilings white. Add 2 tablespoons of the wall color into the ceiling paint. You won’t notice it, but it will tone down the ceilings just enough. It will soften the room. It will trick the eye. Now, at the paint store they will laugh and say you can’t do that. But tell them that is what you want to do.” In fact, the clerk at the paint store refused to add the paint. “Company regulations,” he said. I had to add the 2 Tbsp myself and only then would he shake the can. You do not notice the ceilings as tinted, but the room does look great. )
But cream, for the light cord, was not an option. They sell, at $6 per foot, a “grey mesh” cord, clear plastic with the silver wires visible. It is very nice, very subtle and harmonizes perfectly with the galvanized metal. $6 per foot is wicked exorbitant, but with ceilings only 7′ 9″ I needed three feet of wire.
I have heard the average kitchen remodel costs upwards of $40,000. Hard to imagine but easy to believe. Using scrap and creative re-use has put our costs far below that mark, but what we save in dollars we are paying for in time and patience. It is a load of work to build a kitchen. We are not done yet. Far from it: I need to build the island, mill the cabinet face frames and drawer faces (I will use barn wood), build several more drawers, make the drawer pulls using beach stones, do some tile work.
With a newborn the progress has slowed considerably. Rightfully so. But we are finding that going slowly allows us to incorporate design changes that reflect our actual patterns of use. Cardboard and patience turn out to be great planning tools.
Christmas Trees are for the Birds
Posted: January 8, 2013 Filed under: Art & Healing, Child Centered Activities, Chronicles of a First Time Parent, In the Kitchen 2 Comments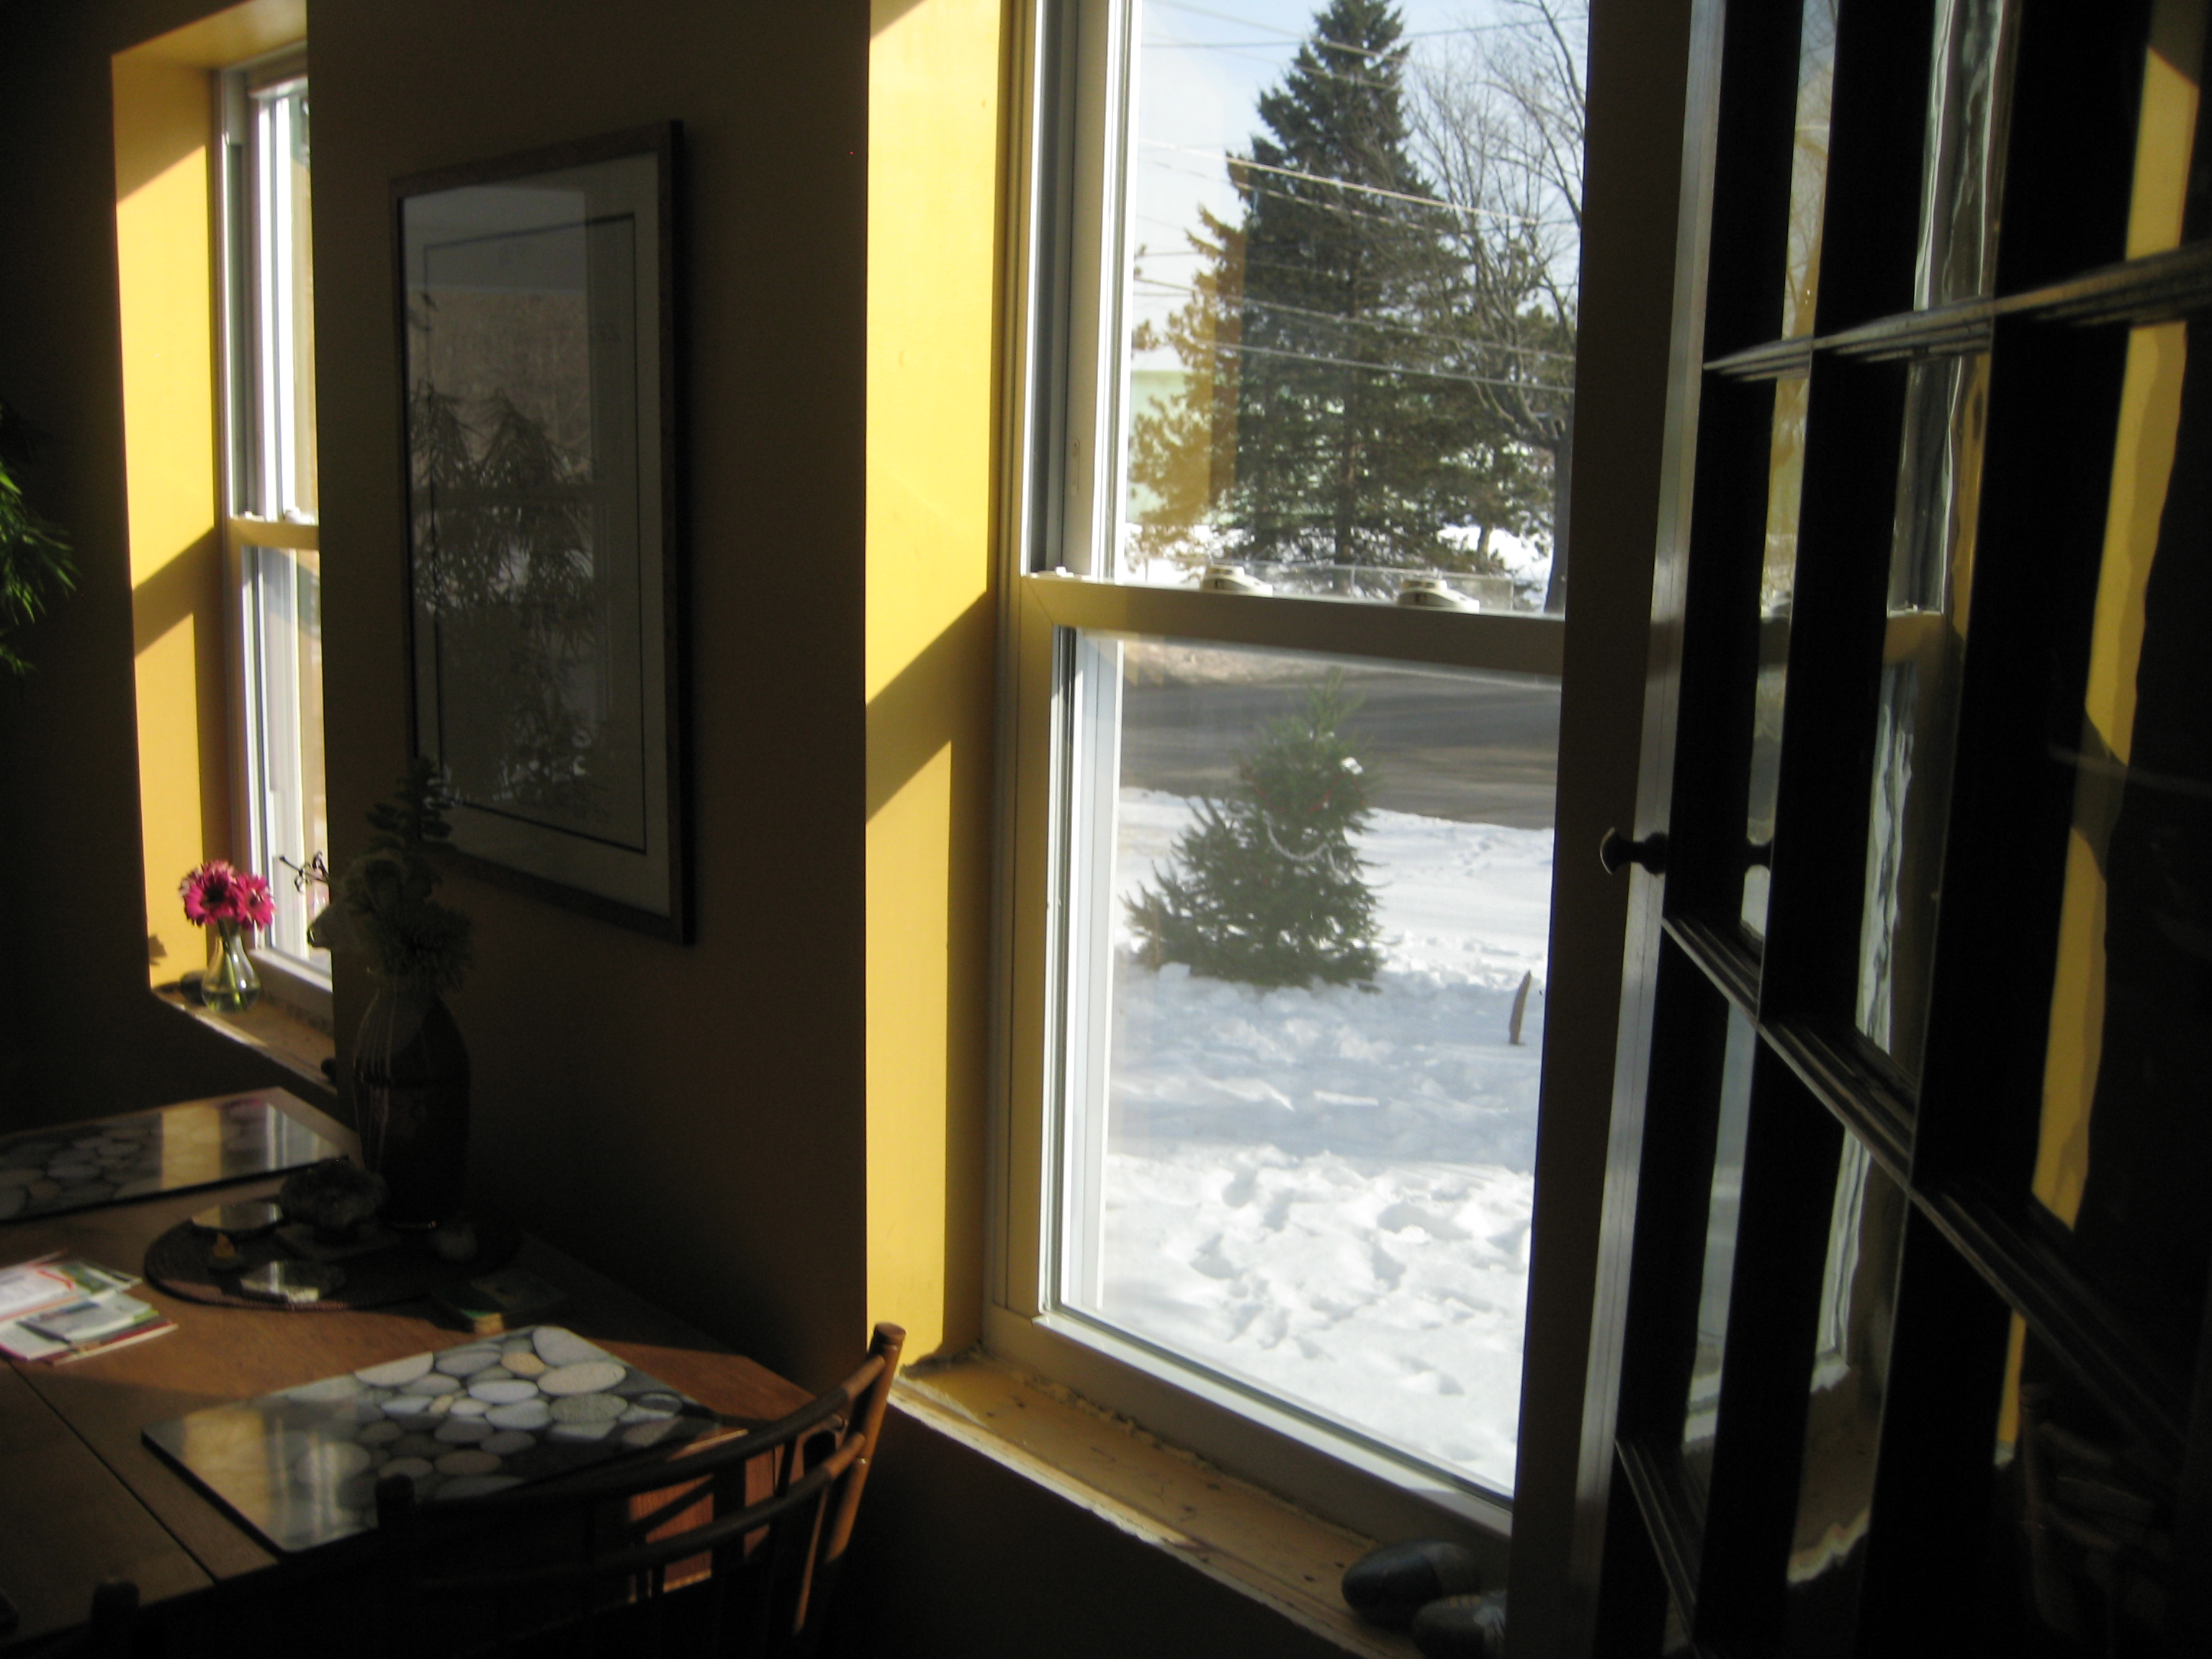
First year ever. We bought a Christmas Tree.
Out into the fields, Little Miss E and I went.
We toasted marshmallows, drank some hot chocolate then ran among the trees, E shouting, “This one! No, this one! No, no this one!!” In the fading light of a mid-December dusk I made a quick choice and cut rapidly with the saw. Oh, what a big event, and its momentum carried through the holidays.
And then last Sunday it was time to take down the tree. Along the roads now, balsams lie discarded, heaped upon the snow banks, so much trash waiting to be carted away. “Where do they go?” E asked, and I really don’t know. It got me wondering.
In our home, the threat of discarding the tree was too great. E had a meltdown. And I had an idea. I remembered my mother, an avid birder, telling me that our feathered friends love to take shelter in the boughs and branches of the trees – whether rooted or cut down does not matter – and so a plan was hatched. “Wait, we can help the birds!”
While Becca grabbed cranberries from the freezer, and a needle and thread, E and I hauled the tree outdoors, into the sunlight of the front yard. We stood the tree upright in the snow.
E was thrilled. Back into the house, she dashed to the art table and insisted “I can do it!” I showed her how to hold the needle and thread, how to position the fingers while pulling the needle through, and she was off. In her typical fashion, she shouted, “I can do it, I can do it. Give me space!”


And for good style, she donned rabbit ears. Who knows why. It was quite a look.
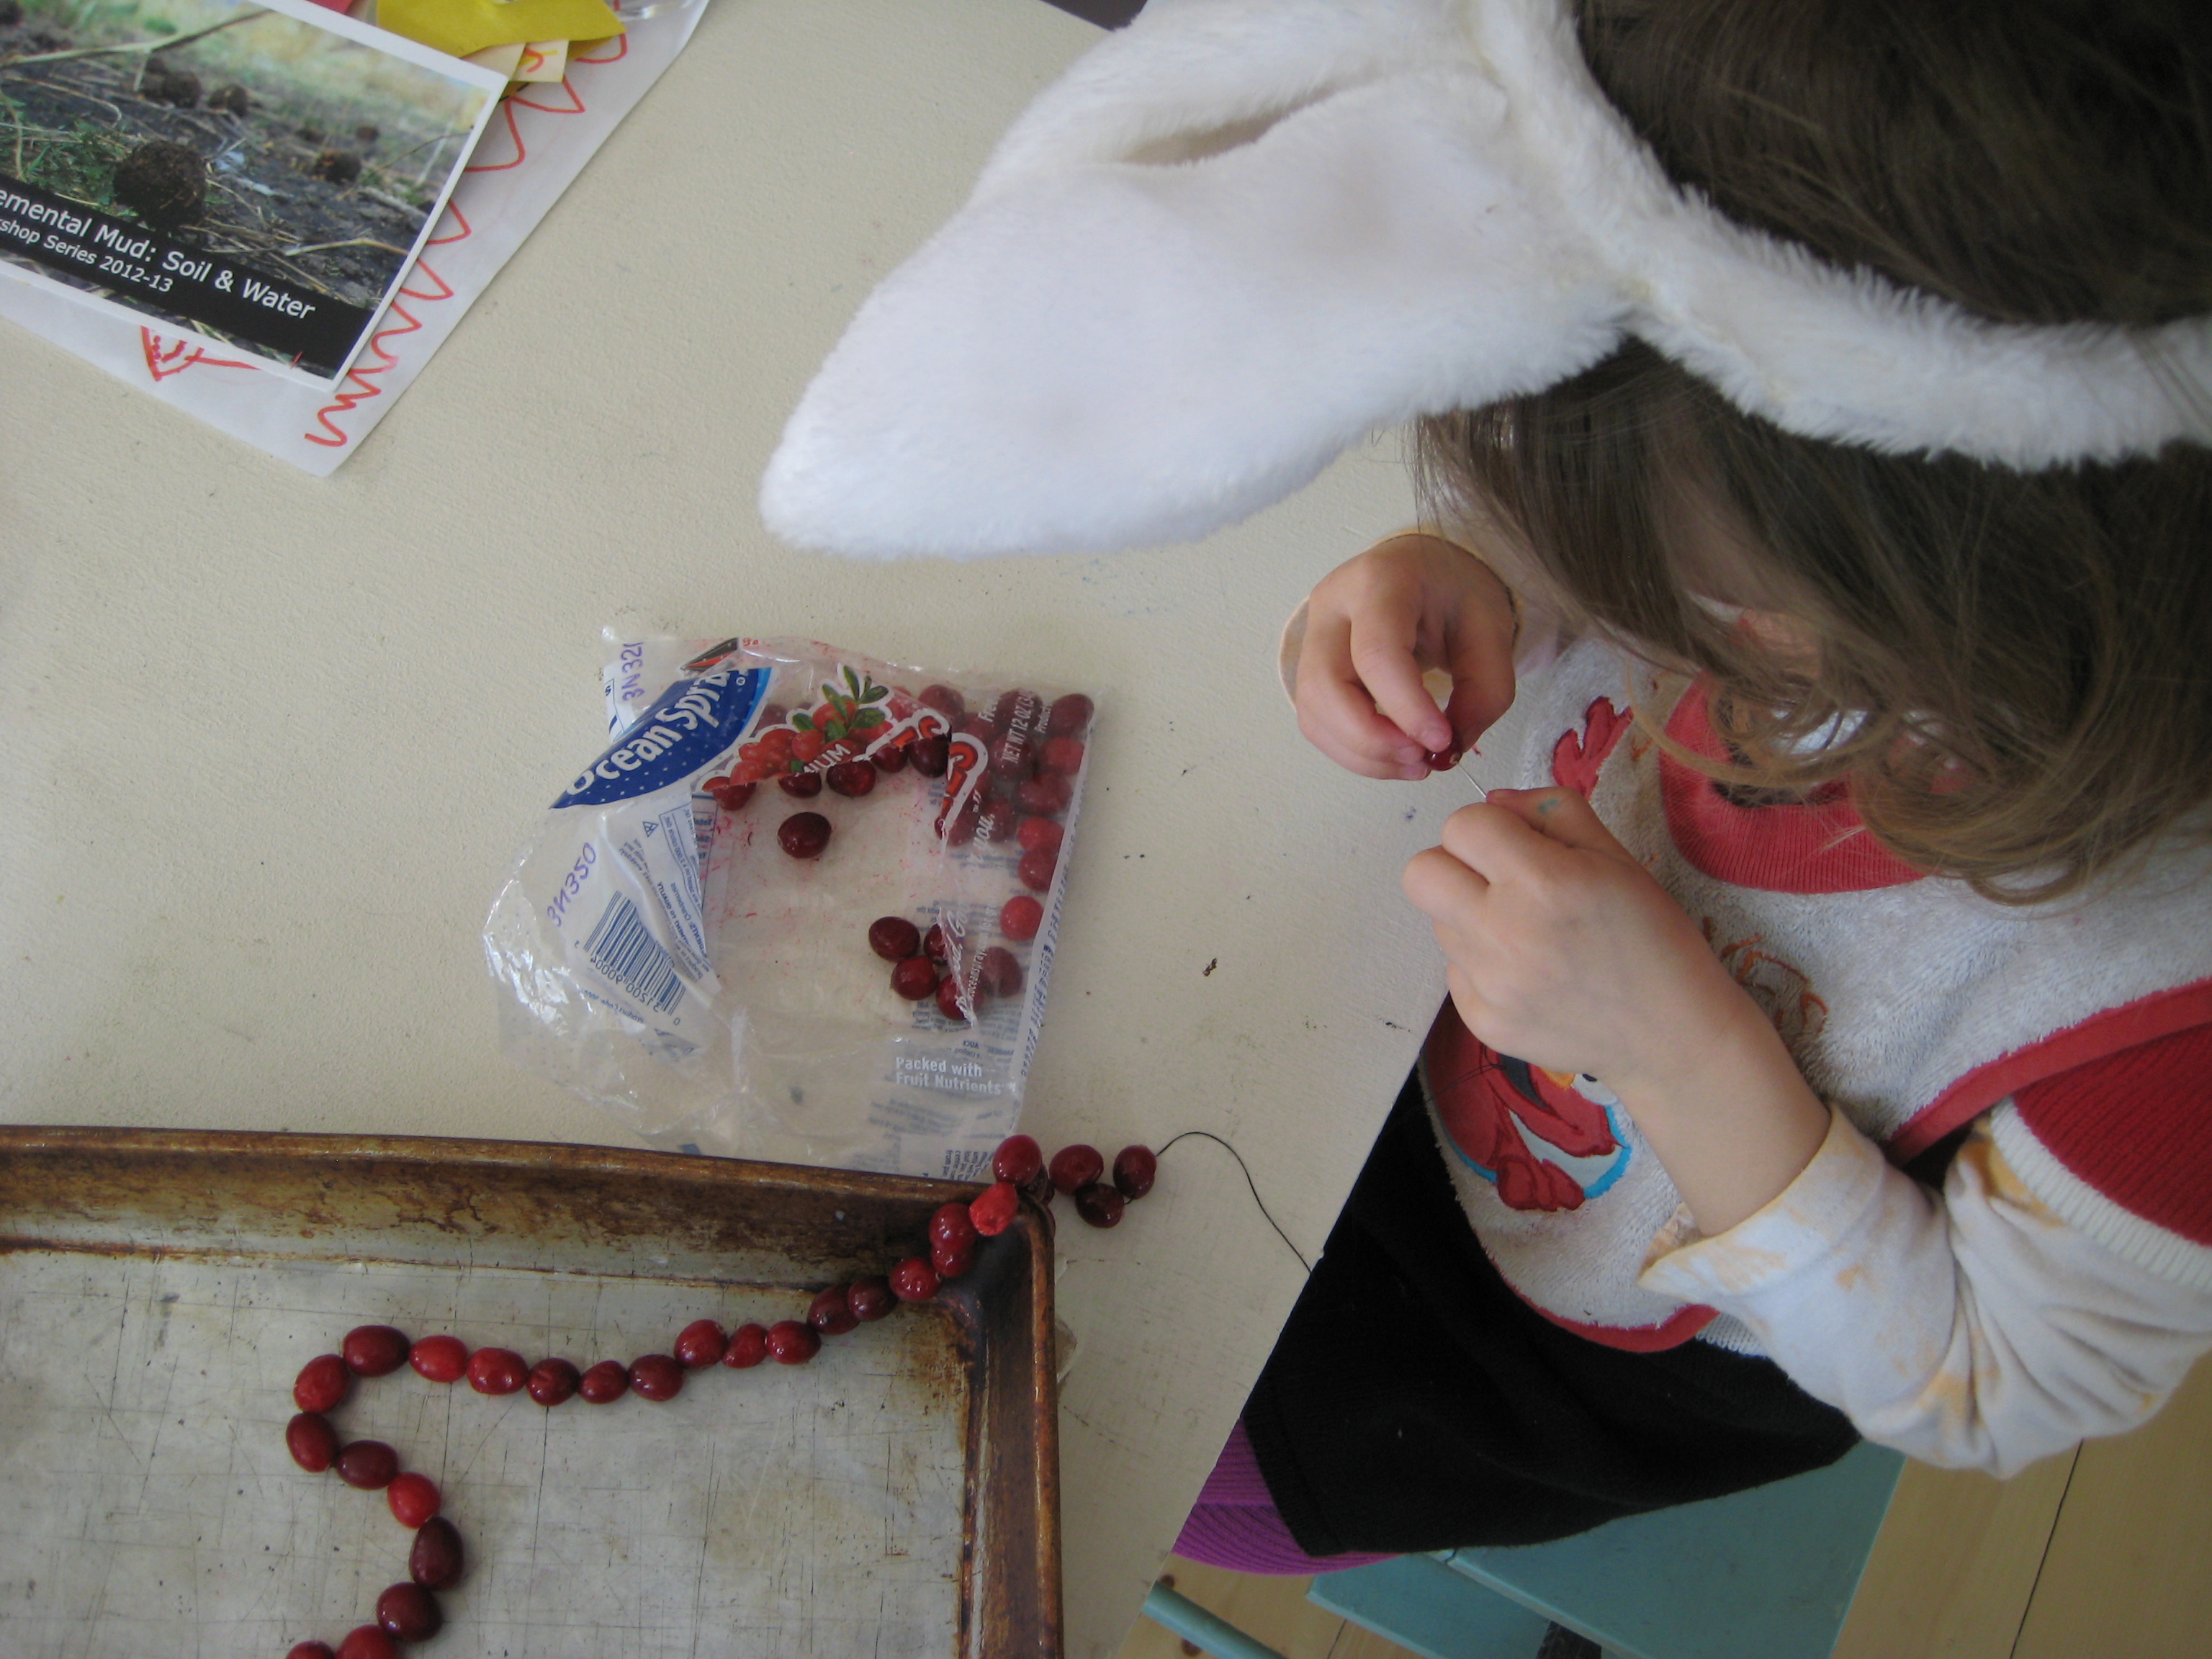
We transitioned from meltdown to excitement. She ate loads of raw berries, then danced as we hung them on the tree. Later, while stringing popcorn, she ate far more than she strung.
But we put together enough garland to encircle the tree several times. And so we answered her question about where our tree will go: at our house, it is for the birds.


